Amperity APIs
Amperity has the following APIs:
Amperity API
The Amperity API enables programmatic access to your Amperity tenant through a collection of RESTful endpoints that support API-first use cases for integrations, applications, and custom workflows. Use Amperity API endpoints to streamline workflows, enhance marketing strategies, and unlock the value of your brand’s customer data.
Available Endpoints
Profile API
The Profile API enables your brand to access customer profiles using a collection of RESTful API endpoints to build and support real-time use cases:
Identify returning customers
Personalize welcome messages and emails
Extend customer profiles for campaigns managed from Braze, Movable Ink, Criteo, Salesforce Marketing Cloud, and other downstream marketing applications.
The Profile API is unique to your tenant. The endpoints that are enabled for your use cases do not exist until the results of queries that have been defined by your brand have been published to the Profile API as an index. A set of actions are available for each endpoint that your brand enables when using the Profile API.
Note
The Allow Profile API administration policy option allows full access to the Profile API, including the ability to manage a list of Profile API endpoints from the Destinations page.
A user must be assigned the Allow Profile API administration policy before they can manage endpoints that are enabled by the Profile API.
A user who is assigned the Allow user administration policy can assign the Allow Profile API administration policy to individual users within your tenant.
Streaming API
The Streaming API is a tenant-specific API that supports real-time streaming of data from external systems to Amperity.
The Streaming API is designed for streaming events and profile updates. It is a low latency, high throughput REST API, designed to accept billions of records per day.
Authenticate to Amperity APIs
Authenticate to Amperity APIs by including the following line in the request:
-H "Authorization: Bearer ${access-token}"
After the token passes validation, the request will look up any access policies attached to the API key, and then determine whether the requested operation is permitted.
About Amperity API keys
Amperity API keys are synthetic identities that are bound to your tenant and enable programmatic access to Amperity.
Access to the Amperity API requires using JSON Web Token (JWT) access tokens that are signed by Amperity-managed API keys.
API keys are tenant-specific and are not pulled to a sandbox or promoted from a sandbox to production. API keys must be created in a sandbox to use an Amperity API endpoint, stream data using the Streaming API, or access Profile API indexes.
Important
A user must be assigned the Allow API key administration policy before they can manage API keys and access tokens that are required by Amperity APIs.
A user who is assigned the Allow user administration policy can assign the Allow API key administration policy to individual users within your tenant.
About API keys
API keys are managed directly from the Amperity UI.
Add API keys
Each API key has a unique internal secret that is signed into the claims of all access tokens that are issued for that API key. This secret is one of the validation checks that occurs during authentication to the Amperity API.
You can create the following types of API tokens for the Amperity API:
API token issuer
An API issuer token enables your downstream workflow to programmatically issue new access tokens for API keys.
To add an issuer token

|
Open the Settings page, and then select the Security tab. Under API keys click Add API key. |

|
From the Add API key dialog, add the name for the API key, select the API Token Issuer option, and then click Save. 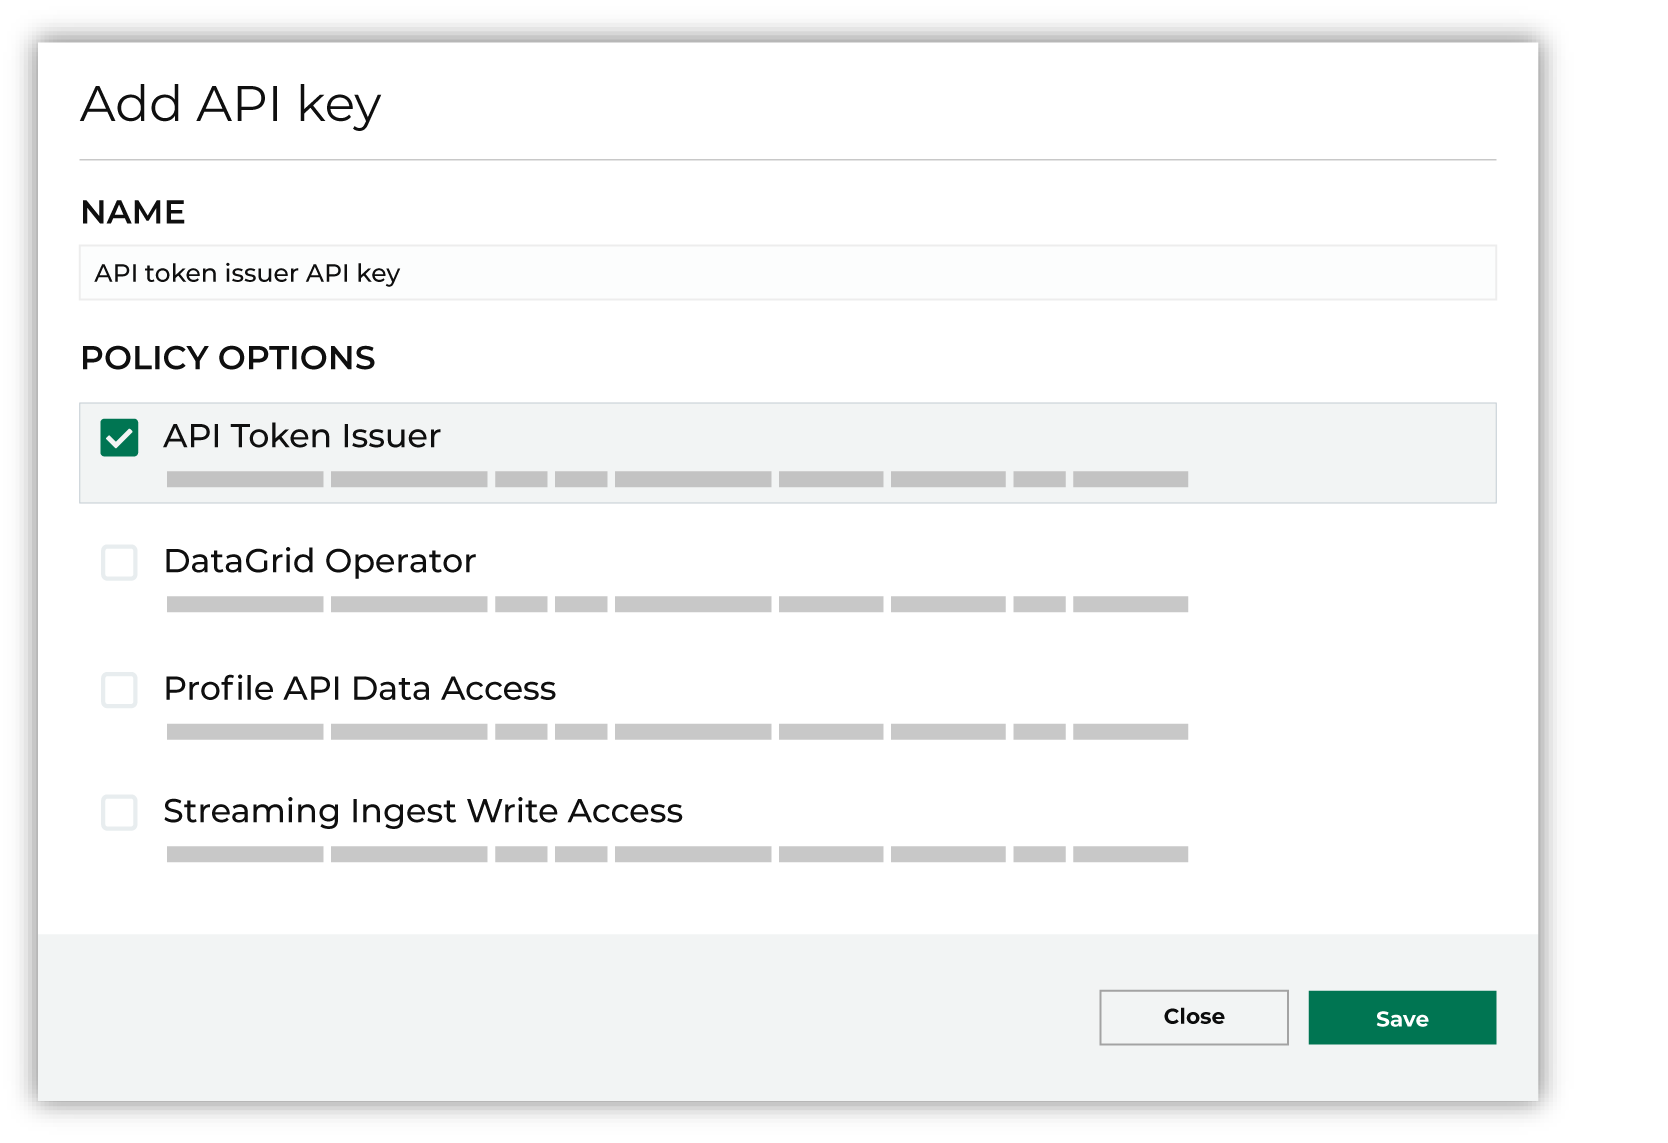
|
Amperity API data access
An API key enables your downstream use cases to interact with the Amperity API.
To add an API key for the Amperity API

|
Open the Settings page, and then select the Security tab. Under API keys click Add API key. |

|
From the Add API key dialog, add the name for the API key, select the DataGrid Operator option, and then click Save. 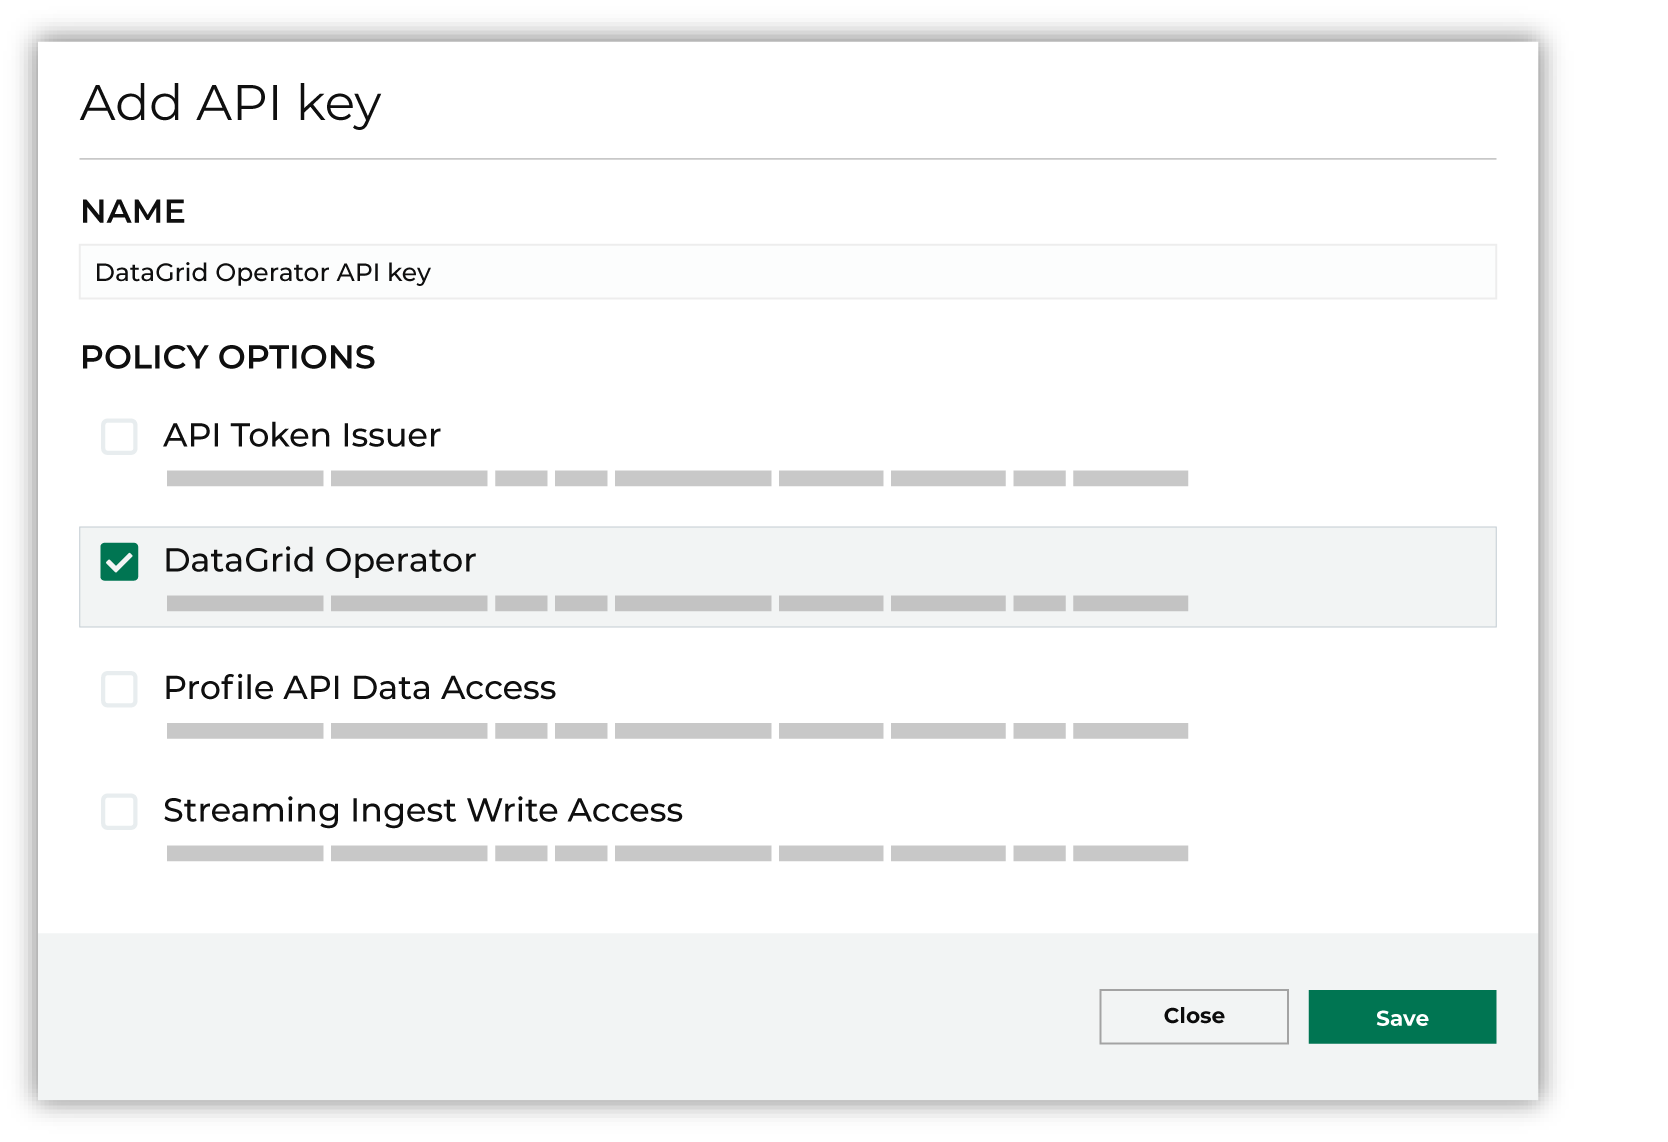
|
Profile API data access
An API key enables your downstream use cases to read data from the Profile API.
To add an API key for the Profile API

|
Open the Settings page, and then select the Security tab. Under API keys click Add API key. |

|
From the Add API key dialog, add the name for the API key, select the Profile API Data Access option, and then click Save. 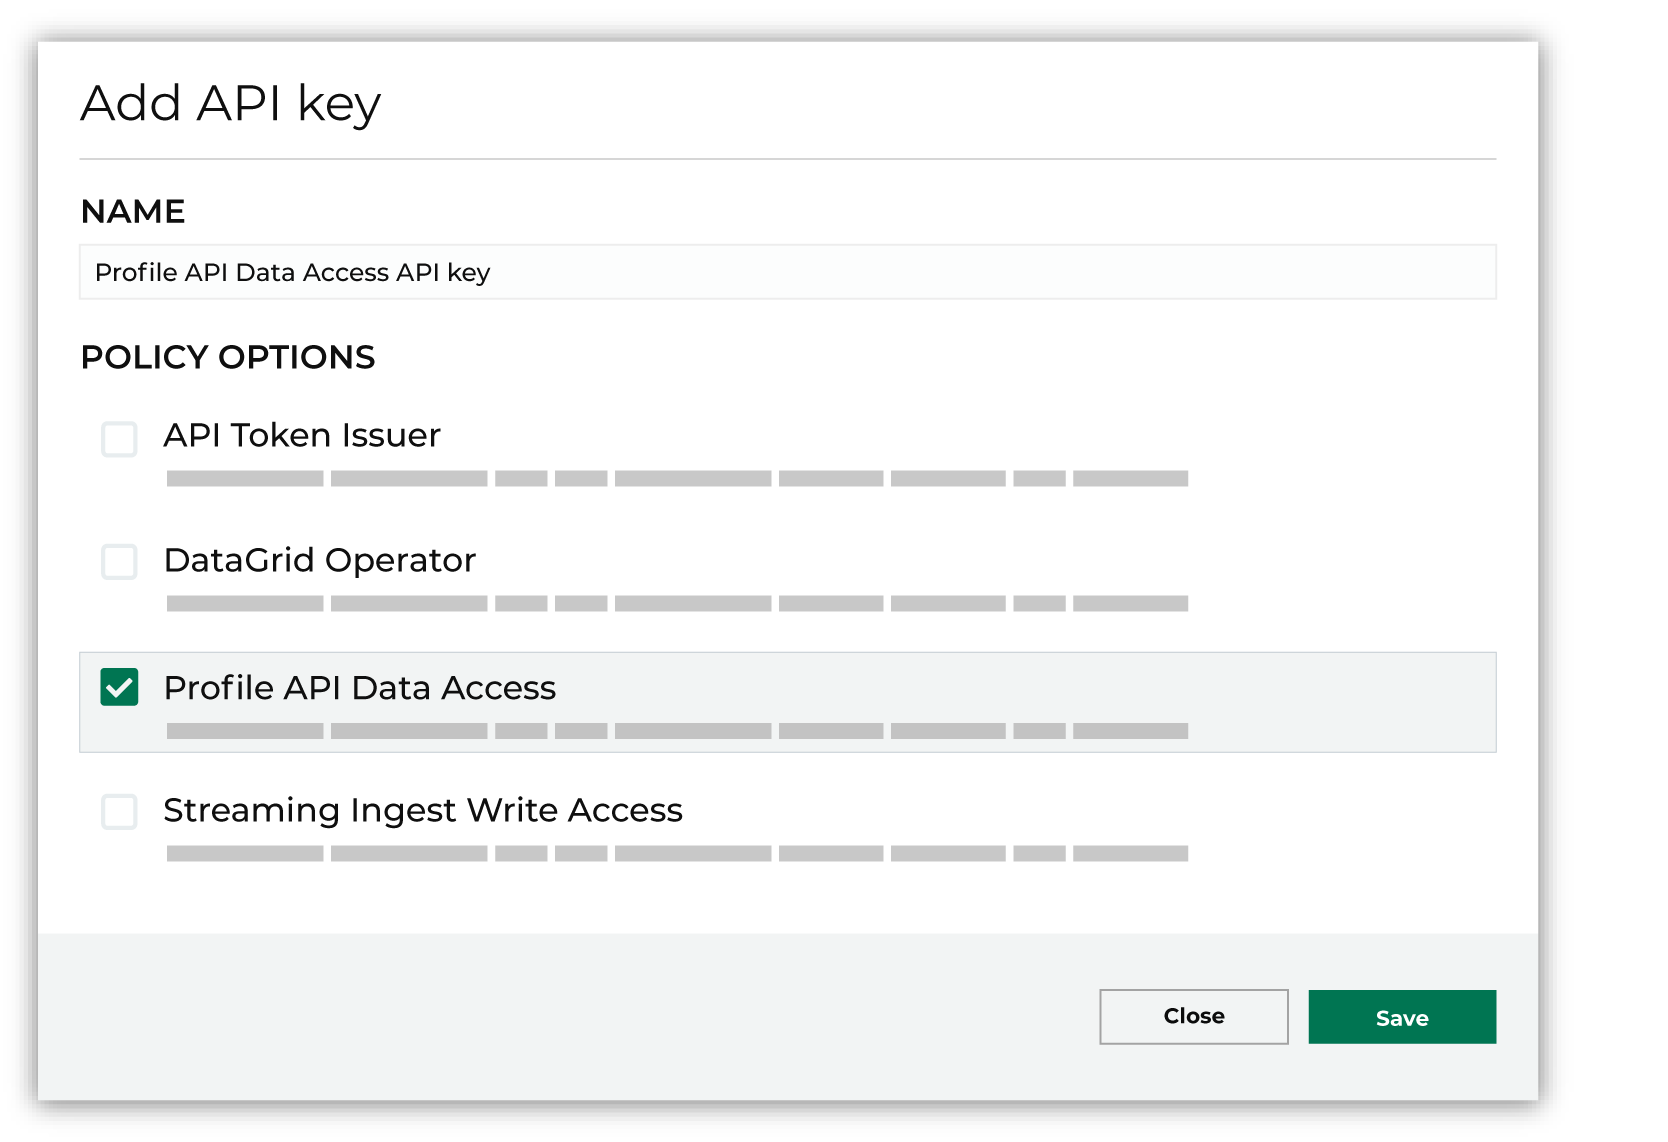
|
Streaming Ingest API write access
A write access token enables your upstream use cases to write data to the Streaming Ingest API.
To add an access token for the Streaming Ingest API

|
Open the Settings page, and then select the Security tab. Under API keys click Add API key. |

|
From the Add API key dialog, add the name for the API key, select the Streaming Ingest Write Access option, and then click Save. 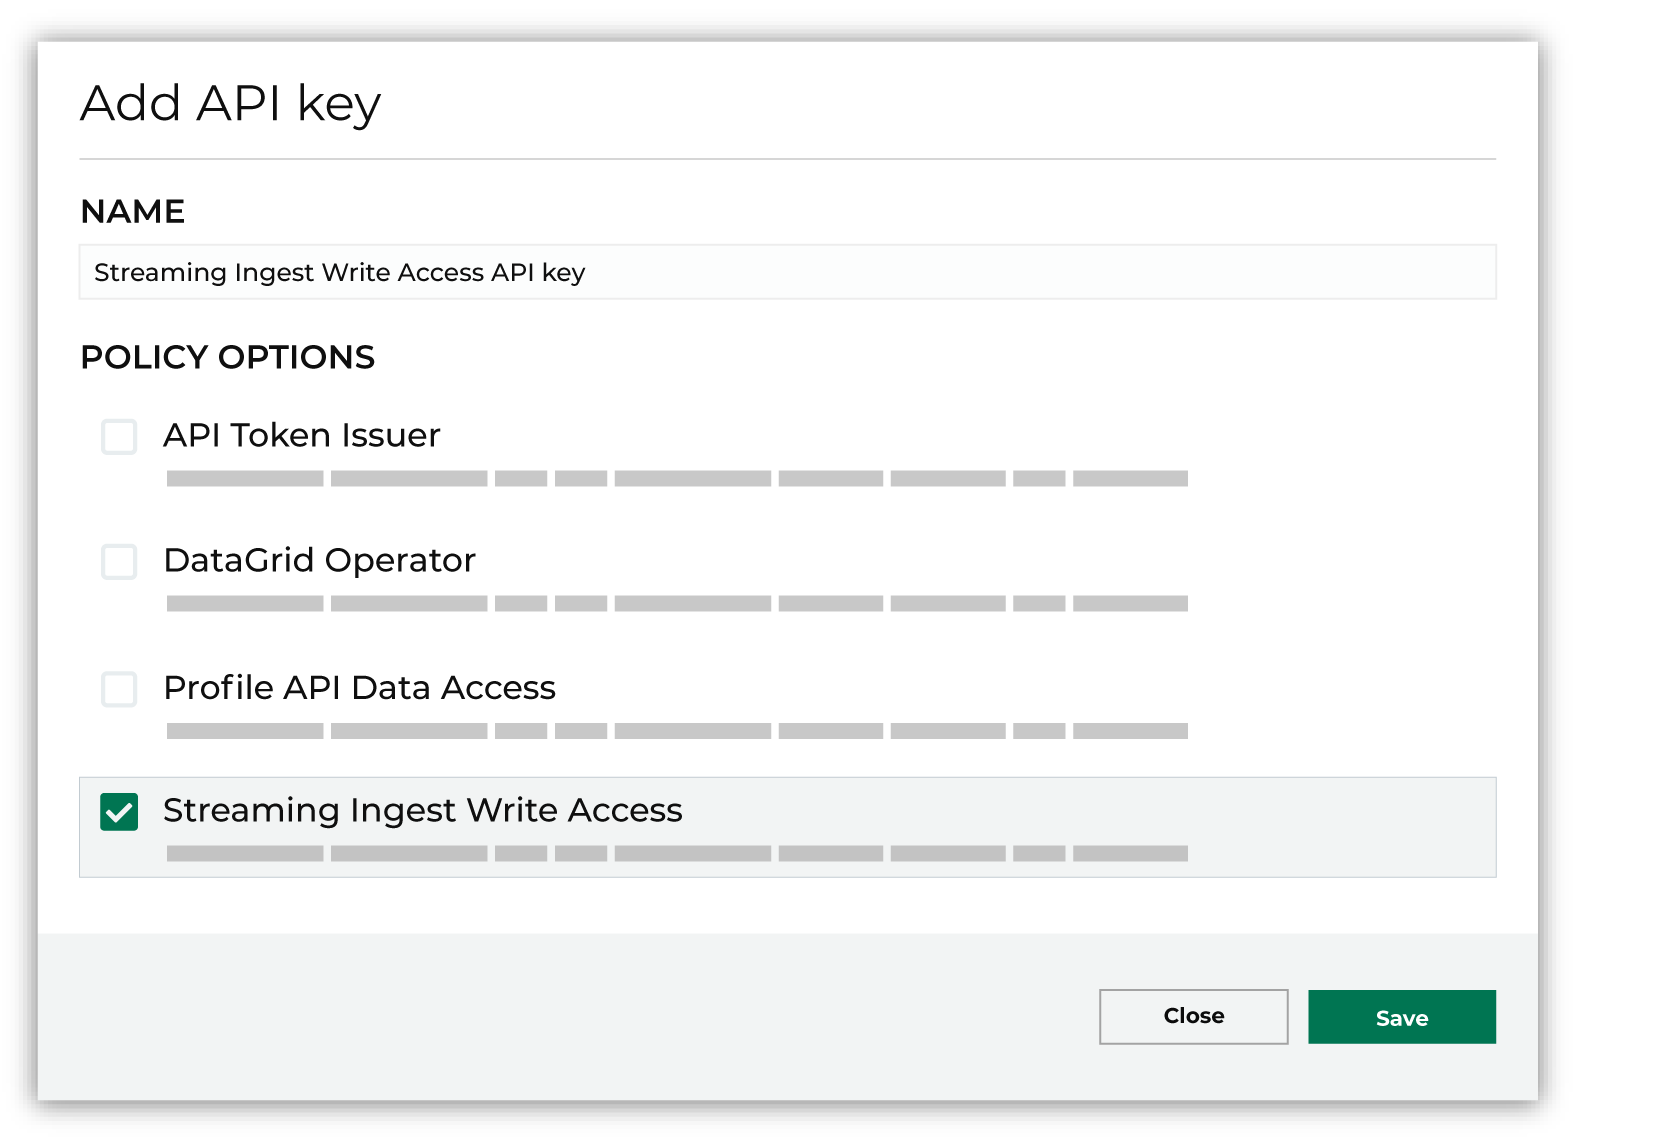
|
Delete API keys
In situations where rotating an access key is not enough, you can delete an API key.
To delete API tokens

|
Open the Settings page, and then select the Security tab. |

|
Under API keys find the index, and then from the Actions menu select Delete. 
|
Get OAuth credentials
Every configured API token has an access token to enable using OAuth.
To get OAuth credentials for an API key

|
Open the Settings page, and then select the Security tab. |

|
Under API keys find the index, and then from the Actions menu select Get OAuth credentials. The OAuth credentials dialog box opens and shows the following credential details:
Use these values to configure automated workflows to use OAuth when accessing the API for which this token allows access. |

|
Use the client ID and client secret to send an HTTP POST request to the token endpoint. This will return an access token. Example request details POST /api/v0/oauth2/token HTTP/1.1
Host: acme.amperity.com
Content-Type: application/x-www-form-urlencoded
X-Amperity-Tenant: acme2
grant_type=client_credentials
&client_id=ClientId
&client_secret=ClientSecret
The 200 OK response will be similar to {
"access_token": "N88Du6L1xsmA5DRZrtxSGYmbHP",
"expires_in": 3600,
"token_type": "Bearer"
}
Where:
|
Rotate API keys
You can rotate the internal secrets used by access tokens to ensure that previously issued access tokens cannot authenticate to the Amperity API.
When an API key is rotated a new internal secret is generated, after which it becomes the active secret for that API key. The previously issued access token is deposed, which allows the previous code to remain valid for a short period of time to allow for distribution of the new access token. A deposed access token will remain valid for 30 days, or may be explicitly dropped.
If an access token already has a deposed token, that deposed token is dropped and the previously issued access token takes its place as the deposed token.
This process may be used to invalidate outstanding tokens issued without expiry times. Clients should be careful not to rotate too often, such as to not rotate on every issue call, or they will be surprised when their existing tokens stop working.
Note
If you rotate your tokens too often you may run into issues where previously issued access tokens are not deposed for a long enough time, which prevents newly issued tokens from being distributed.
To rotate API keys

|
Open the Settings page, and then select the Security tab. |

|
Under API keys find the index, and then from the Actions menu select Generate token. Set the token expiration length. Enable the Rotate key secret option to rotate an existing secret when generating an access token. This will force all previously provisioned tokens that are associated with the current API key to expire in 30 days. |
About access tokens
Amperity uses a JSON Web Token (JWT) for authentication to the Amperity API. These access tokens are issued from API keys which are authorized to perform certain actions with Amperity.
Because a JWT access token automatically expires, tokens should be refreshed on a regular basis.
Access tokens are managed directly from the Amperity UI.
About JWT
A JSON Web Token (JWT) is a compact, URL-safe means of representing claims to be transferred between two parties.
Programmatic workflows should authenticate to Amperity APIs using JWT access tokens as the bearer token within the header of a request.
Generate access tokens
Access tokens that enable authentication to the Amperity API are managed directly from the Settings page in Amperity.
To generate access tokens

|
Open the Settings page, and then select the Security tab. |

|
Under API keys find the API key for which you want to generate an access token, and then from the Actions menu select Get token. 
|

|
Select the number of days this token allows access to the API, after which it will expire. For example, 3 days: 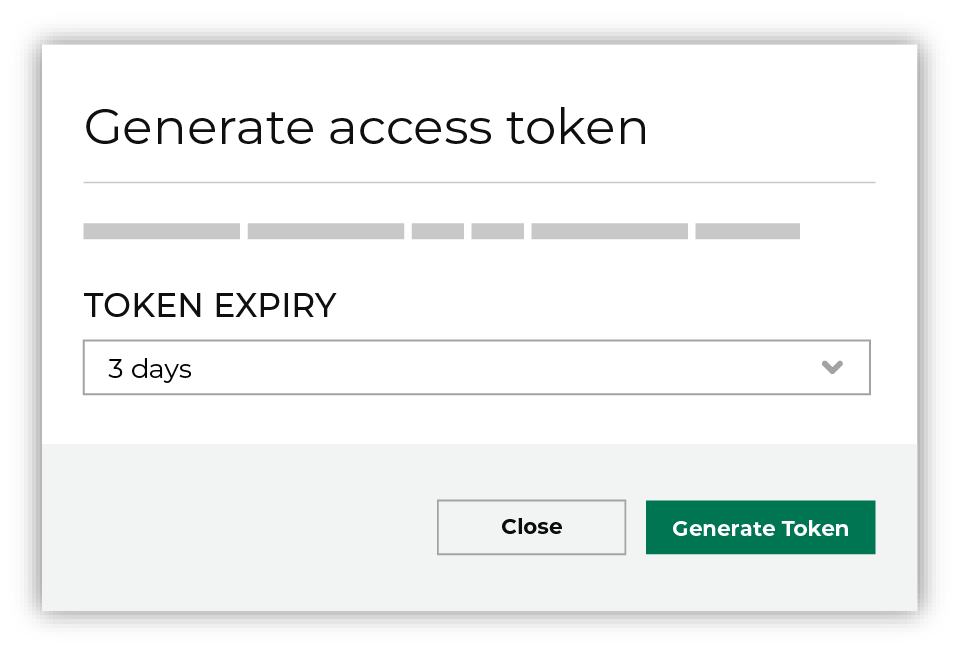
Use the Rotate key secret option to rotate an existing secret when generating an access token. This will force all previously provisioned tokens that are associated with the current API key to expire in 30 days. Click Generate token. The token is generated, and then is automatically copied to your clipboard. 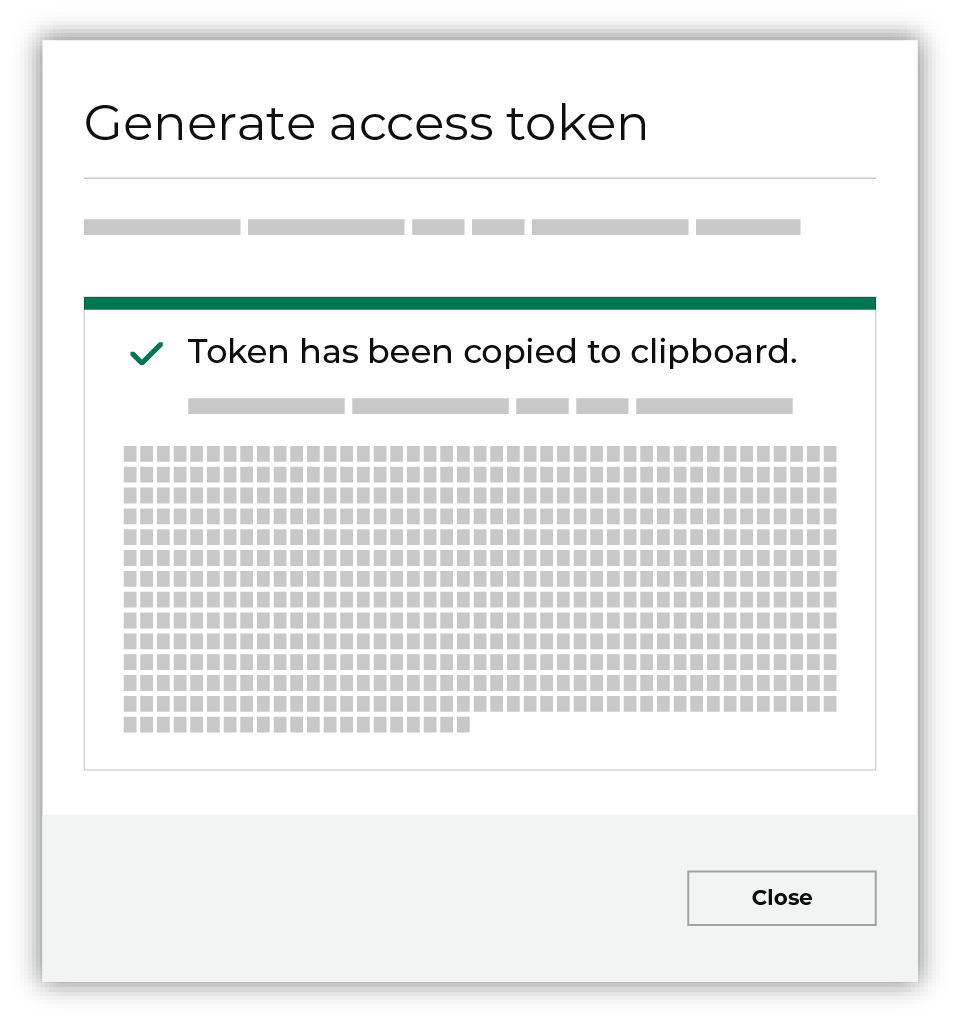
Important You are the only person who have access to the newly generated access key. Amperity does not save the access key anywhere and it will disappear when you close this dialog. Store the access key in a safe place. |
Refresh access tokens
Access tokens may be refreshed directly (using an issuer token), and by using HTTP or cURL.
Using API issuer tokens
Use API issuer tokens to enable a downstream workflow to programmatically refresh access tokens. Generate an access token for the issuer token, and then use the issuer token as part of the programmatic workflow.
Find the token ID for the access token to be refreshed under Settings, Users, API keys in the ID column. API issuer tokens can refresh their own tokens. A fully automated token refresh workflow uses the refresh token’s ID along with the access token’s ID.
Using cURL
To refresh an access token using cURL, submit a request similar to:
curl -XPOST \
-H "Content-Type: application/json" \
-H "X-Amperity-Tenant: <tenant-name>" \
-H "Authorization: Bearer <token-refresher token>" \
https://<tenant-name>.amperity.com/api/v0/admin/api-keys/<api-key-id>/tokens \
-d '{"expires-at": "2020-06-16T00:24:16Z"}'
Using HTTP
To refresh an access token using HTTP, submit a request similar to:
POST /api/v0/admin/api-keys/<api-key-id>/tokens HTTP/1.1
Host: https://<tenant-name>.amperity.com
Content-Type: application/json
X-Amperity-Tenant: <tenant-name>
Authorization: Bearer <token-refresher token>

{"expires-at": "2020-06-16T00:24:16Z"}
Using Postman
Postman is a collaboration platform for API development that enables support for sending data to Amperity using the Streaming Ingest REST API.
Amperity provides complete details for refreshing an API token using a Postman collection for the Refresh Token API . Use this collection as the starting point for testing your refresh token workflow.
When generating an access token
Use the Rotate key secret option to rotate an existing secret when generating an access token. This will force all previously provisioned tokens that are associated with the current API key to expire in 30 days.
Revoke access tokens
You may revoke access tokens associated with an API key by opening the Actions menu for an API key, and then choosing Revoke tokens. Do one of the following:
Revoke all tokens that were issued prior to the last rotation.
Revoke all tokens immediately.
The selected action cannot be undone.
To revoke access tokens

|
Open the Settings page, and then select the Security tab. |

|
Under API keys find the API key for which you want to revoke tokens, and then from the Actions menu select Revoke token. |

|
From the Revoke tokens dialog, choose one of the following options: 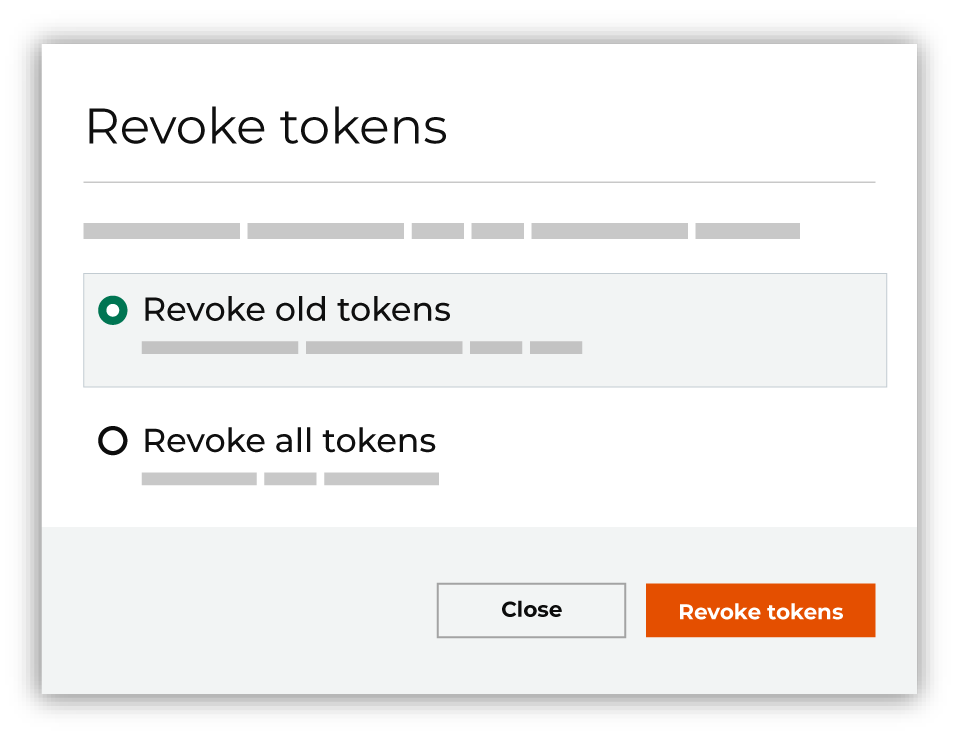
Use Revoke old tokens to revoke only tokens that were created prior to the last rotation. Use Revoke all tokens to immediately revoke all tokens. |

|
Click Revoke tokens, and then confirm that you want to revoke the selected tokens. This action cannot be undone. |
About Profile API actions
The following actions are available for each endpoint that your brand enables in the Profile API:
Copy endpoint URL
Use this to get the full URL of your tenant, including the ID for the endpoint. Use this URL in the requests your brand makes to the profile API.
Important
Each request to a profile API endpoint MUST have the correct URL of that endpoint. The URL of an endpoint is similar to:
https://{tenant-domain}/attribute/v0/indexes/{index-id}
To copy the URL of an endpoint
Open the Destinations page.
Under Profile API, select from a row within the list of endpoints, and then select Copy URL.

This copies the full URL to the clipboard on your computer, after which you can use it to configure requests that are made to that endpoint.
Copy index ID
The index ID is a unique identifier for an endpoint. To make a request to any Profile API endpoint you must include the index ID in the URL of the request.
https://{tenant-domain}/attribute/v0/indexes/{index-id}
To copy the index ID for an endpoint
Open the Destinations page.
Under Profile API, select from a row within the list of endpoints, and then select Copy index ID.

This copies the index ID to the clipboard on your computer, after which it can be added to a request that is made to that Profile API endpoint.
Delete endpoint
If your tenant is not using an endpoint, it may be deleted from the Profile API.
To delete an endpoint
Open the Destinations page.
Under Profile API, select the elipses icon for an endpoint, and then select Delete.

Click the Delete button to confirm that you want to delete the endpoint.
Edit endpoint settings
You can update the settings for any endpoint in the Profile API.
To edit the settings for an endpoint
Open the Destinations page.
Under Profile API, select from a row within the list of endpoints, and then select Edit.

Make your changes.
Click Save.
Generate endpoint
Run a query to generate the data that will be available from an endpoint. The Run action does one of the following:
Generates the index if it was not generated on save.
Regenerates the index and refreshes the data that is available at that endpoint.
To run an endpoint
Open the Destinations page.
Under Profile API, select from a row within the list of endpoints, and then select Run.

This action will generate the index if it does not already exist OR this action will regenerate the index and refresh the data that is available from the endpoint.
View endpoint settings
You may view the settings for any configured endpoint.
To view the settings for an endpoint
Open the Destinations page.
Under Profile API, select the elipses icon for an endpoint, and then select View.