About segments
A segment defines a specific attribute profile for use with a marketing campaign. The list of matching customers is the audience.
Amperity Learning Lab
Use the Segment Editor to build audiences for your campaigns.
Open Learning Lab to learn more about creating segments , segment insights , and creating segments from segment insights . Registration is required.
About the Segments page
The Segments page provides the interface for building, defining, and managing a list of segments.
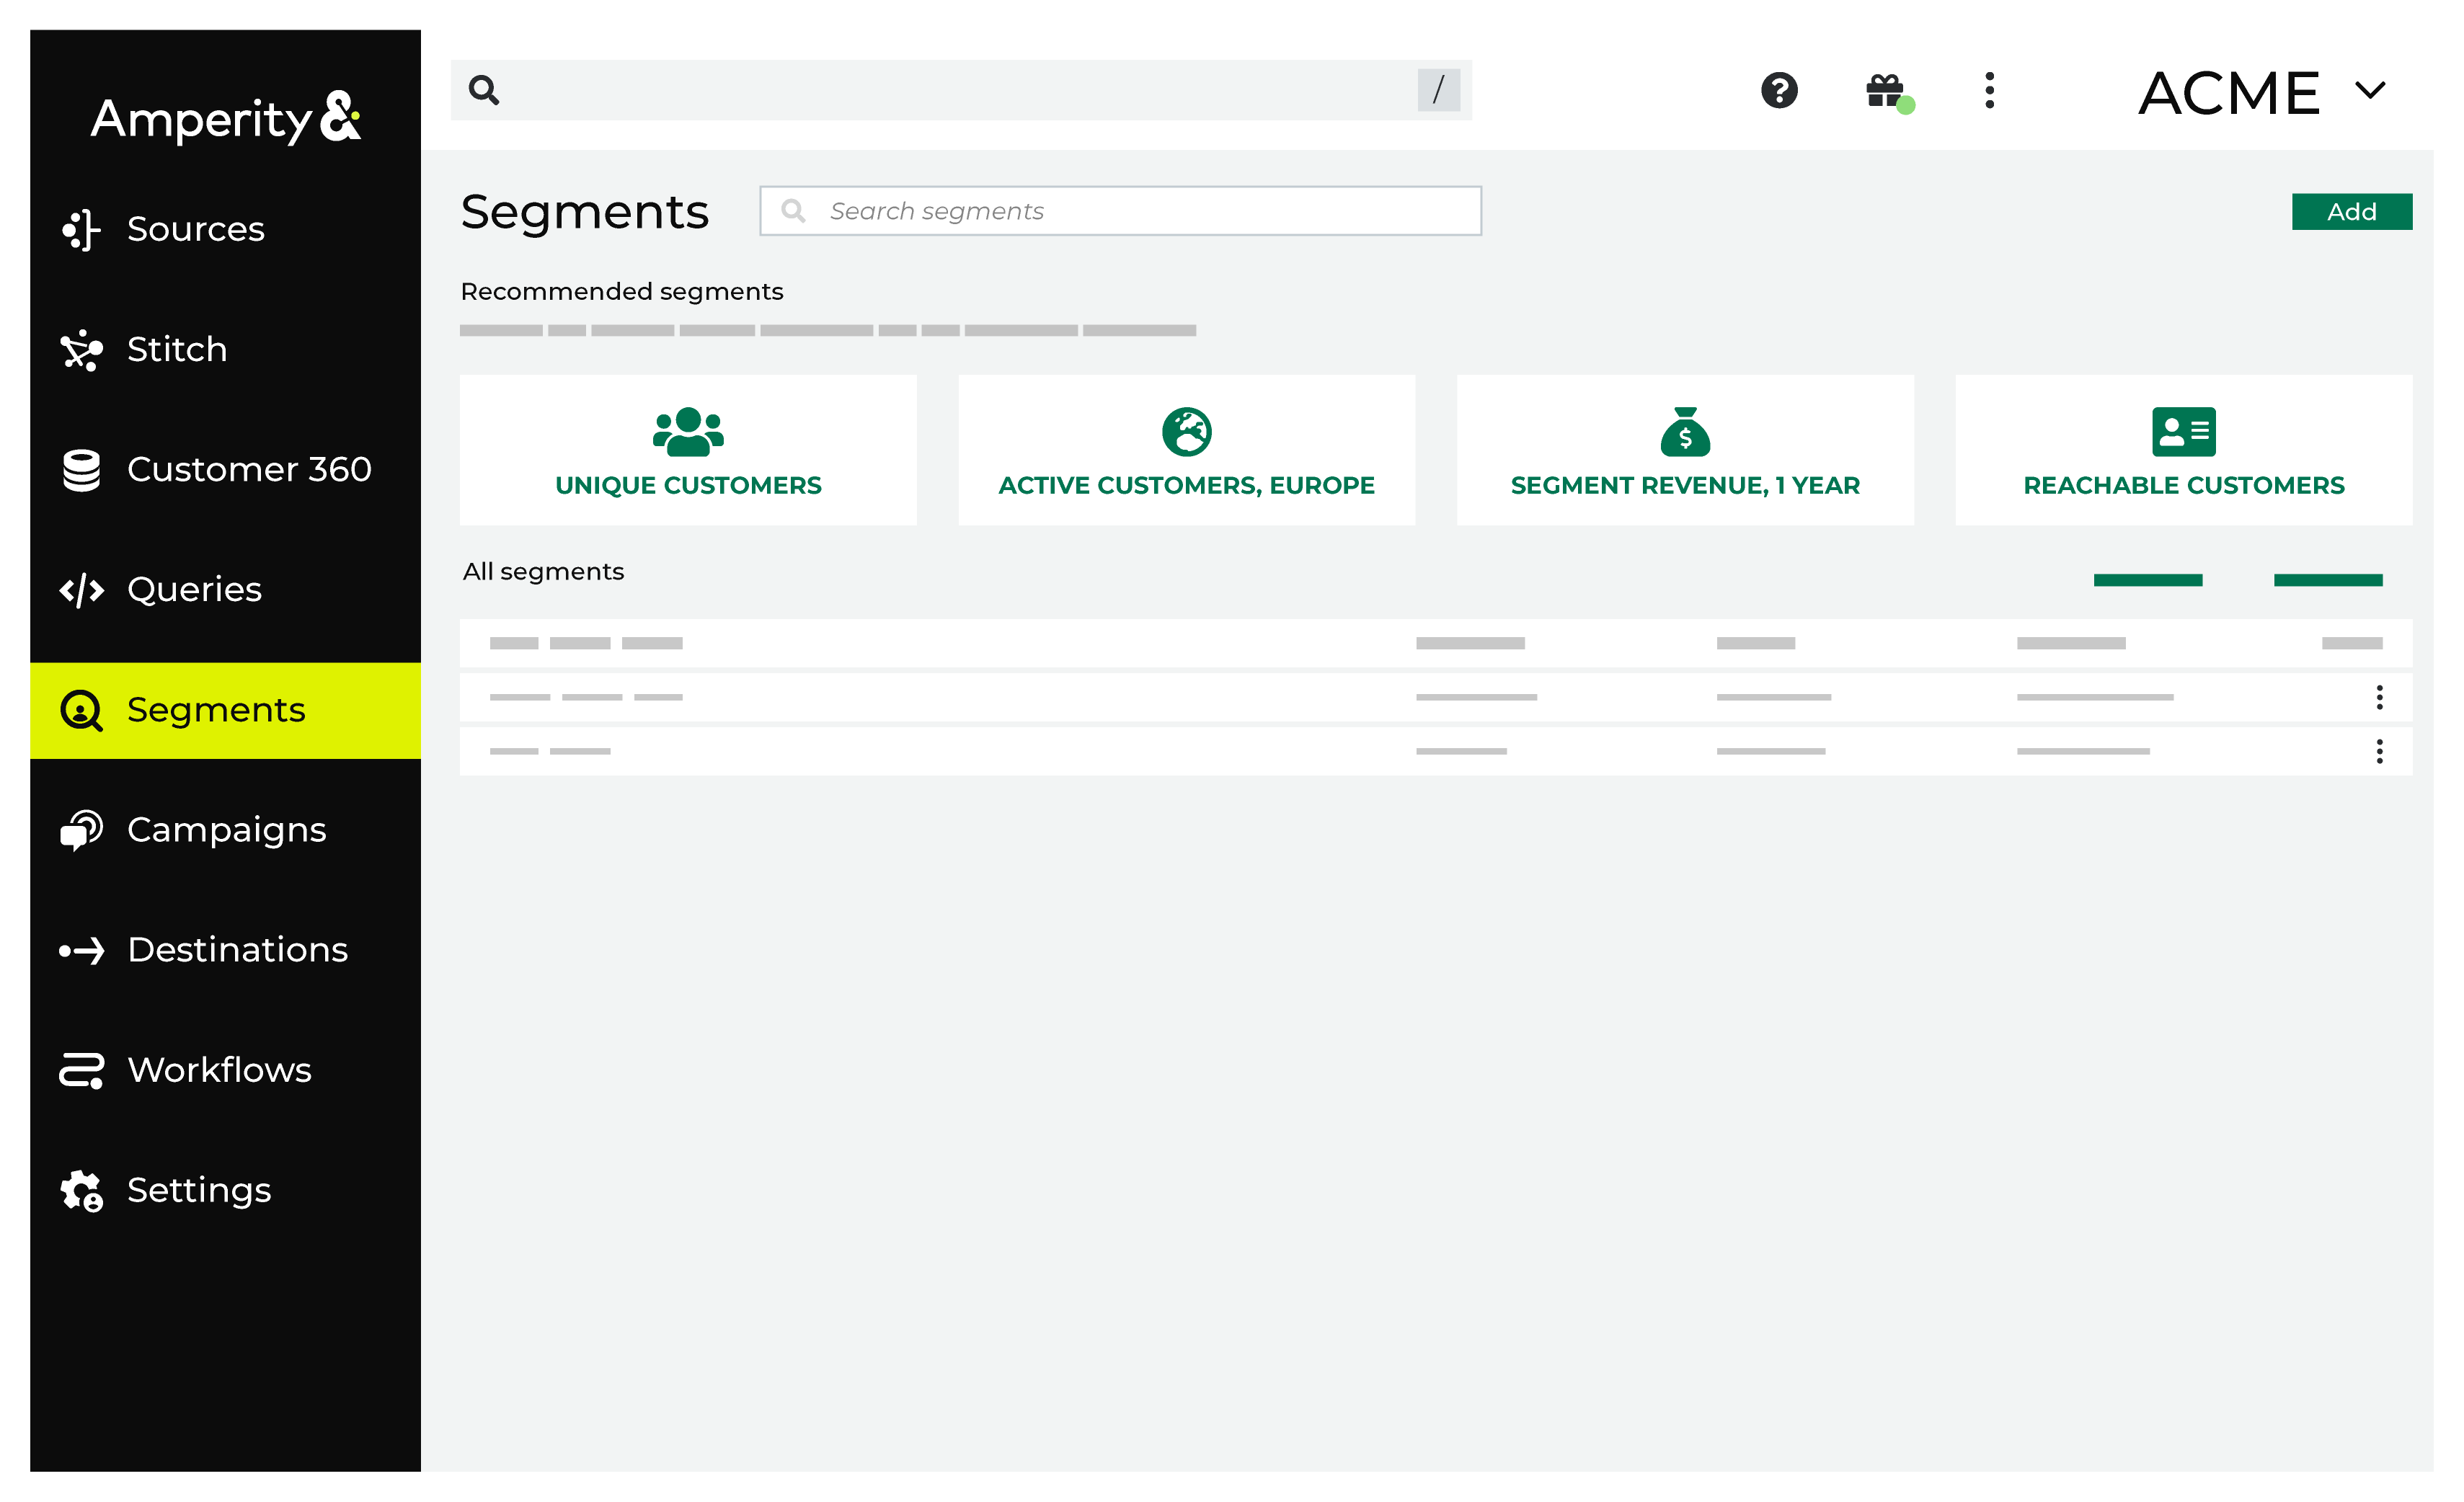
You can view a list of active segments along with recommended segments highlighted across the top of the page.
Click Create Segment to open the Segment Editor. Build your segment using a series of dropdowns and picklists. Refresh Segment insights to see how many customers match and to see how much value they bring to your brand. Activate the segment when you are ready to use it in marketing campaigns.
You can reorder the list of segments alphabetically by Name and Status. Or, you can reorder the date Last updated. View which campaigns a segment is activated under Used in.
Segments page tasks
Recommended segments
The Segments page has a list of active segments along with recommended segments highlighted across the top of the page.
Configure recommended segments
Up to five segments may be configured to show in the list of recommended segments. (Ask your Amperity representative to configure the list of recommended segments for your tenant.)

|
From the Segments page, under Recommended segments, click Configure. 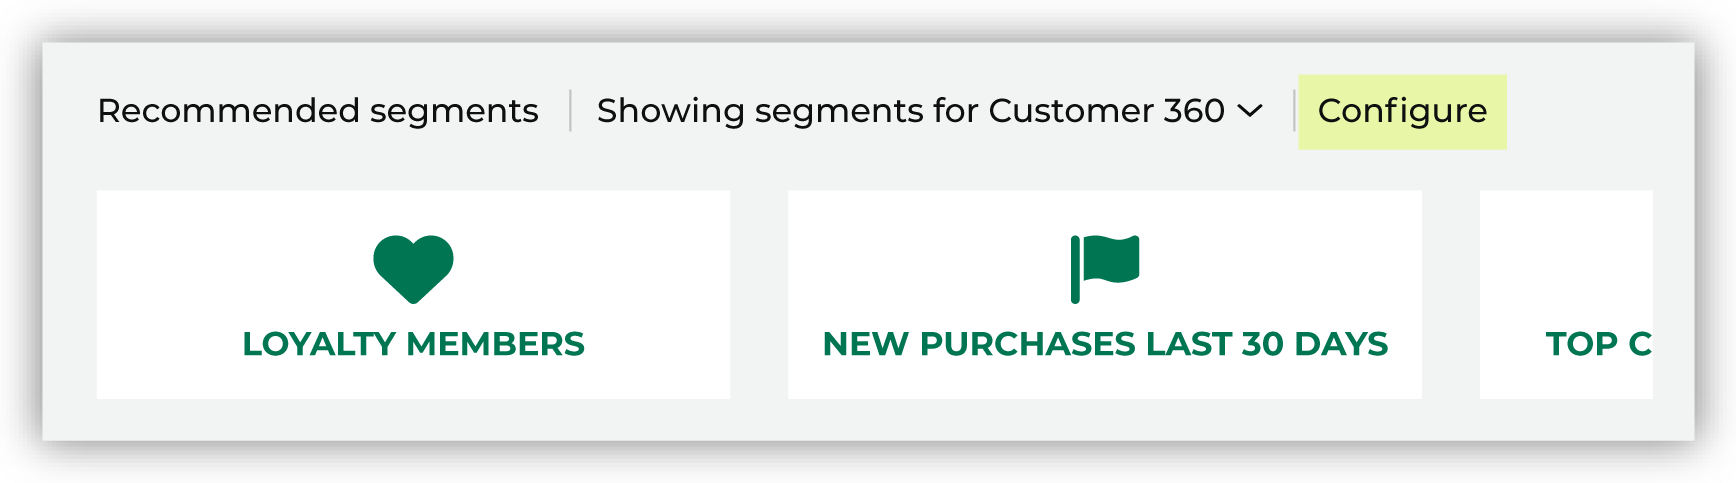
This opens the Configure recommended segments dialog box. For each recommended segment, use the dropdown list to choose a segment 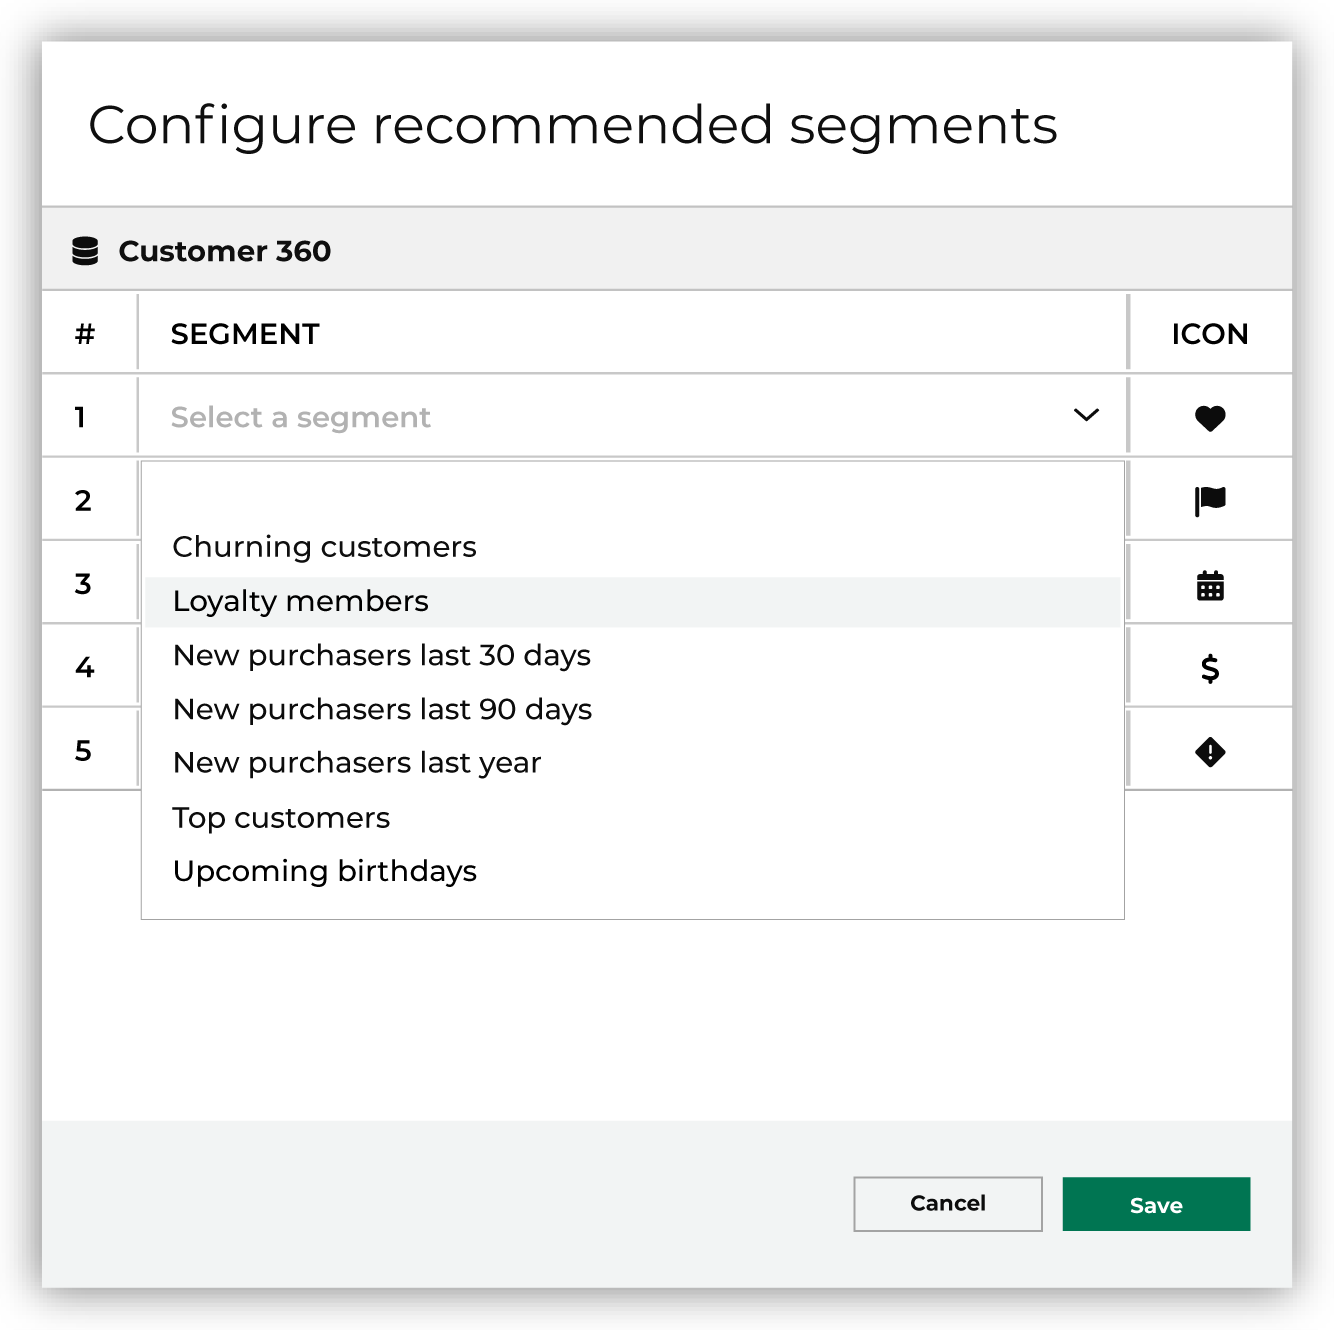
and then choose an icon. |
|
Up to five recommended segments may be configured. 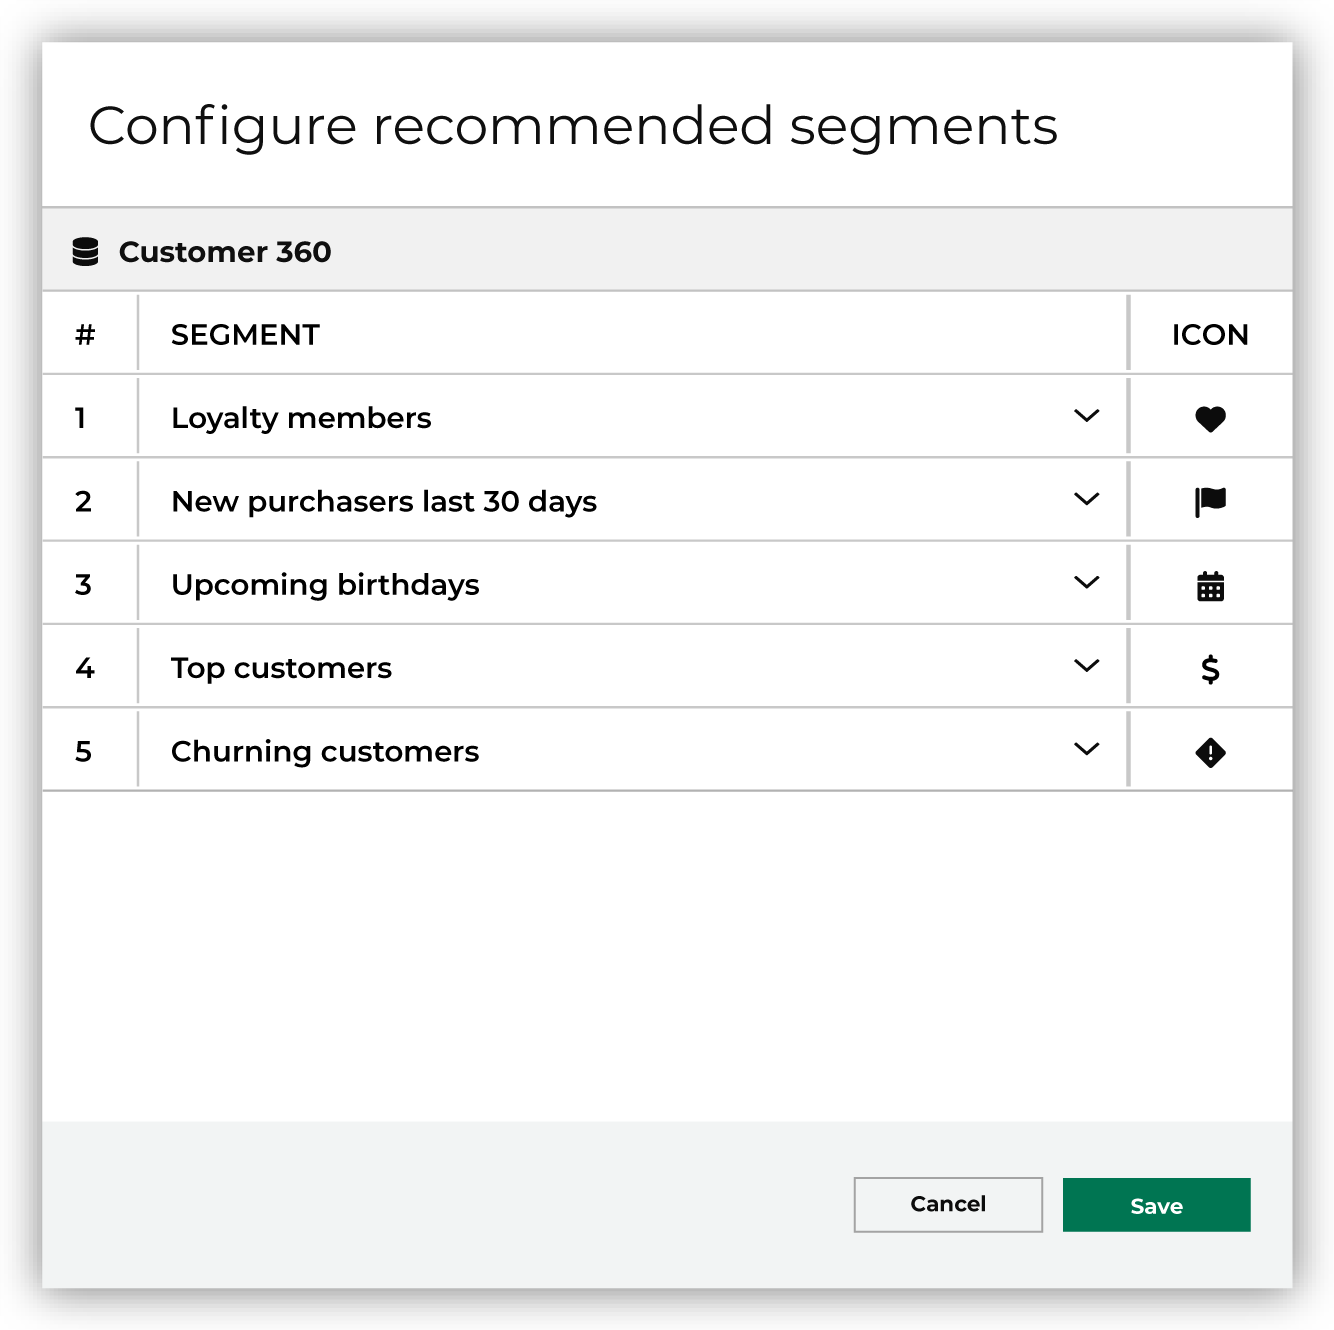
|

|
When your tenant has more than one database, you can select the list of recommended segments for each database. 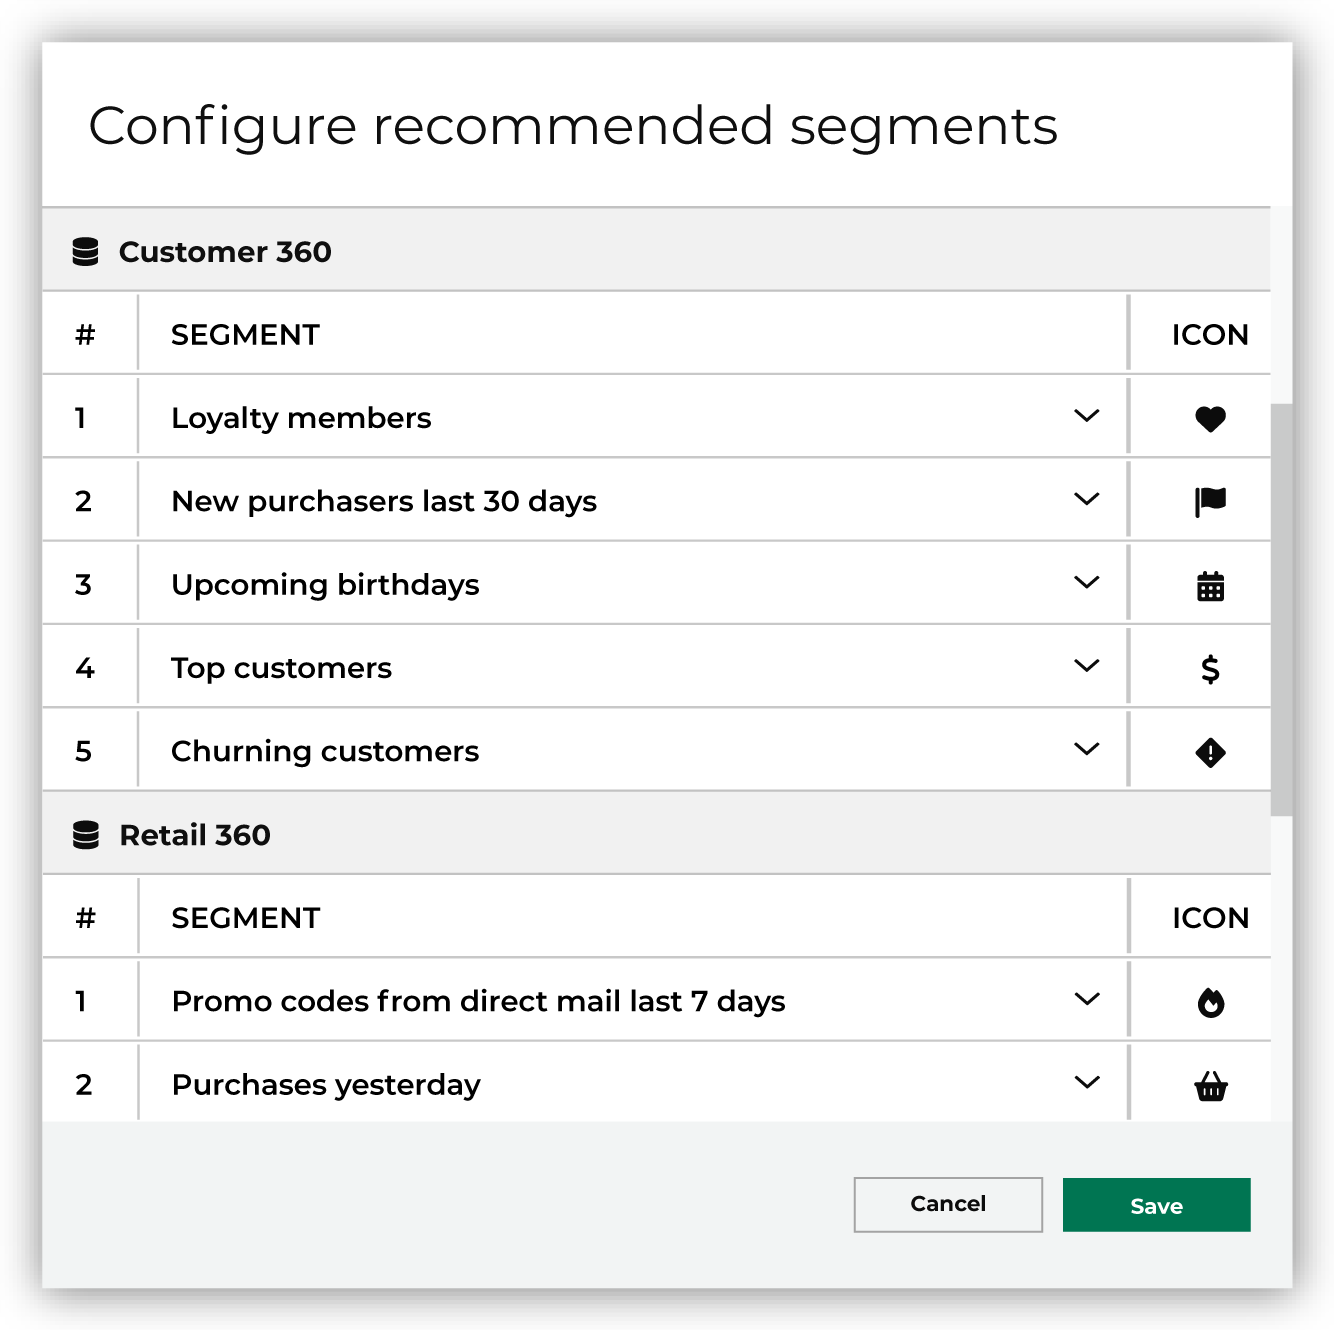
From the Segments page, you can switch between the lists of recommended segments by choosing a database from the “Showing segments for” dropdown. 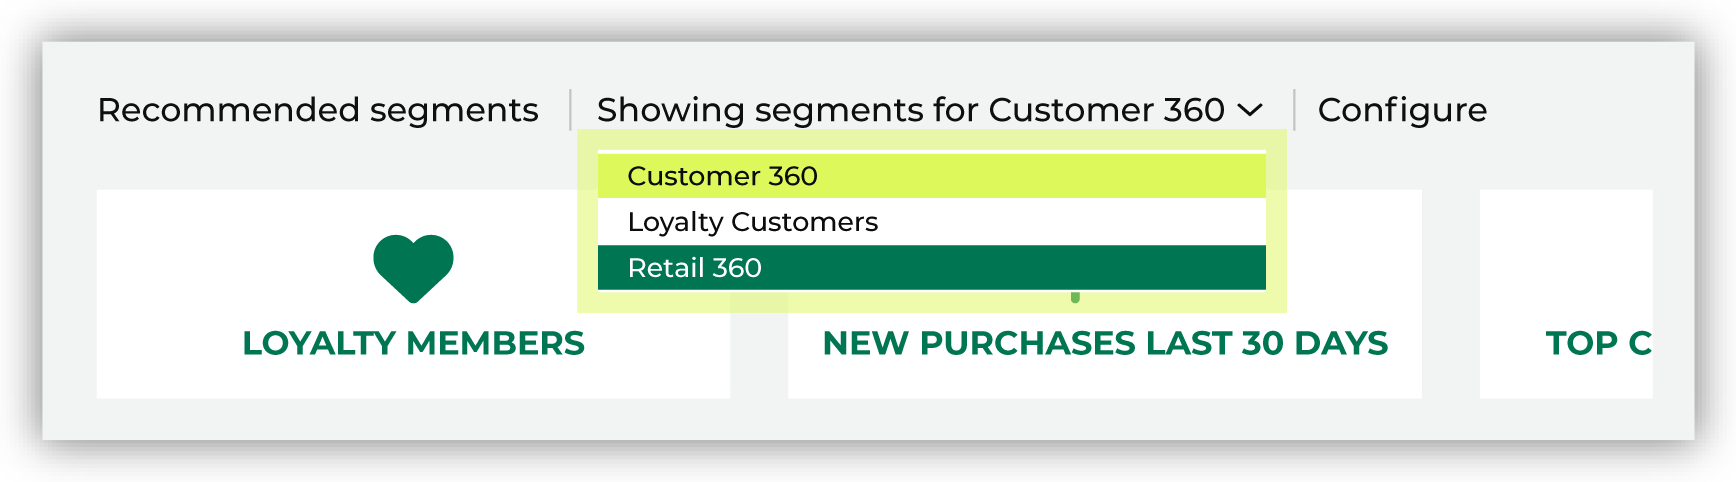
|
Segment tabs
After you click a segment on the Segments page, you can view insights about segments on the following tabs:
Summary tab
The Summary tab highlights important information about a segment, including:
How much opportunity does this segment have?
Which channels can I engage on?
What is the predicted revenue for this segment?
Use the information on the Summary tab to help determine the best way to initiate a marketing campaign.
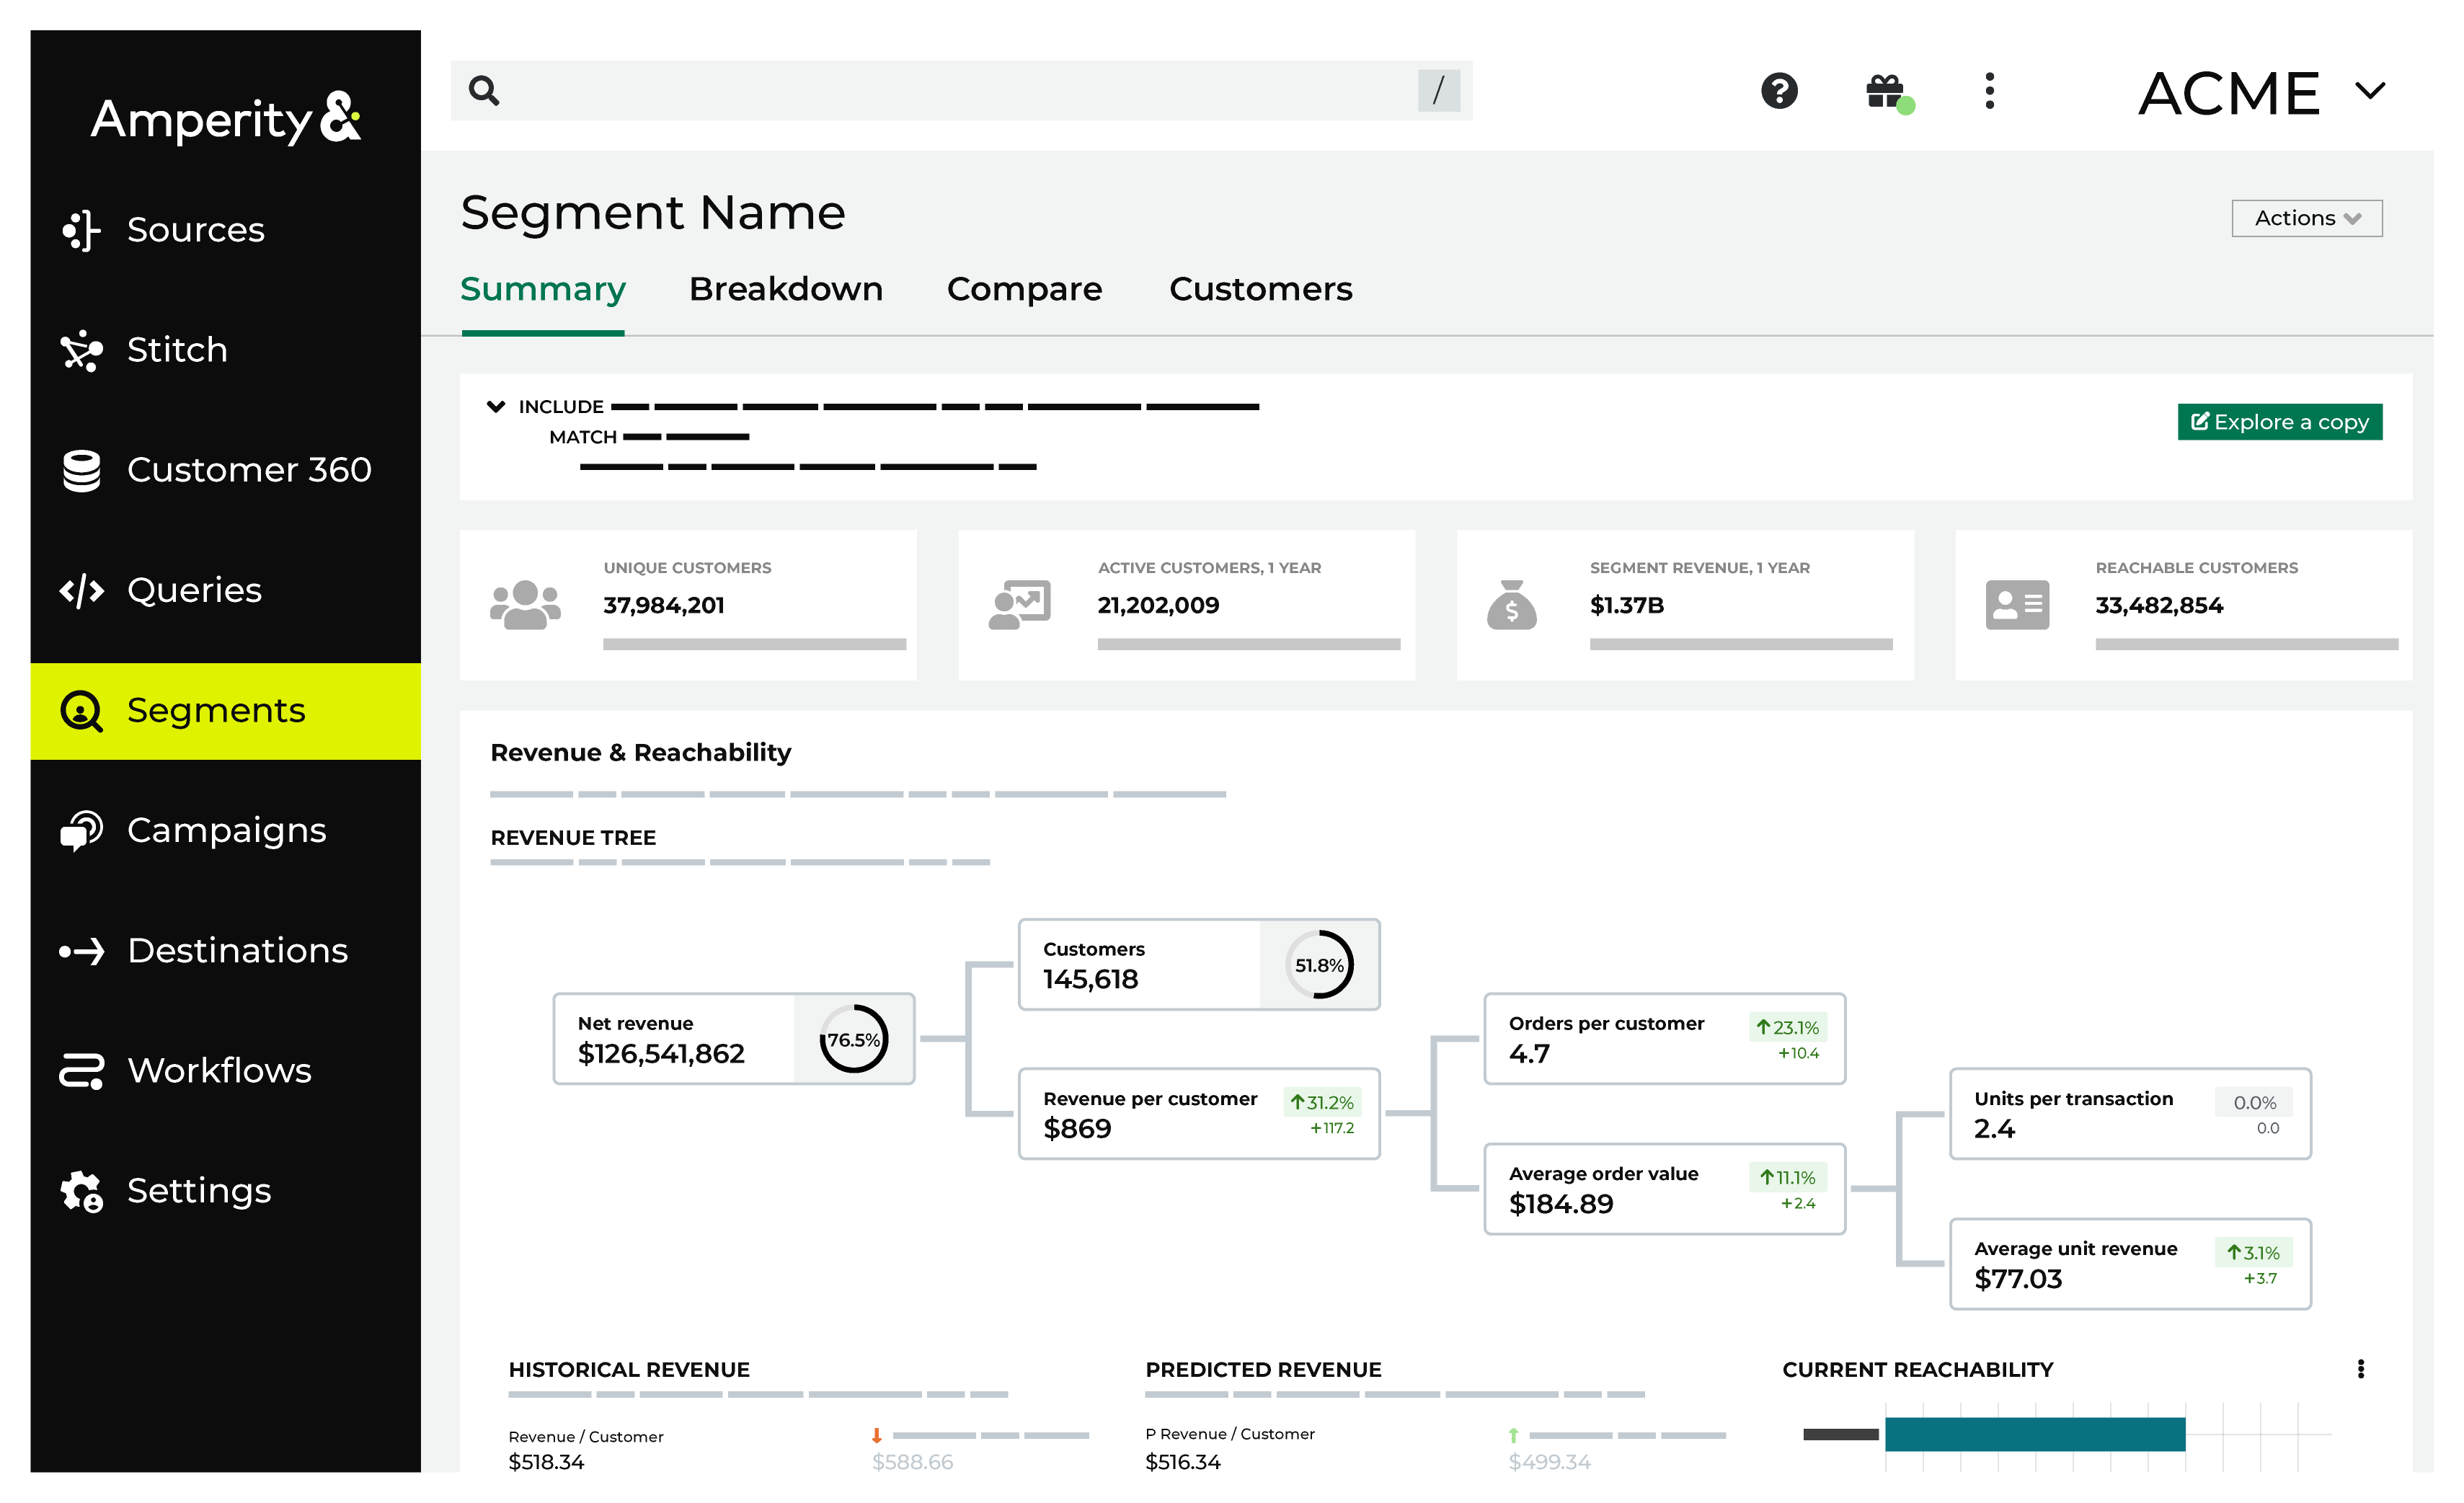
Each Summary tab has the following details:
The number of unique customers.
The number of customers who have been active within the last year.
The amount of revenue generated from these customers within the last year.
Revenue statistics, including historical revenue trends and a revenue tree.
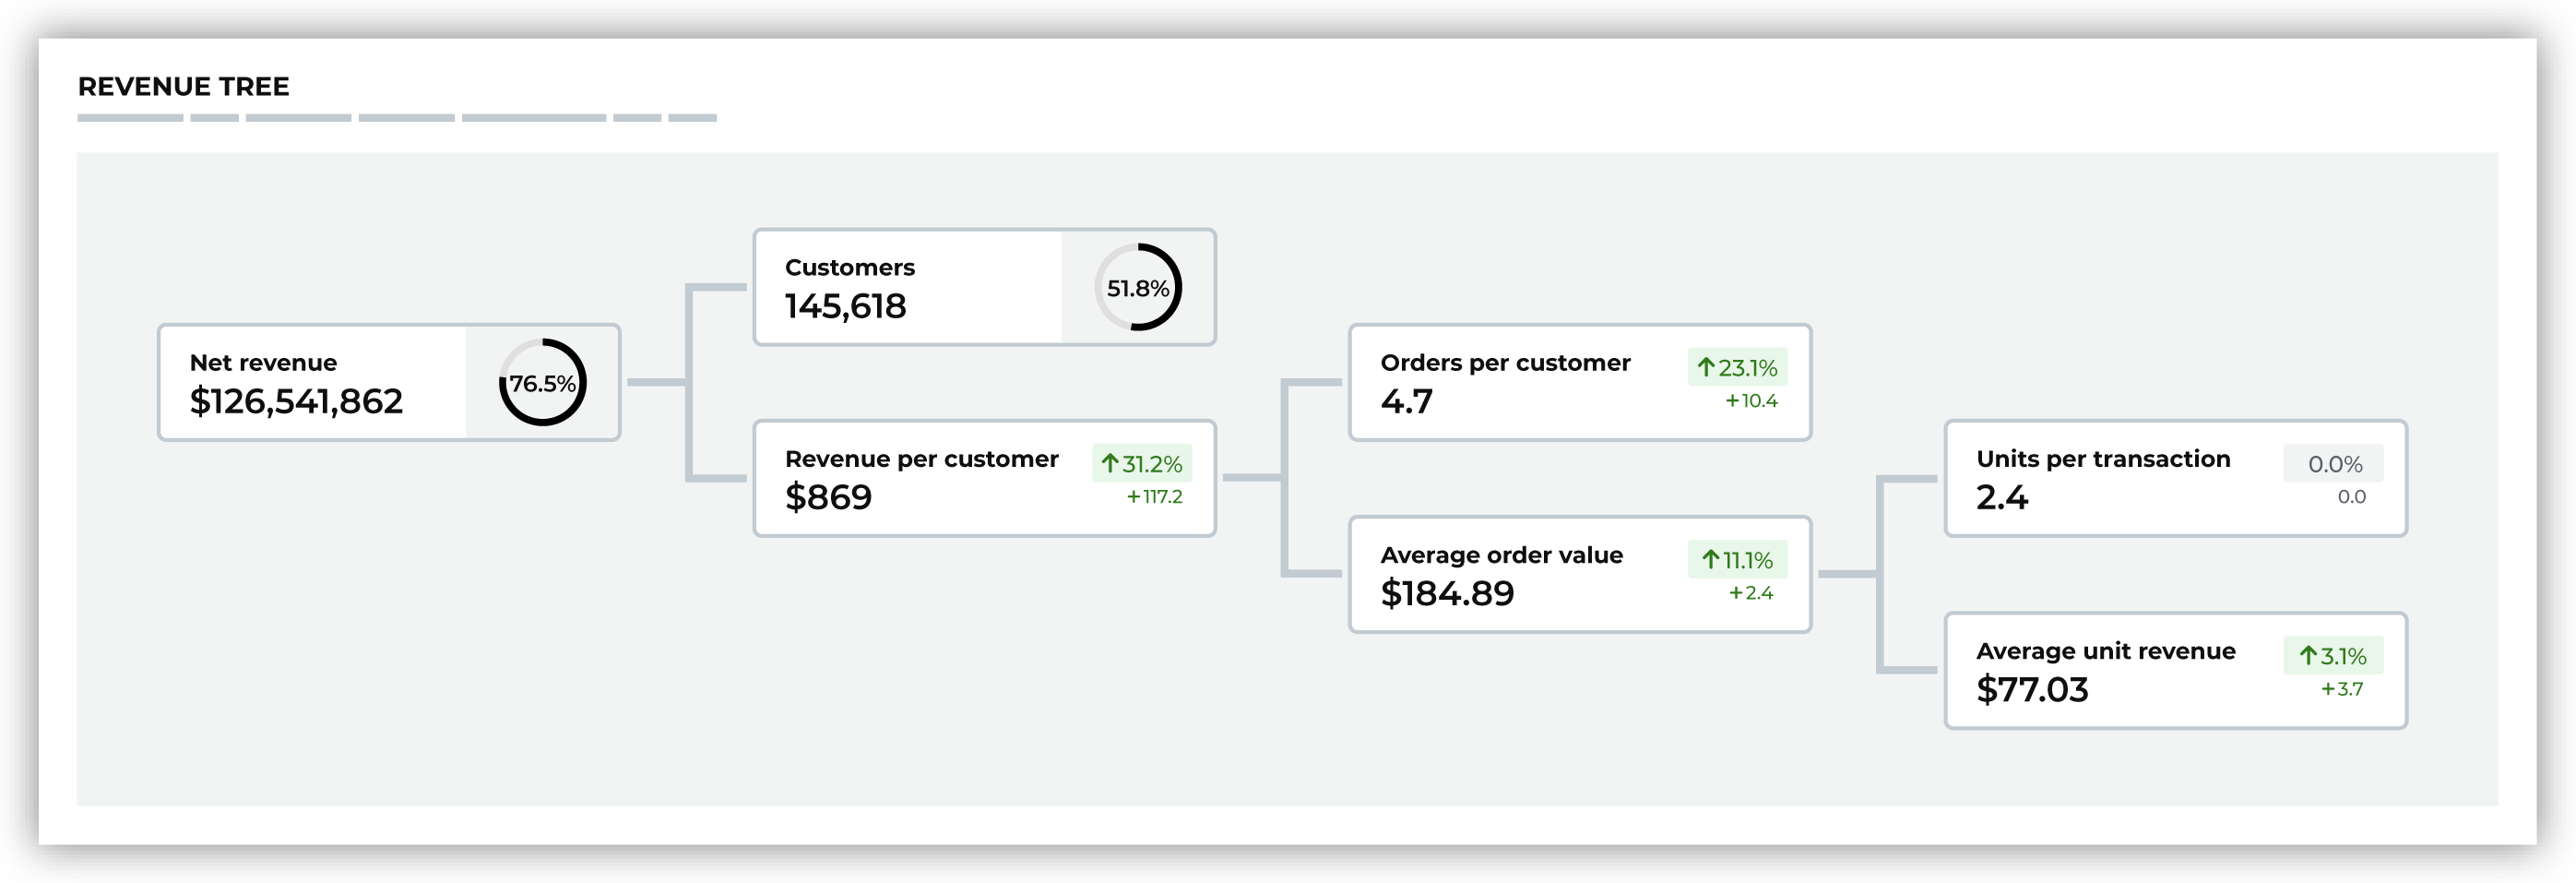
The revenue tree is built as a series of calculations from fields in the Transactions Attributes Extended table. The revenue tree has the following segment insights:
Net revenue
Net revenue is the sum of all order revenue in the past year.
Customers
All customers, unique by Amperity ID, in the past year.
Revenue per customer
Revenue per customer is net revenue divided by customers.
Orders per customer
Orders per customer is order frequency divided by customers.
Average order value
Average order value is net revenue divided by order frequency.
Units per transaction
Units per transaction is the quantity of purchased items divided by order frequency.
Average unit revenue
Average unit revenue is net revenue divided by the quanity of purchased items.
Note
Historical revenue represents the sum of order revenue for all customers who made at least one purchase during the previous year.
Tip
You can view the SQL query for each summary statistic by opening the menu and choosing View SQL.
Summary tab tasks
Custom segment metrics
Use custom segment metrics to visualize the metrics that are most meaningful to your business, based on attributes in your databases or profiles. Select and manage custom segment metrics from the Summary tab.
You can set a maximum of ten custom segment metrics for any segment.
Note
Custom segment metrics apply to a pairing of a Database and an Activation ID, displayed at the top of the Summary tab. All other segments with the same pairing will have the same custom segment metrics.
Use the following formats to define a custom segment metric:
Bar chart, for visualizing distribution among different categories of an attribute. For example: gender, purchase channel, product preference, etc.
Number, for visualizing a single stat. For example: loyalty points, household size, total purchases, etc.
Custom segment metrics tasks
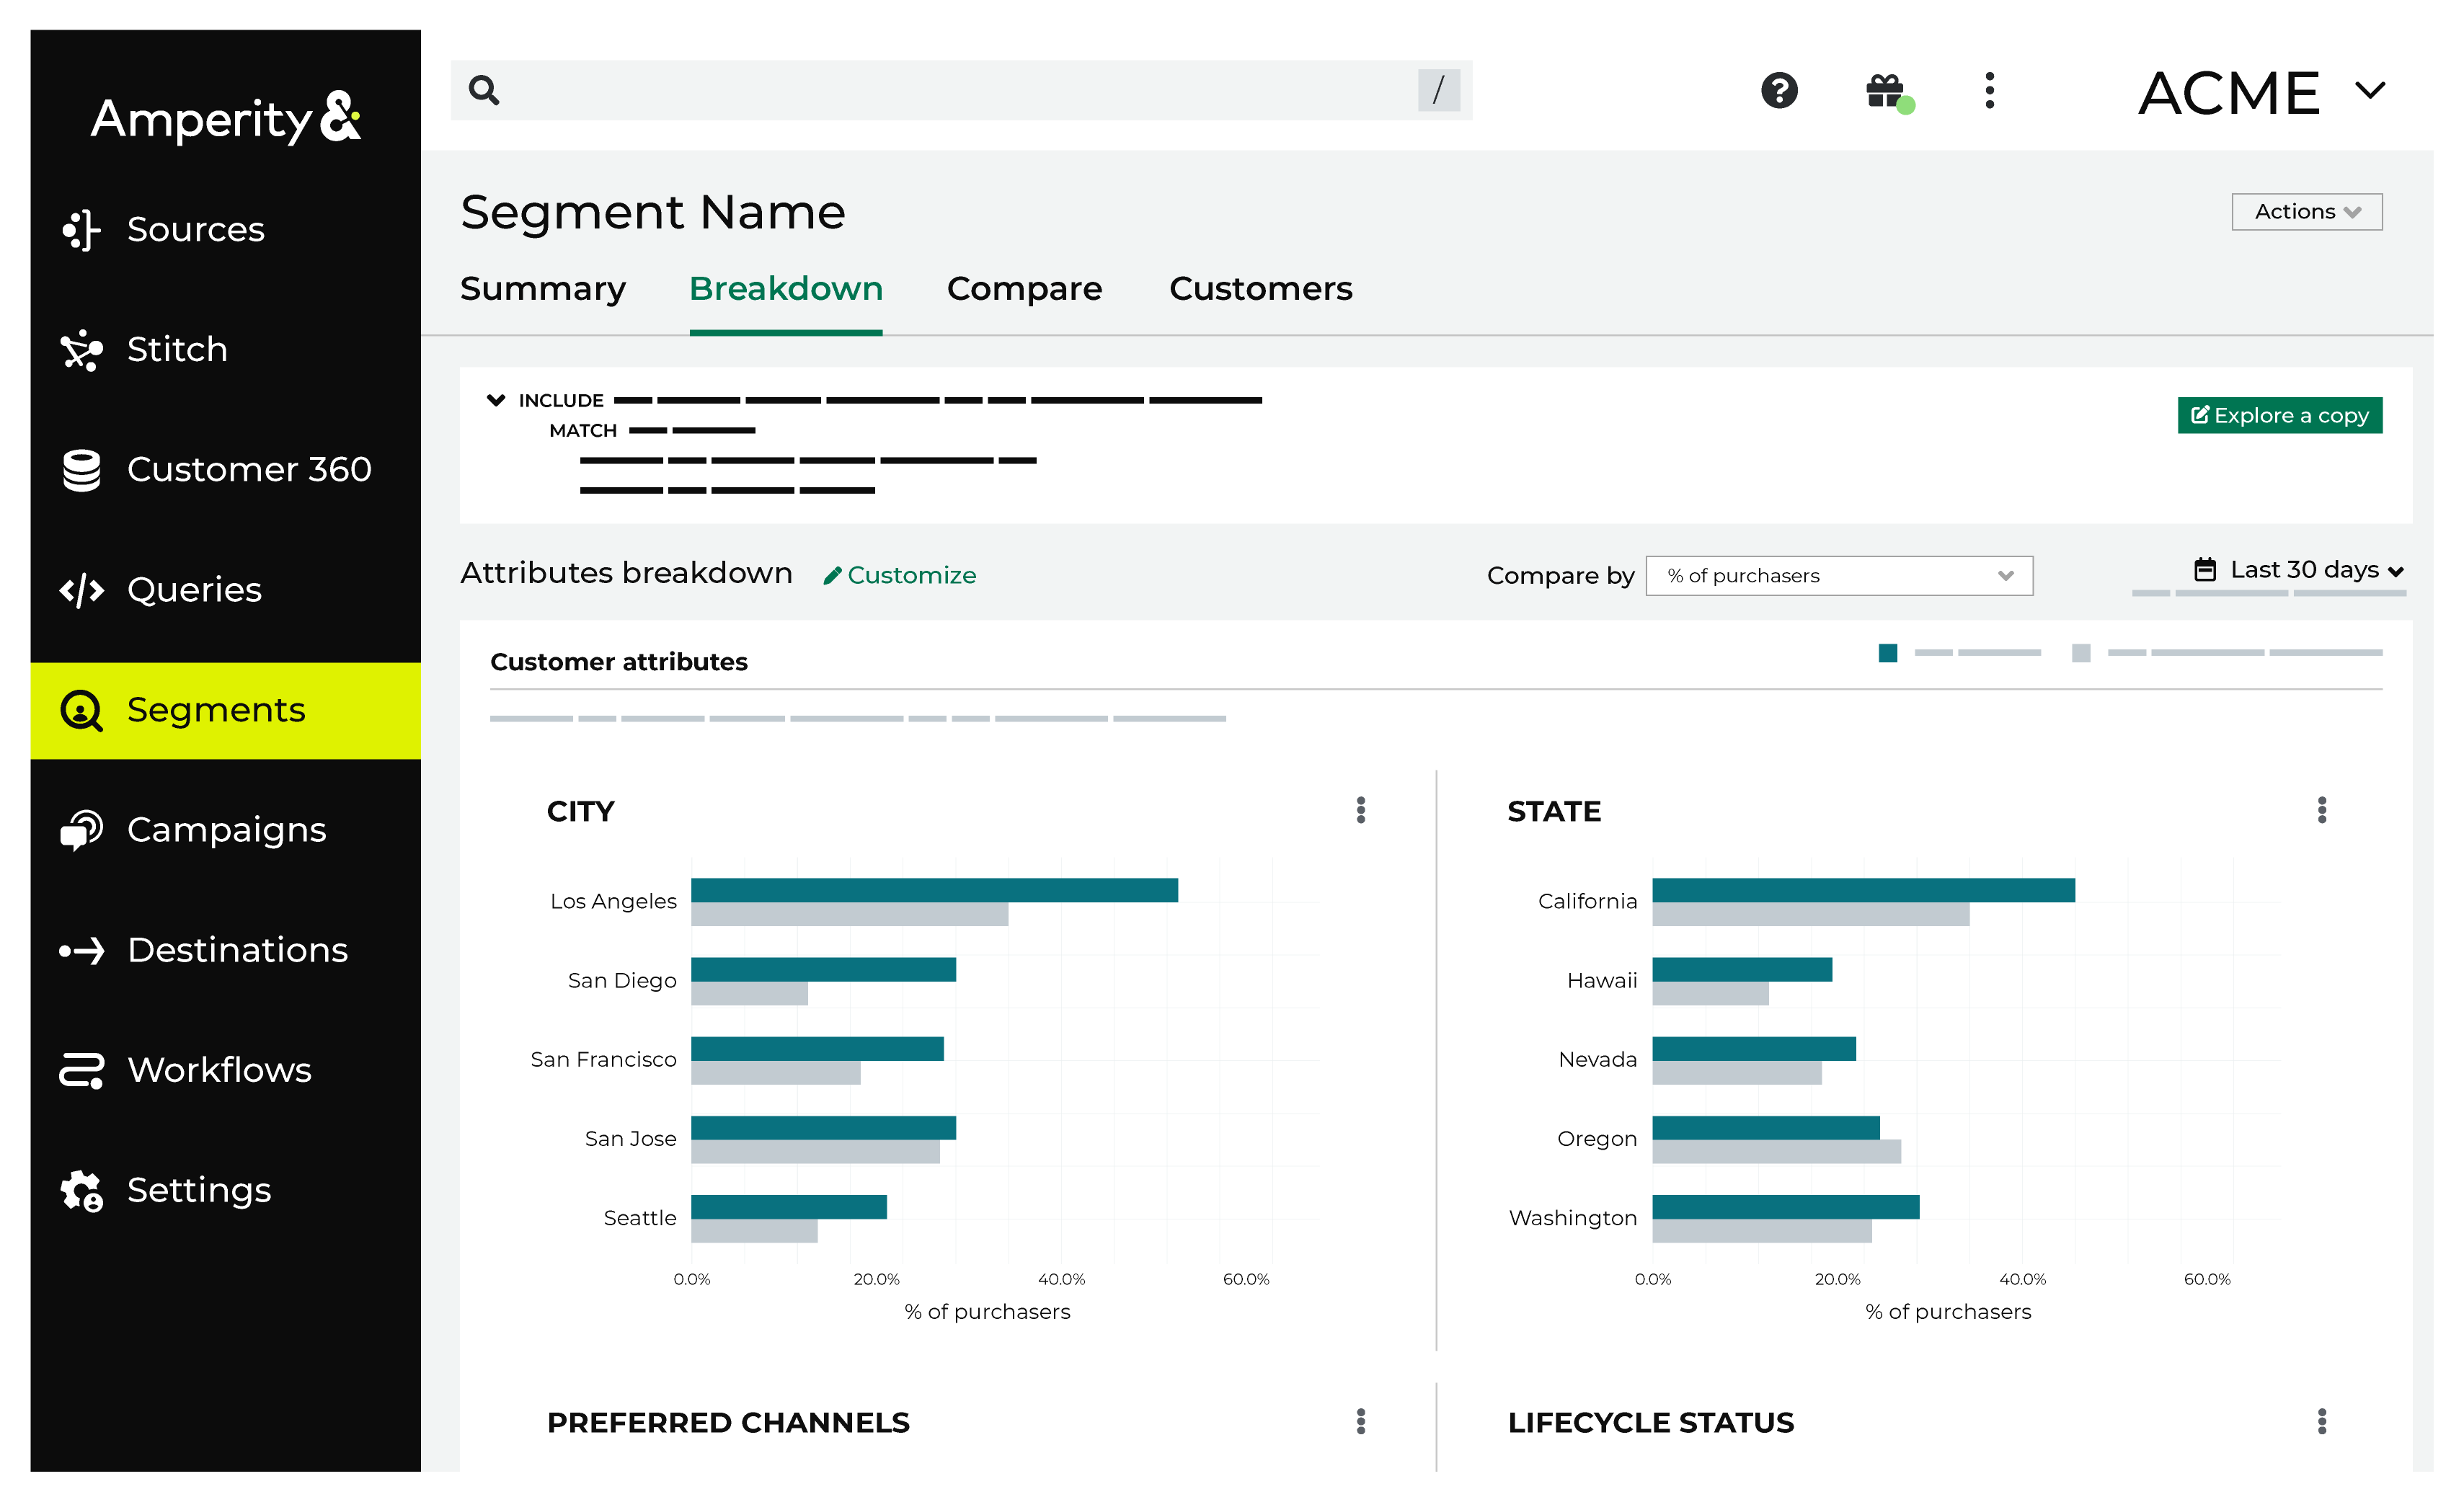
Breakdown tab
The Breakdown tab has insight charts for customer behaviors and customer attributes. You can ask questions to analyze customer demographics and identify target market segments:
What is the distribution of customers across categories?
What are potential customer groups for my marketing efforts?
These charts have a configurable date range and the displayed attributes charts are customizable. To customize the breakdown charts displayed on the Breakdown tab, click the Customize link, select up to six charts on the Customize Breakdown Charts window, and then click Apply.
Note
Compare by % of Purchasers, % of Revenue, or Revenue/Purchaser in the breakdown charts by selecting one of these options from the Compare by dropdown menu.
Tip
You can expand a breakdown chart by clicking the icon and then clicking Expand.
Breakdown tab tasks
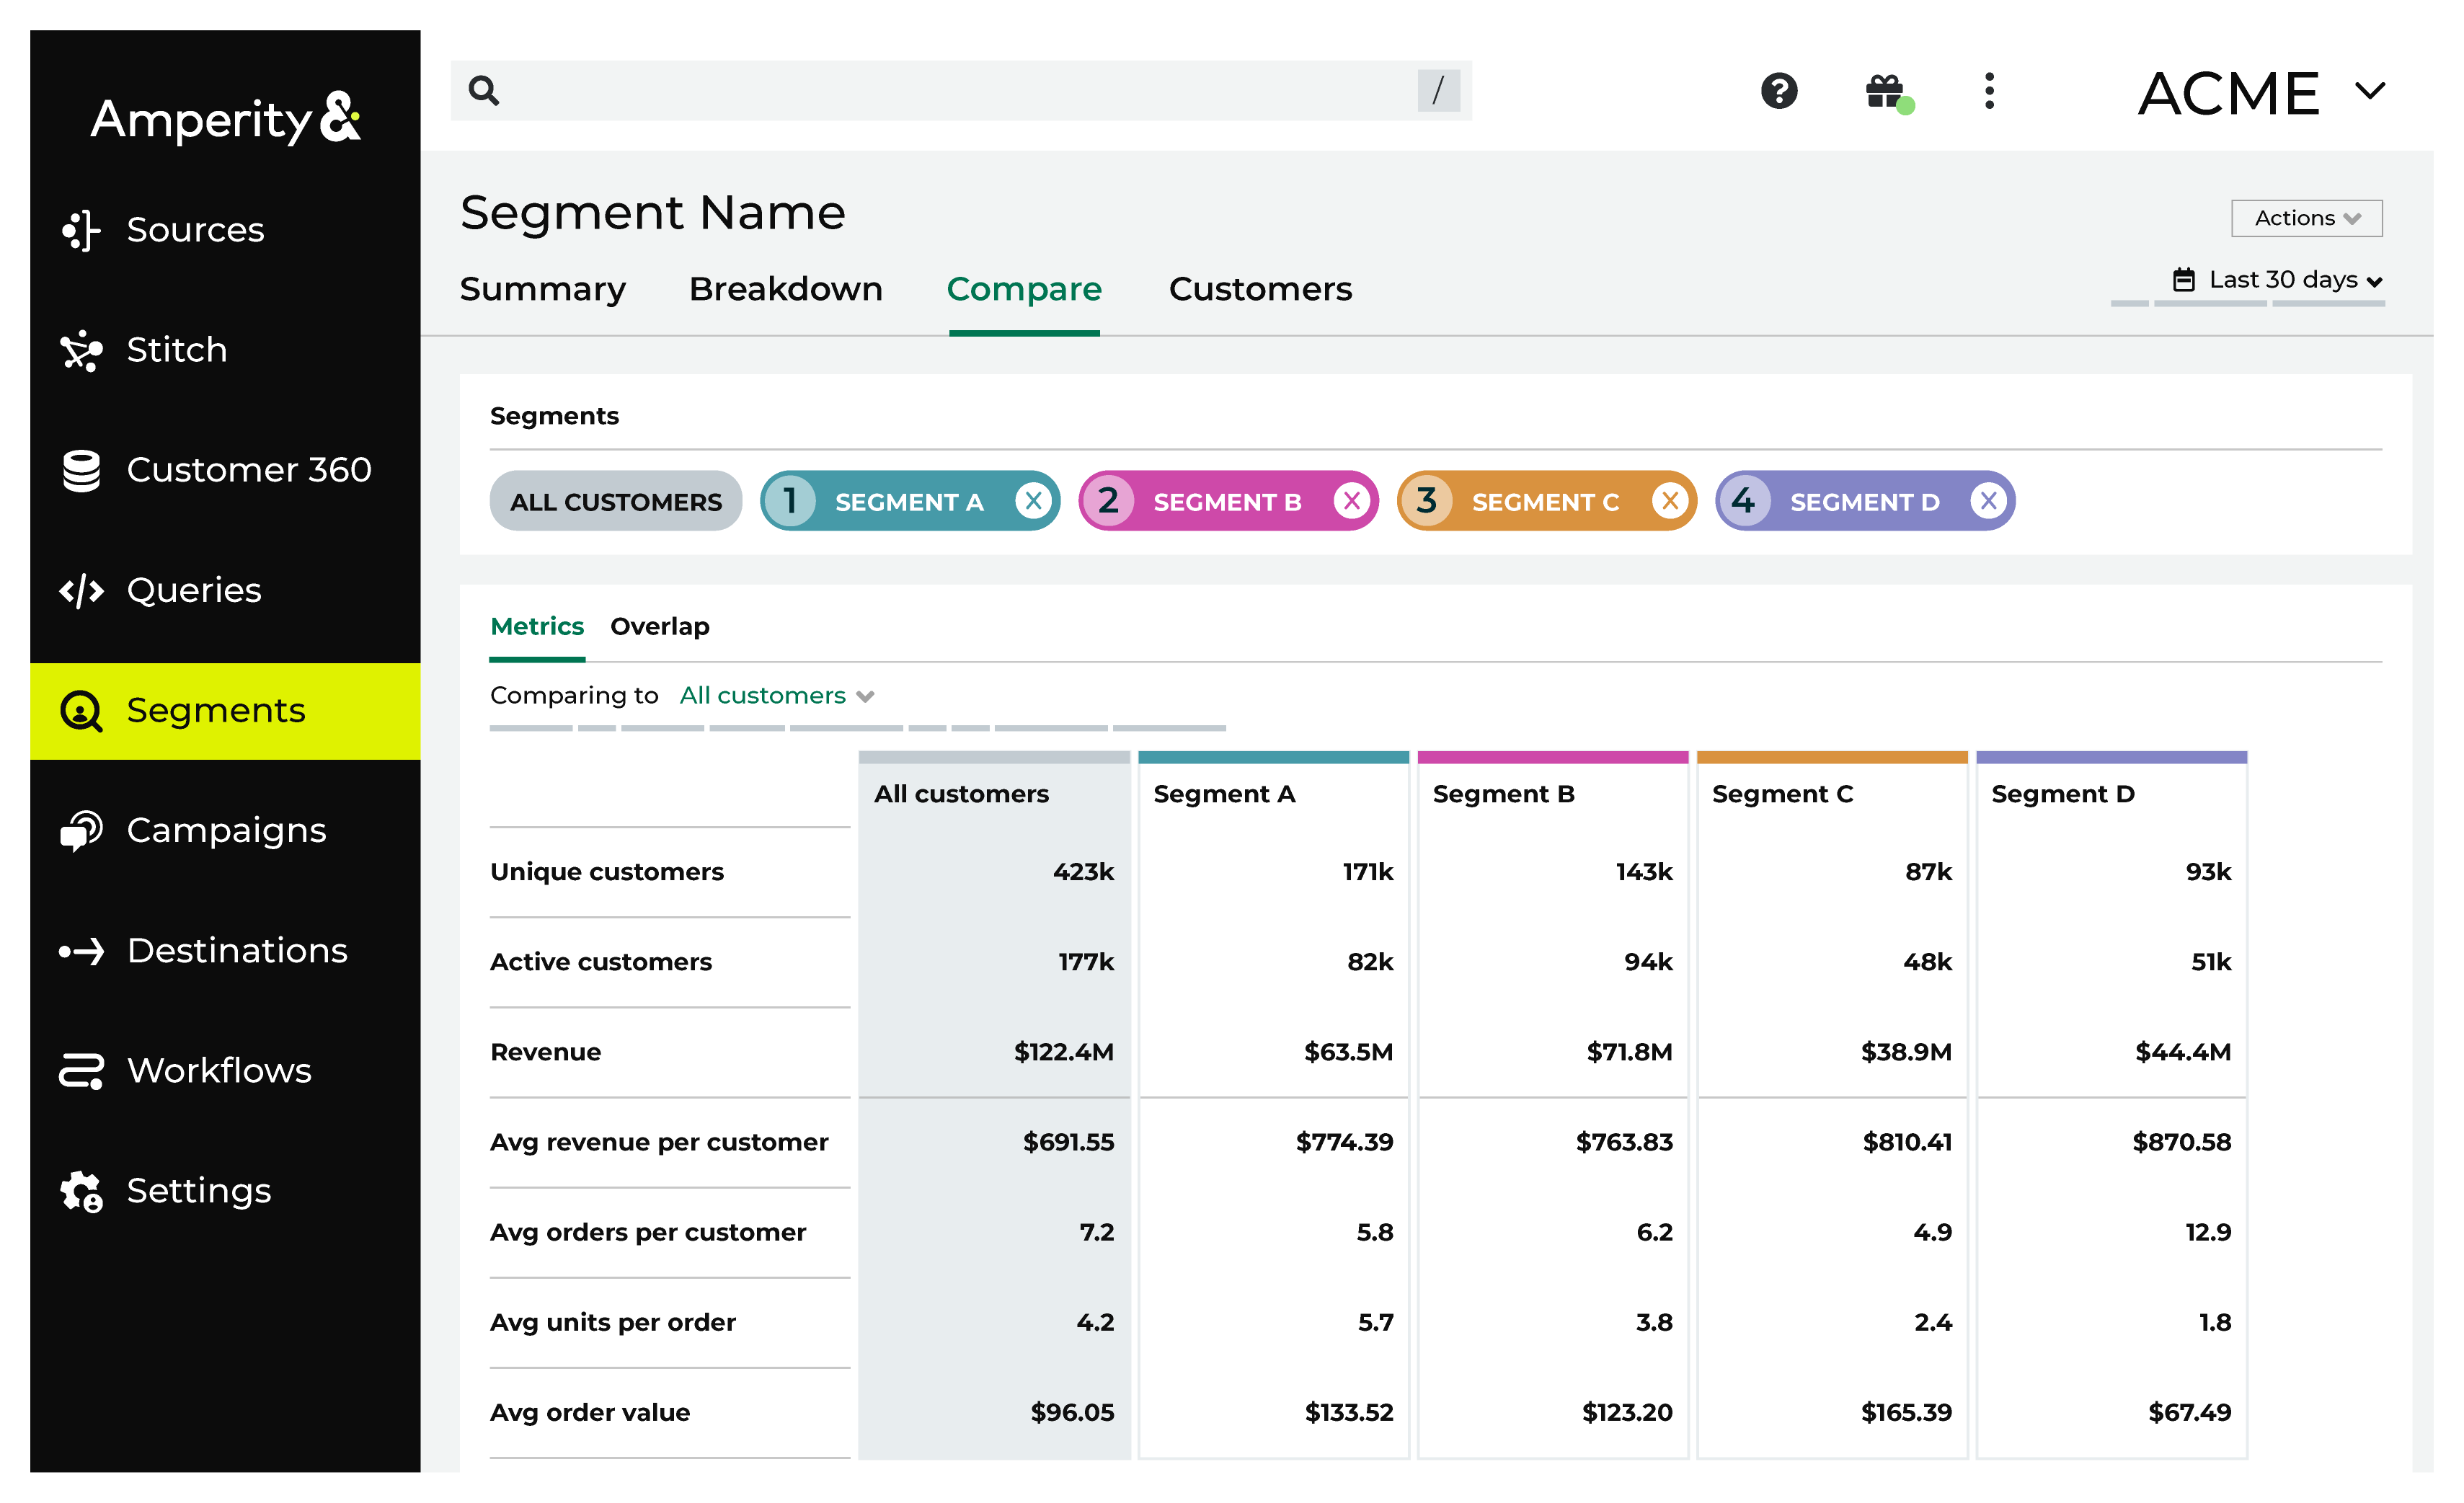
Compare tab
The Compare tab shows how two or more segment statistics compare. You can ask questions that compare key metrics and identify shared audiences to identify new opportunities to reach customers.
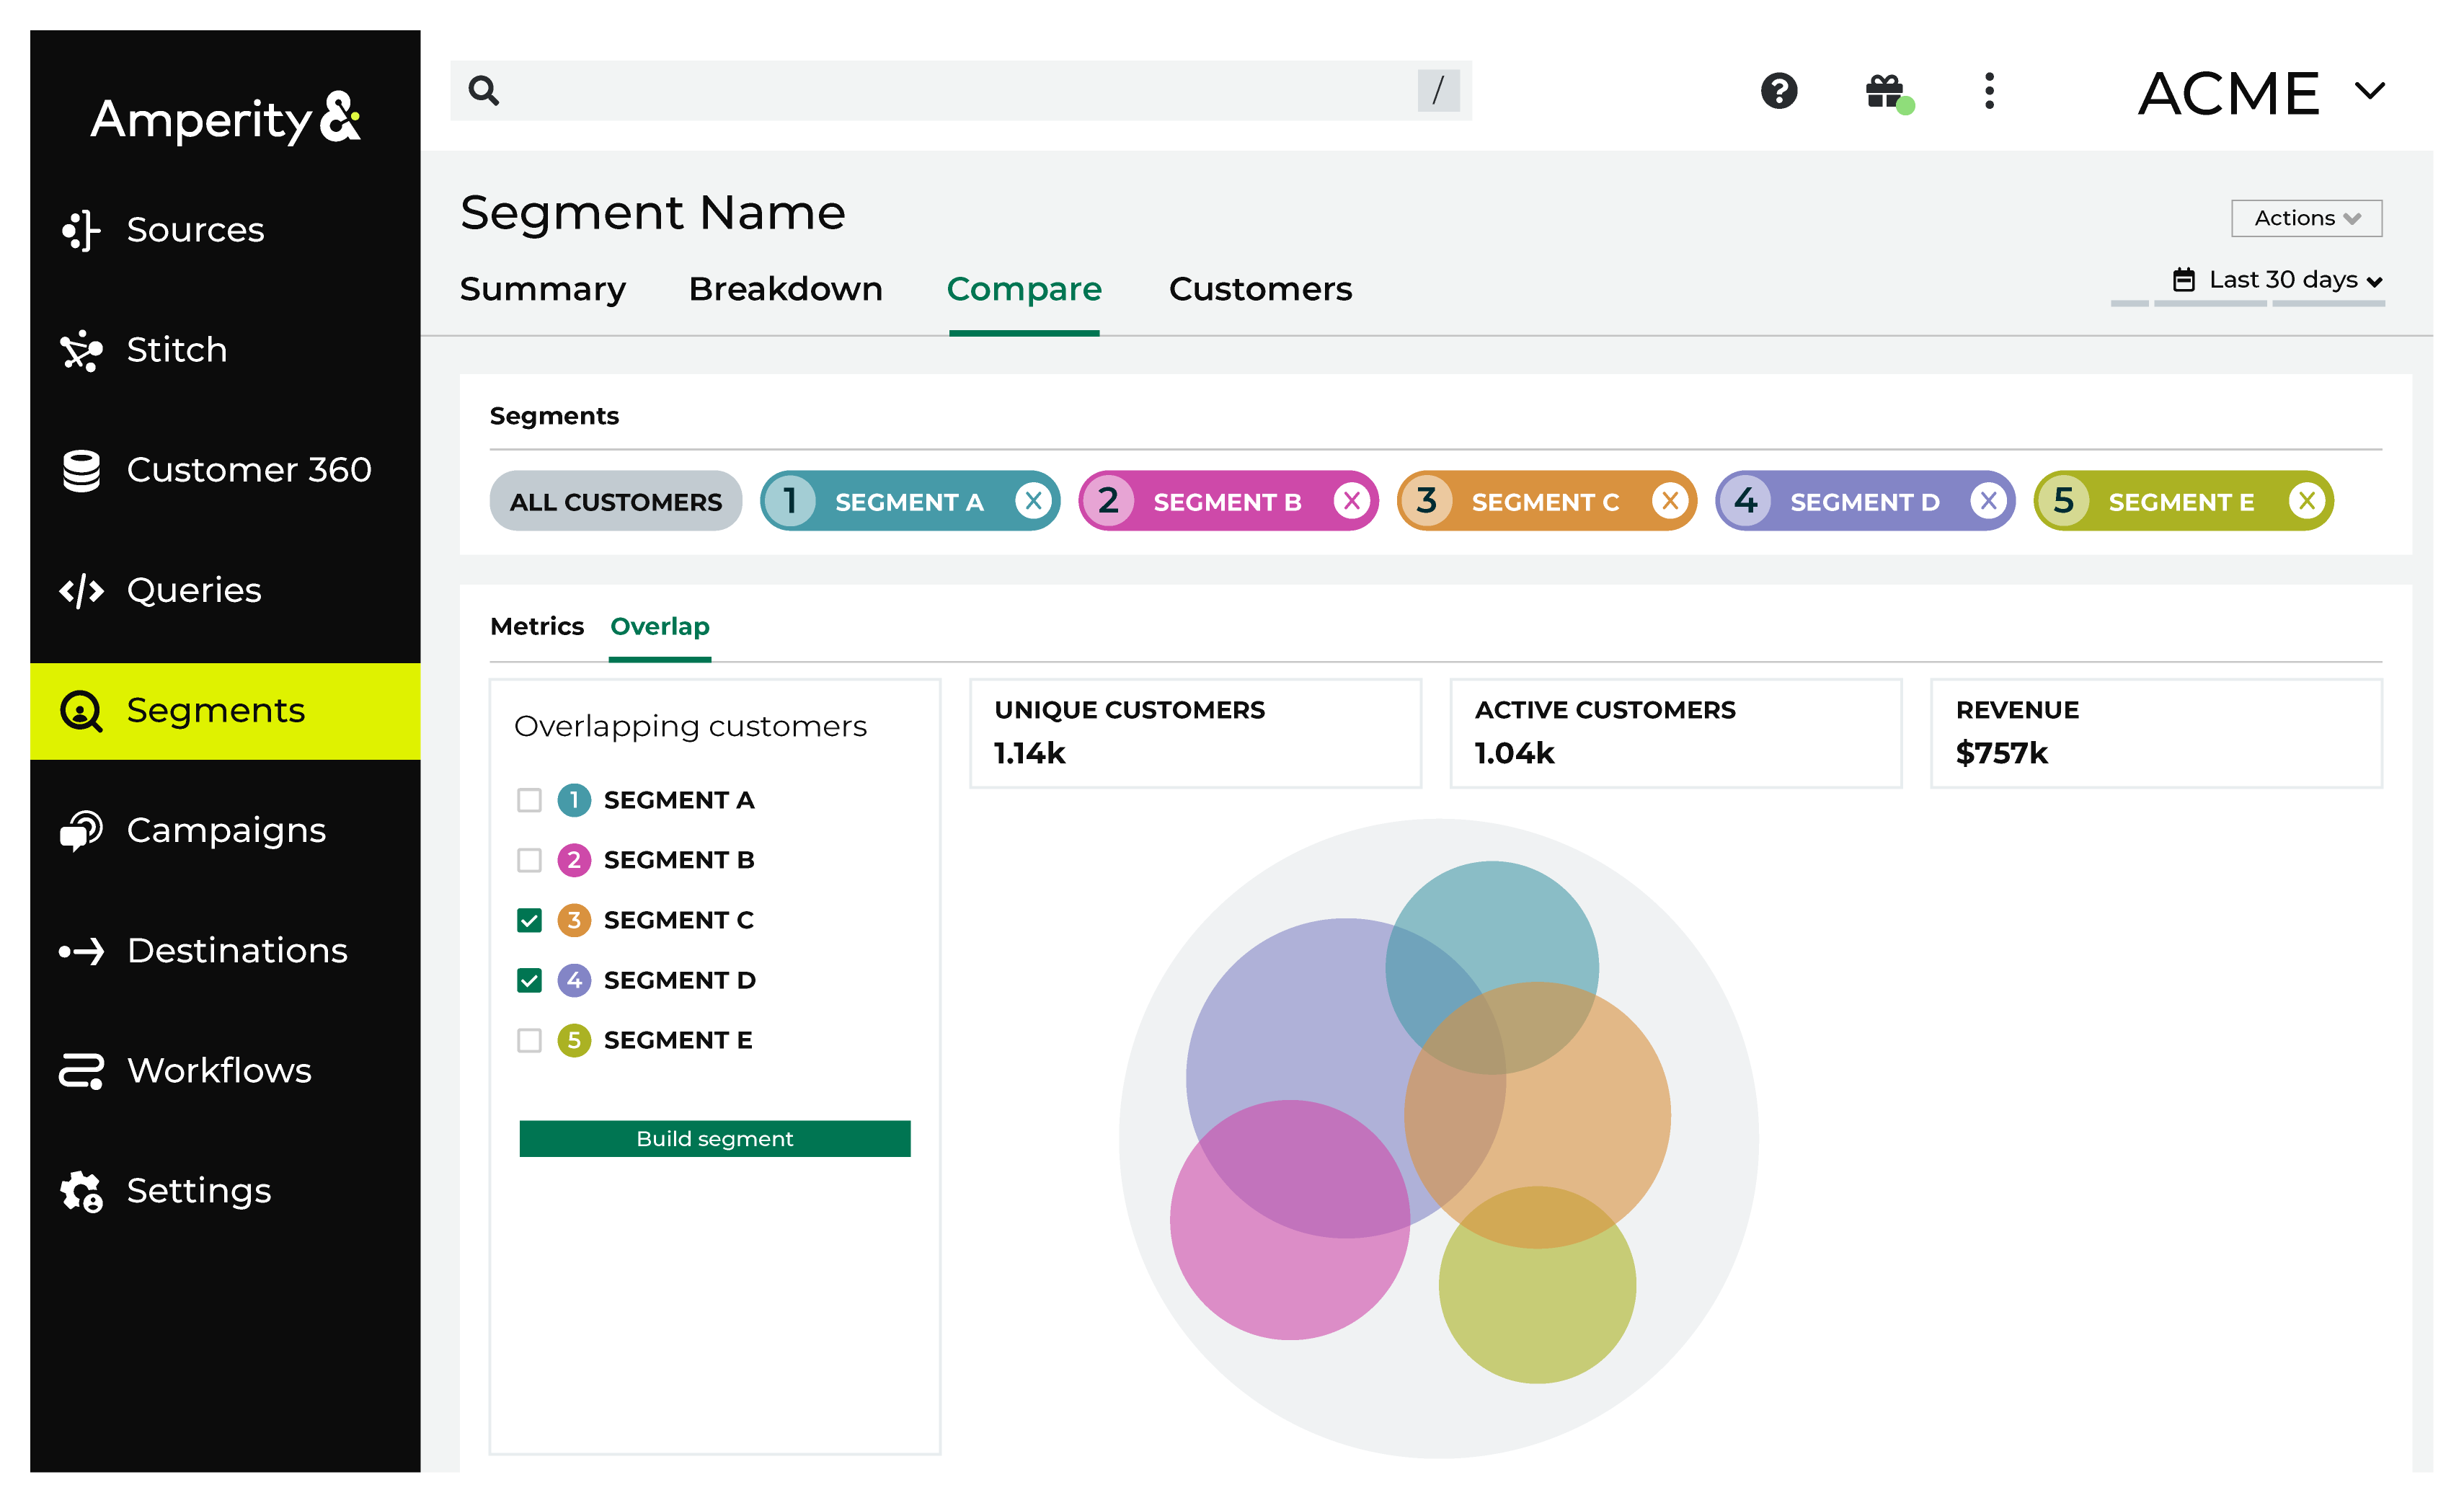
What is the overlap if I compare many segments?
How do metrics like active customers, revenue, average revenue per customer, average units per order, and average order value compare across segments?
Note
Up to five total segments can be compared together.
You can identify overlapping customer groups by visually comparing up to five segments.
Compare tab tasks
Customers tab
The Customers tab shows the all data for all of the customers in this segment as a series of columns pulled from various tables in your Customer 360 database. You can download a csv file containing detailed information about each individual customer within the selected segment. This comprehensive dataset includes information such as:
Basic information like a customers email, address, and phone number.
Depending on your company’s PII restrictions, age group and birthday.
Other categories that are identified in your Customer 360 table.
Tip
You can customize the columns to display to only focus on certain attributes. You can also download the segment as a CSV file.

Compare tab tasks
How-tos
Tasks related to building segments in Amperity: