Pull from Salesforce Marketing Cloud
Salesforce Marketing Cloud is a provider of digital marketing automation and analytics software and services.
The steps that are required to pull email campaigns data to Amperity from Salesforce Marketing Cloud:
Get details
Salesforce Marketing Cloud requires the following configuration details:
The username.
The passphrase.
The optional host public key for SSH host validation.
The hostname.
The location must contain the list of files by filename and file type to be pulled to Amperity. For example: “accounts.csv”, “customers.csv”, and “email-list.csv”. A sample of each file is used during feed creation.
This location is also referred to as the “Export” folder from the perspective of Salesforce Marketing Cloud.
A sample for each file to simplify feed creation.
Review the Marketing Cloud SFTP Guide to answer questions about configuring and managing Salesforce Marketing Cloud.
The name of the directory within the Salesforce Marketing Cloud SFTP server from which data should is pulled. Use the Import Location field to define a non-default directory.
Subscriber key
The subscriber key is an identifier in Salesforce Marketing Cloud. When a subscriber key is provided to Amperity for a workflow that sends data back to Salesforce Marketing Cloud, you should configure this workflow to carry the subscriber key through to the customer 360 database so that it may be included in the query that defines the results to be sent.
Use a customer key semantic tag for the subscriber key field when configuring the feed, and then ensure this field is available to the Customer 360, Queries, and Segments pages. Map this field to the Salesforce Marketing Cloud subscriber_key using a data template.
Add data source and feed
Add a data source that pulls data from Salesforce Marketing Cloud.
Configure Amperity to pull one or more files, and then for each file review the settings, define the schema, activate the courier, and then run a manual workflow. Review the data that is added to the domain table.
To add a data source for any SFTP site

|
Open the Sources page to configure Salesforce Marketing Cloud. Click the Add courier button to open the Add courier dialog box. Select Salesforce Marketing Cloud. Do one of the following:
|

|
Credentials allow Amperity to connect to Salesforce Marketing Cloud and must exist before a courier can be configured to pull data from Salesforce Marketing Cloud. Select an existing credential from the Credential dropdown, and then click Continue. Tip A courier that has credentials that are configured correctly shows a “Connection successful” status, similar to: 
|

|
Select the file that is pulled to Amperity, either by browsing into storage and selecting it or by providing a filename pattern. 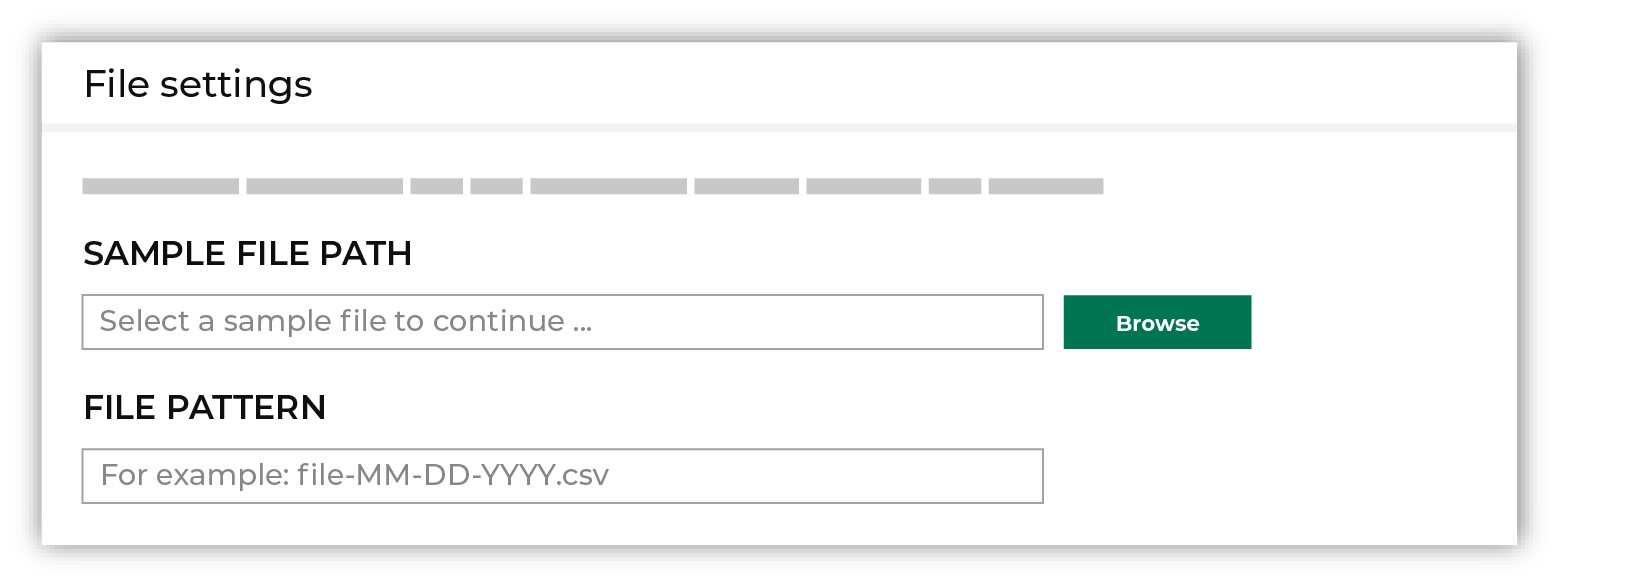
Click Browse to open the File browser. Select the file that is pulled to Amperity, and then click Accept. Use a filename pattern to define files that will be loaded on a recurring basis, but have small changes to the filename over time, such as having a datestamp appended to the filename. Note For a new data source, this file is also used as the sample file that is used to define the schema. For an existing data source, this file must match the schema that has already been defined. 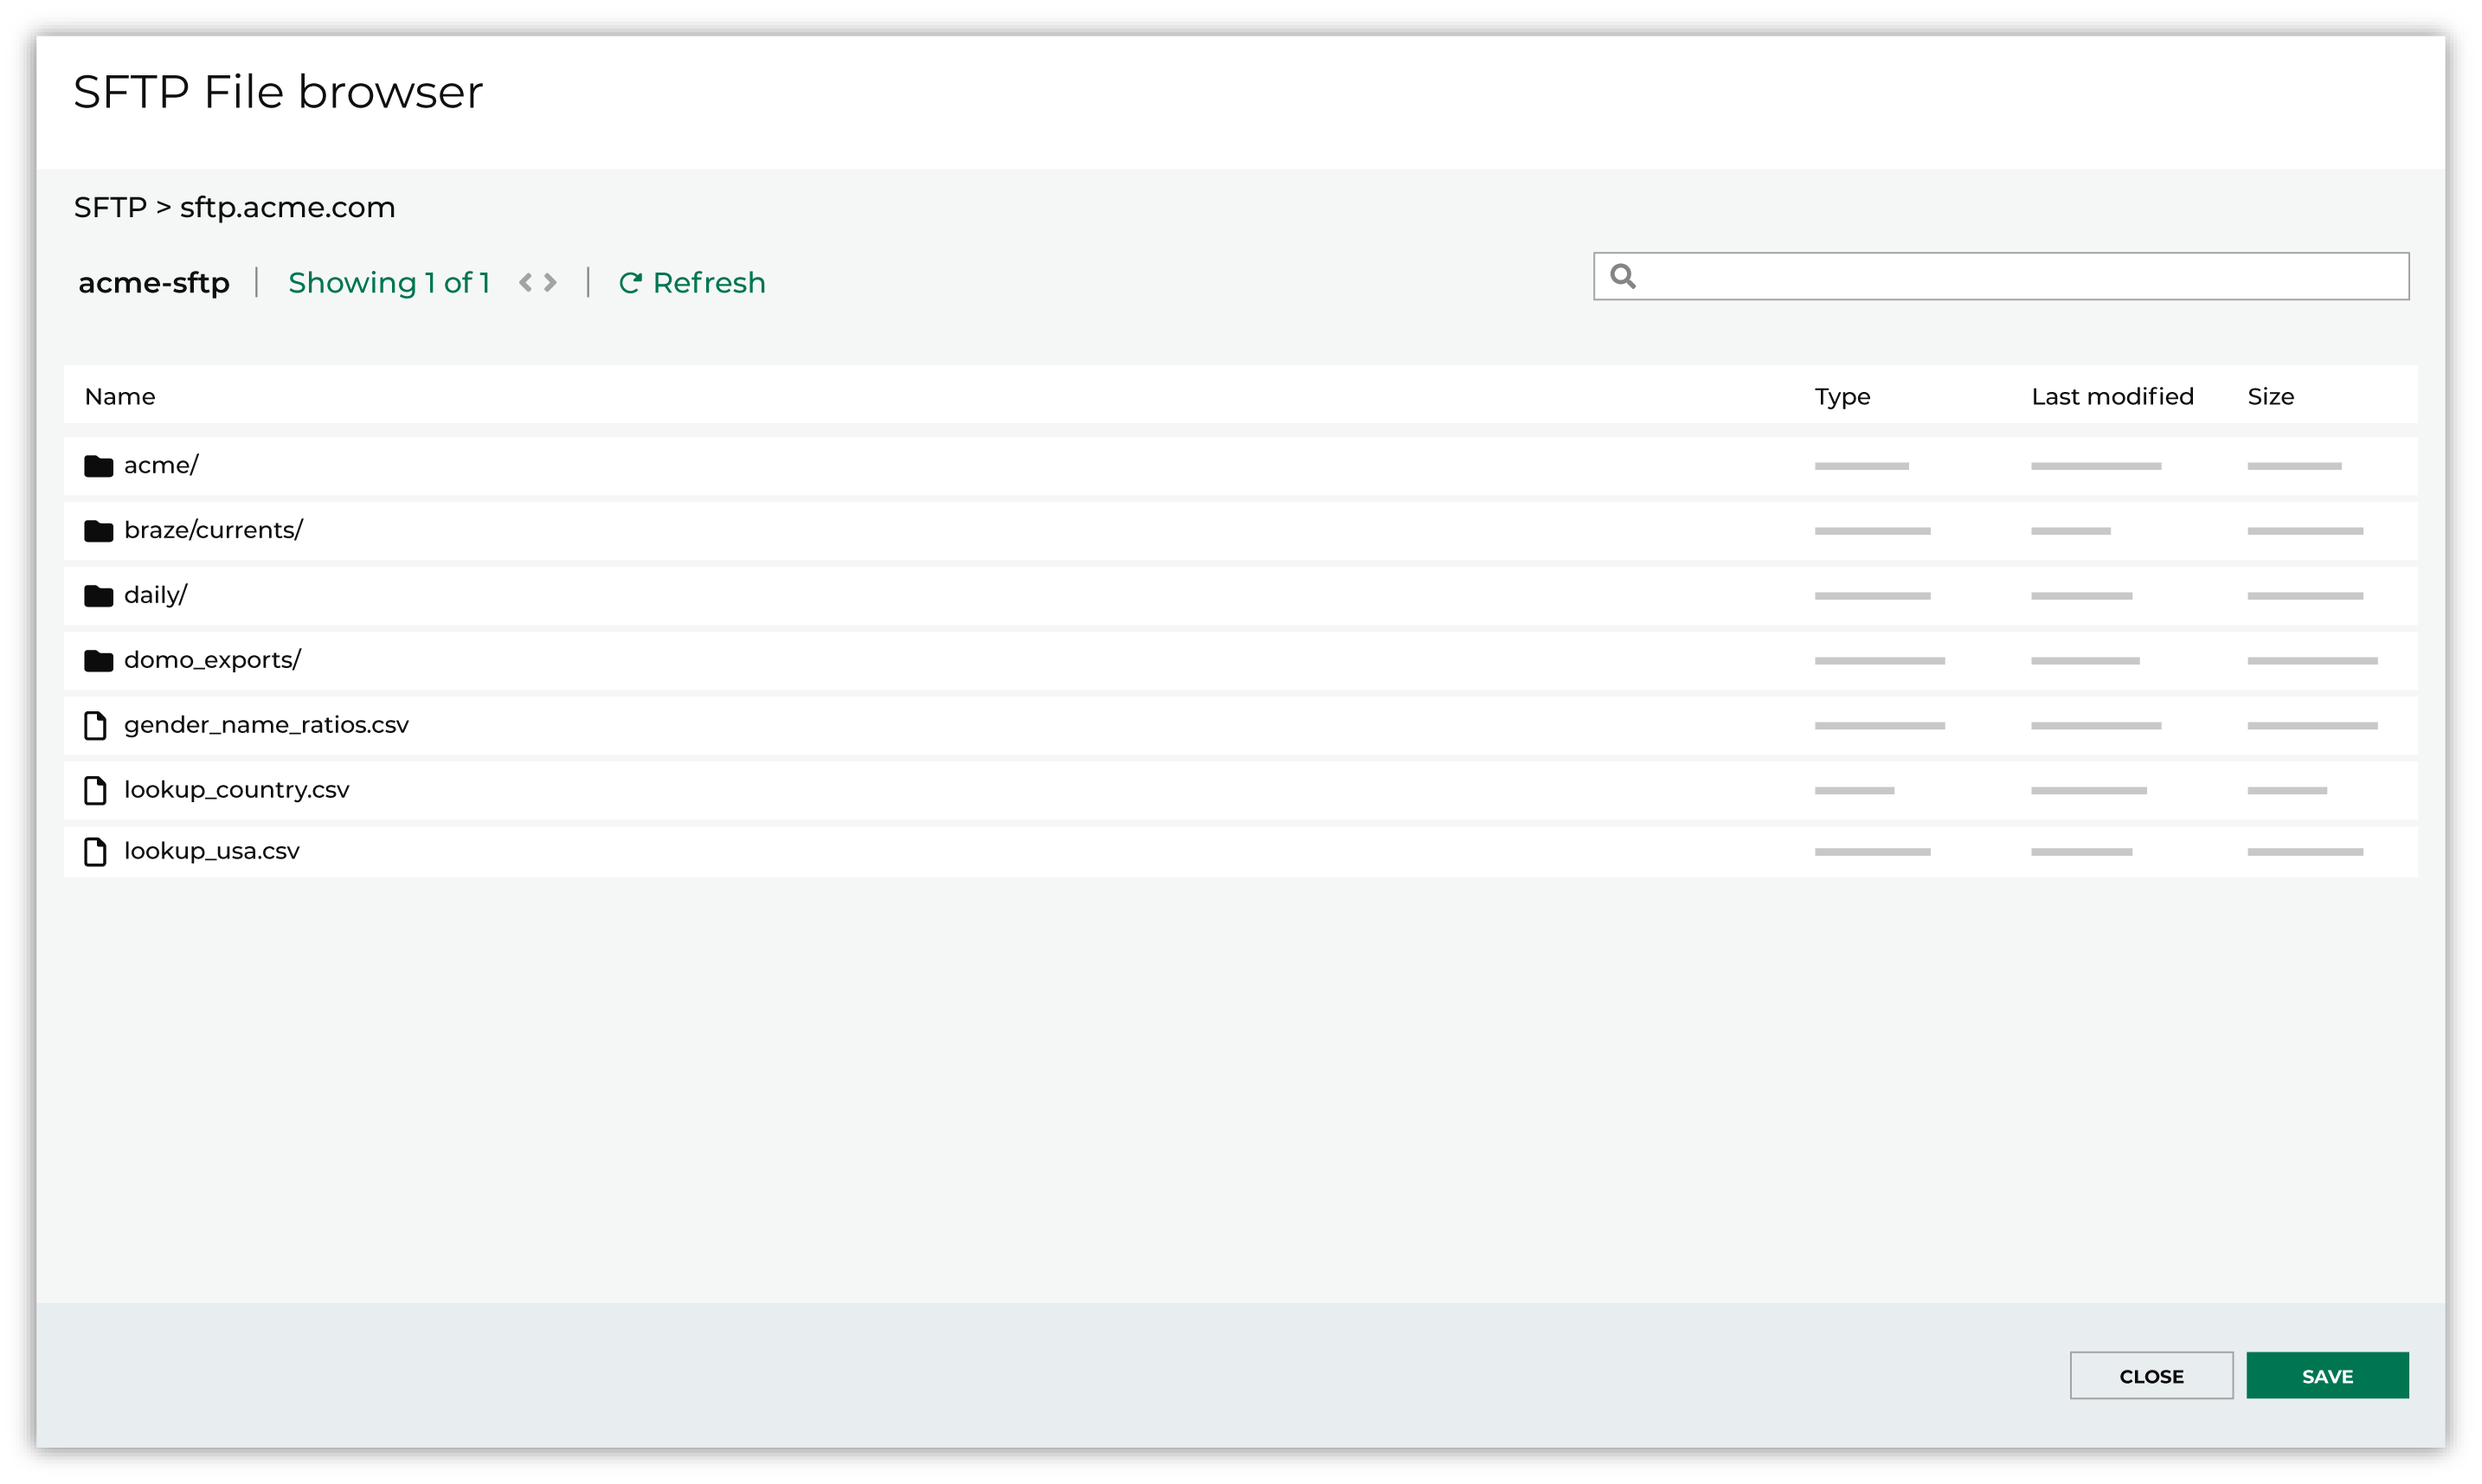
Use the PGP credential setting to specify the credentials to use for an encrypted file. 
|

|
Review the file. 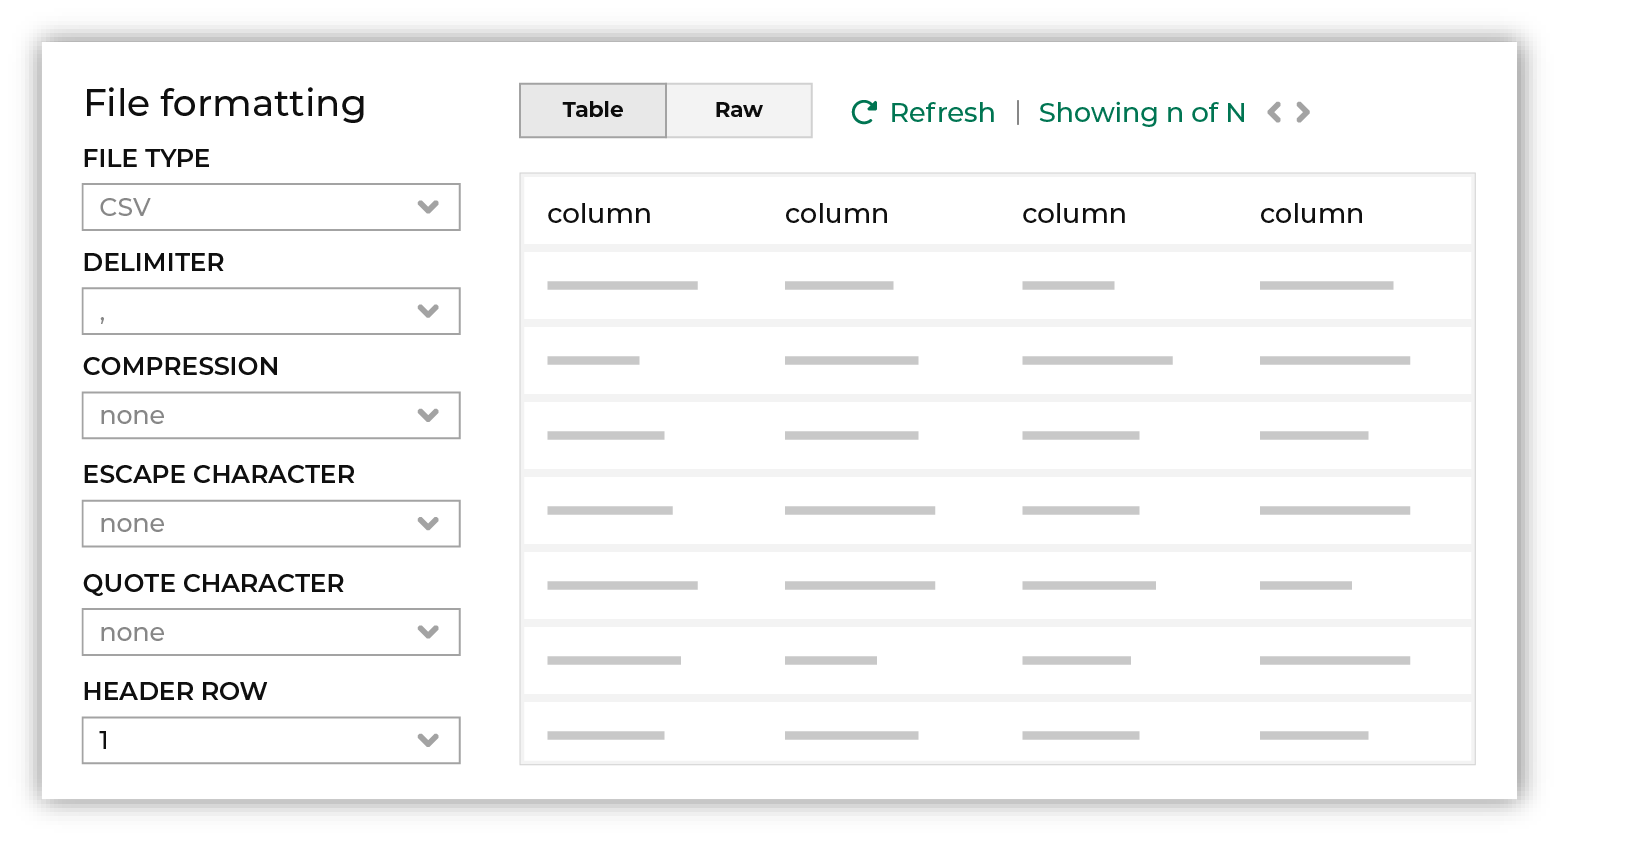
The contents of the file may be viewed as a table and in the raw format. Switch between these views using the Table and Raw buttons, and then click Refresh to view the file in that format. Note PGP encrypted files can be previewed. Apache Parquet PGP encrypted files must be less than 500 MB to be previewed. Amperity will infer formatting details, and then add these details to a series of settings located along the left side of the file view. File settings include:
Review the file, and then update these settings, if necessary. |

|
Each file that is loaded to Amperity must have a defined schema, after which the data in the file is loaded into a domain table ready for use with workflows within Amperity. New feed To use a new data source, choose the Create new feed option, select an existing source from the Source dropdown or type the name of a new data source, and then enter the name of the feed. 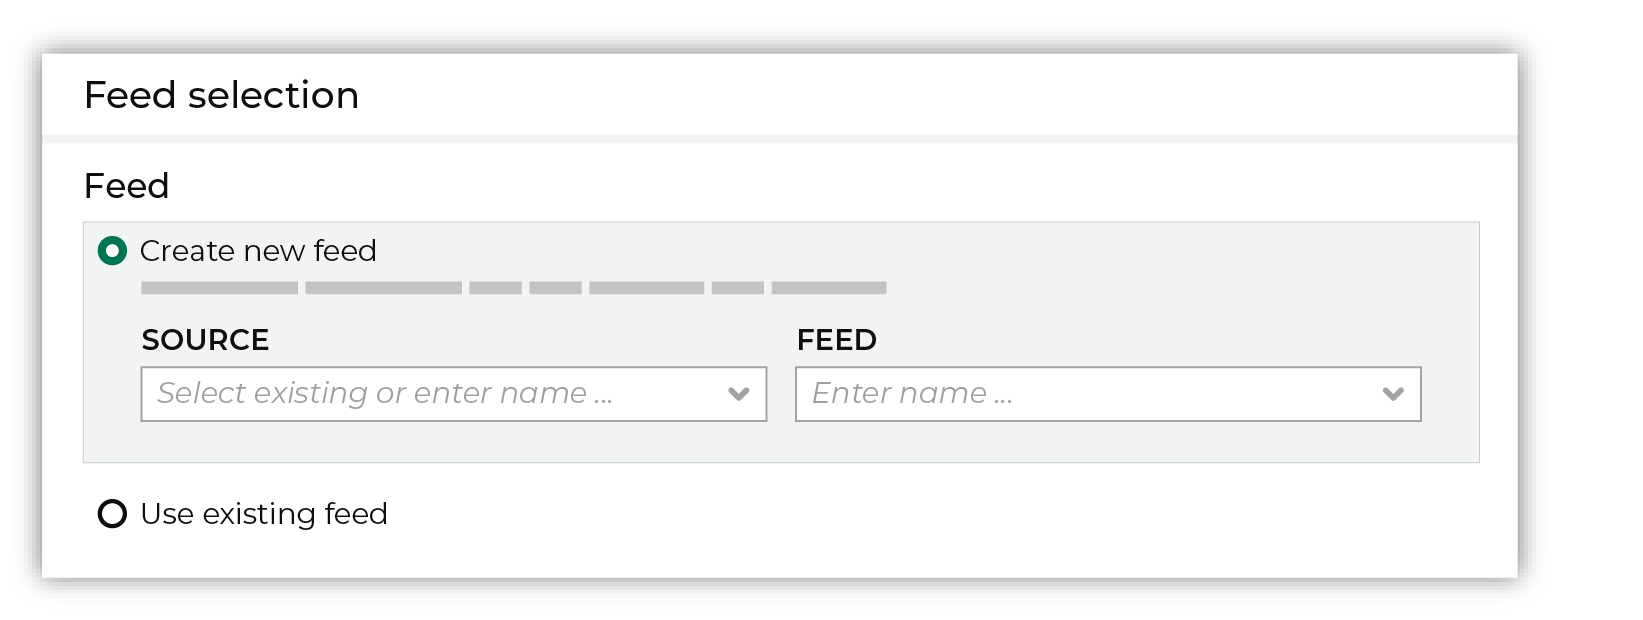
After you choose a load type and save the courier configuration, you will configure the feed using the data within the sample file. Existing feed To use an existing feed, choose the Use existing feed option to use an existing schema. 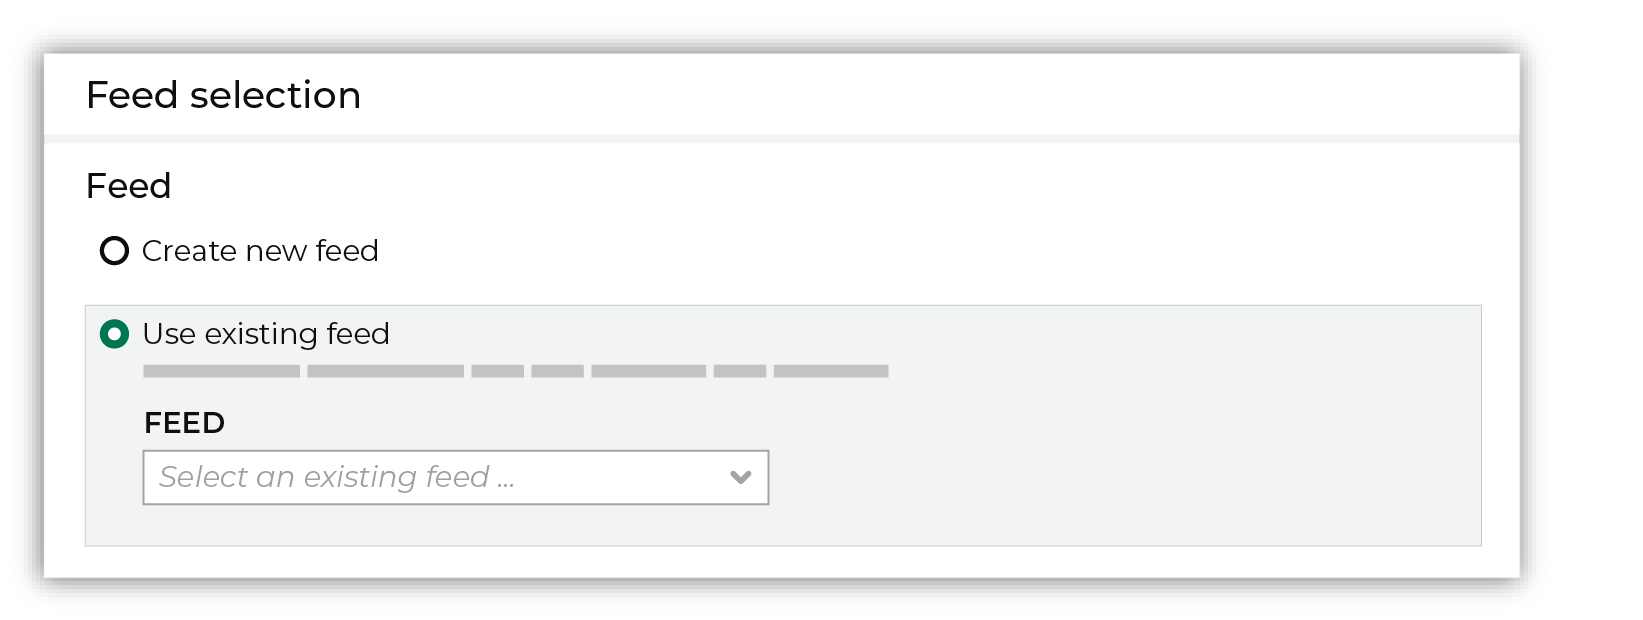
This option requires this file to match all of the feed-specific settings, such as incoming field names, field types, and primary keys. The data within the file may be different Pull data Define how Amperity will pull data from Salesforce Marketing Cloud and how it is loaded to a domain table. 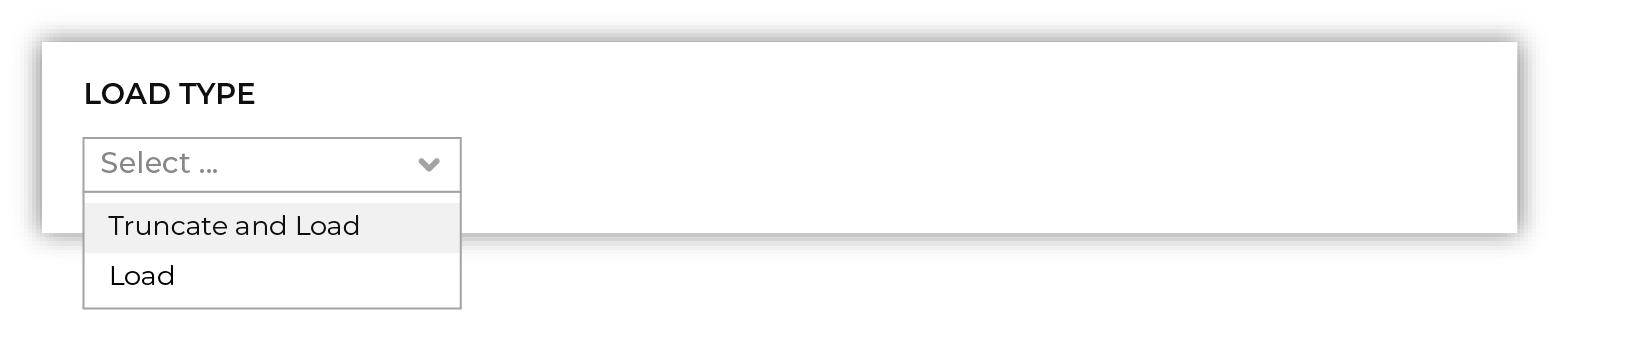
Use the Upsert option to use the selected file update existing records and insert records that do not exist. Use the Truncate and upsert option to delete all records in the existing table, and then insert records. Note When a file is loaded to a domain table using an existing file, the file that is loaded must have the same schema as the existing feed. The data in the file may be new. |

|
Use the feed editor to do all of the following:
When finished, click Activate. |

|
Find the courier related to the feed that was just activated, and then run it manually. On the Sources page, under Couriers, find the courier you want to run and then select Run from the actions menu. 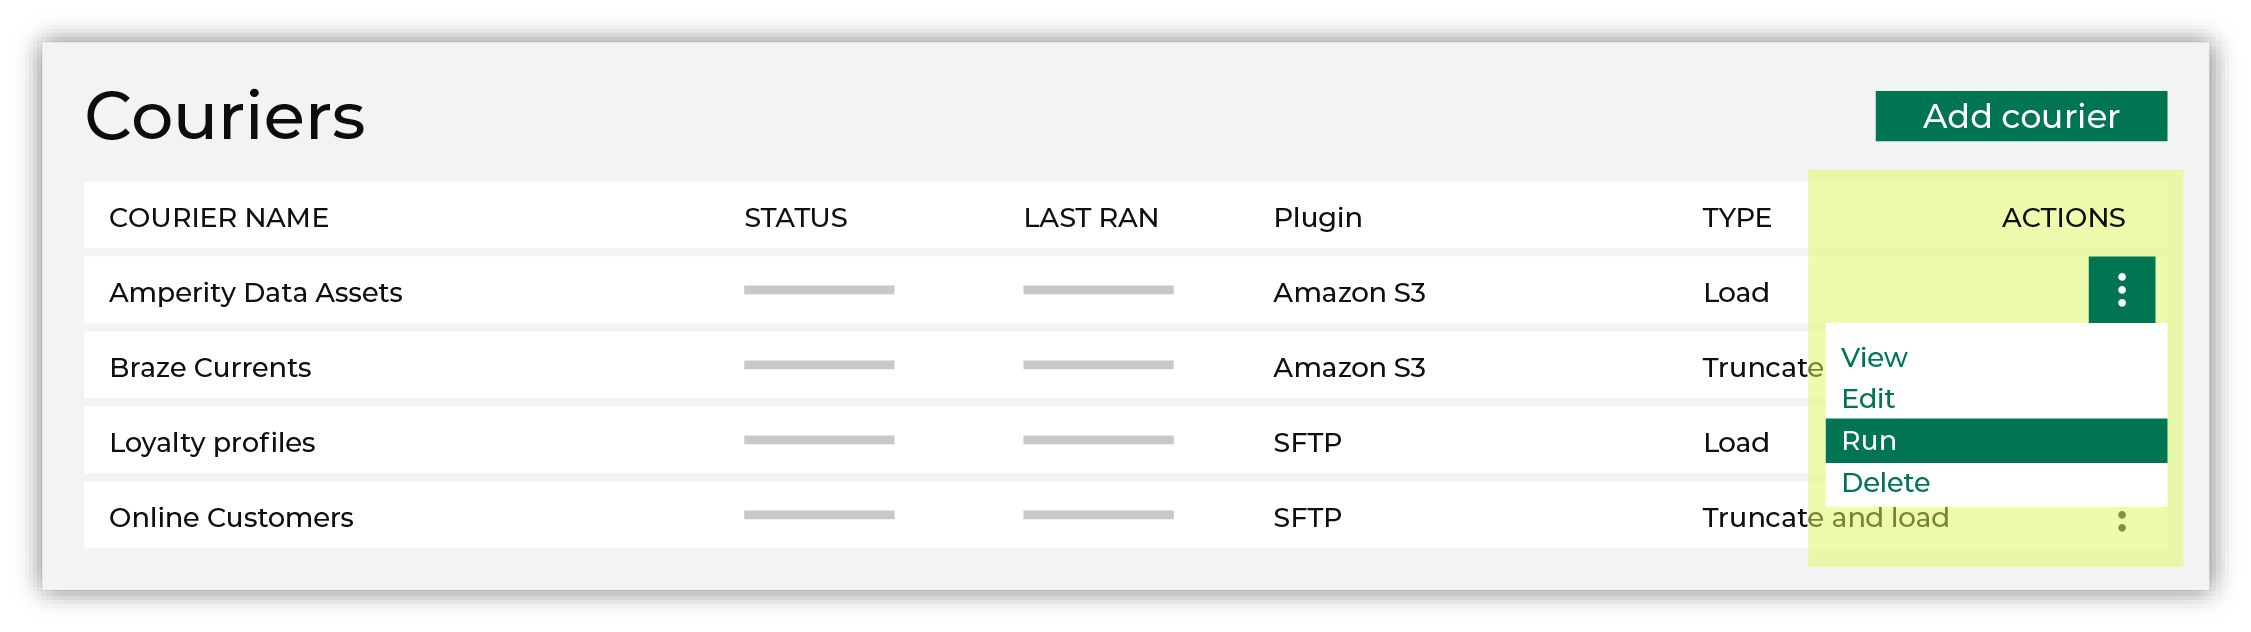
Select a date from the calendar picker that is before today, but after the date on which the file was added to the Salesforce Marketing Cloud file system. 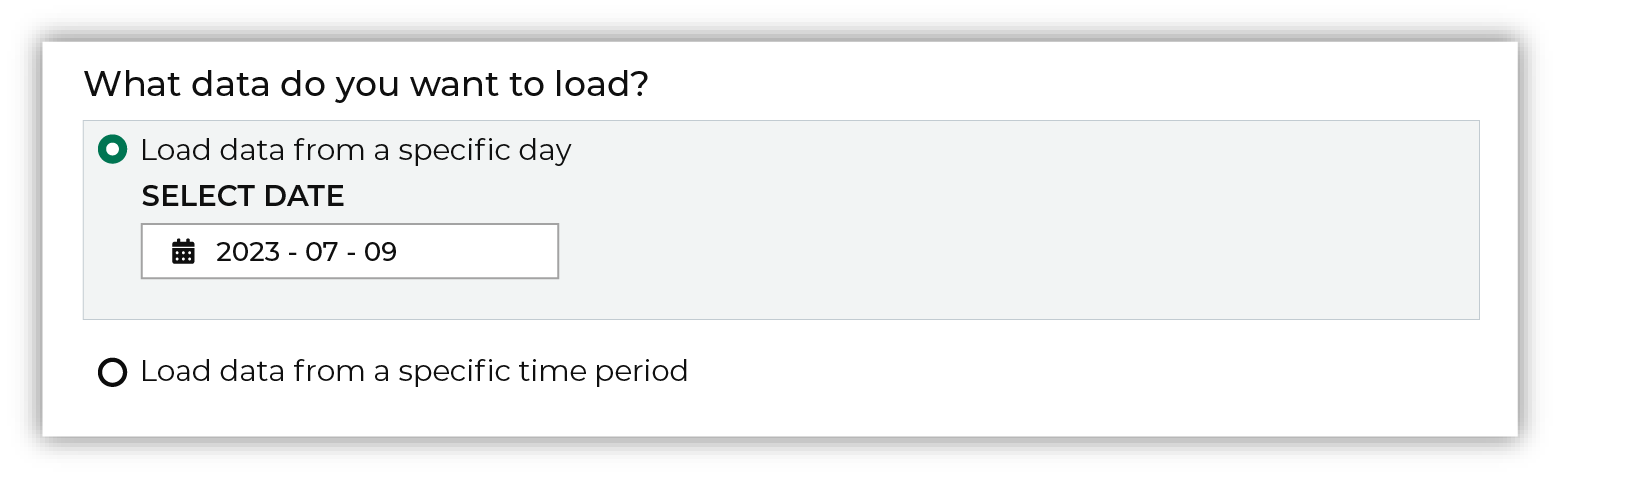
Leave the load options unselected, and then click Run. After the courier has run successfully, inspect the domain table that has the data that was loaded to Amperity. After you have verified that the data is correct, you may do any of the following:
|
Workflow actions
A workflow will occasionally show an error that describes what prevented a workflow from completing successfully. These first appear as alerts in the notifications pane. The alert describes the error, and then links to the Workflows tab.
Open the Workflows page to review a list of workflow actions, choose an action to resolve the workflow error, and then follow the steps that are shown.
|
|
You may receive a notifications error for a configured Salesforce Marketing Cloud data source. This appears as an alert in the notifications pane on the Destinations tab. 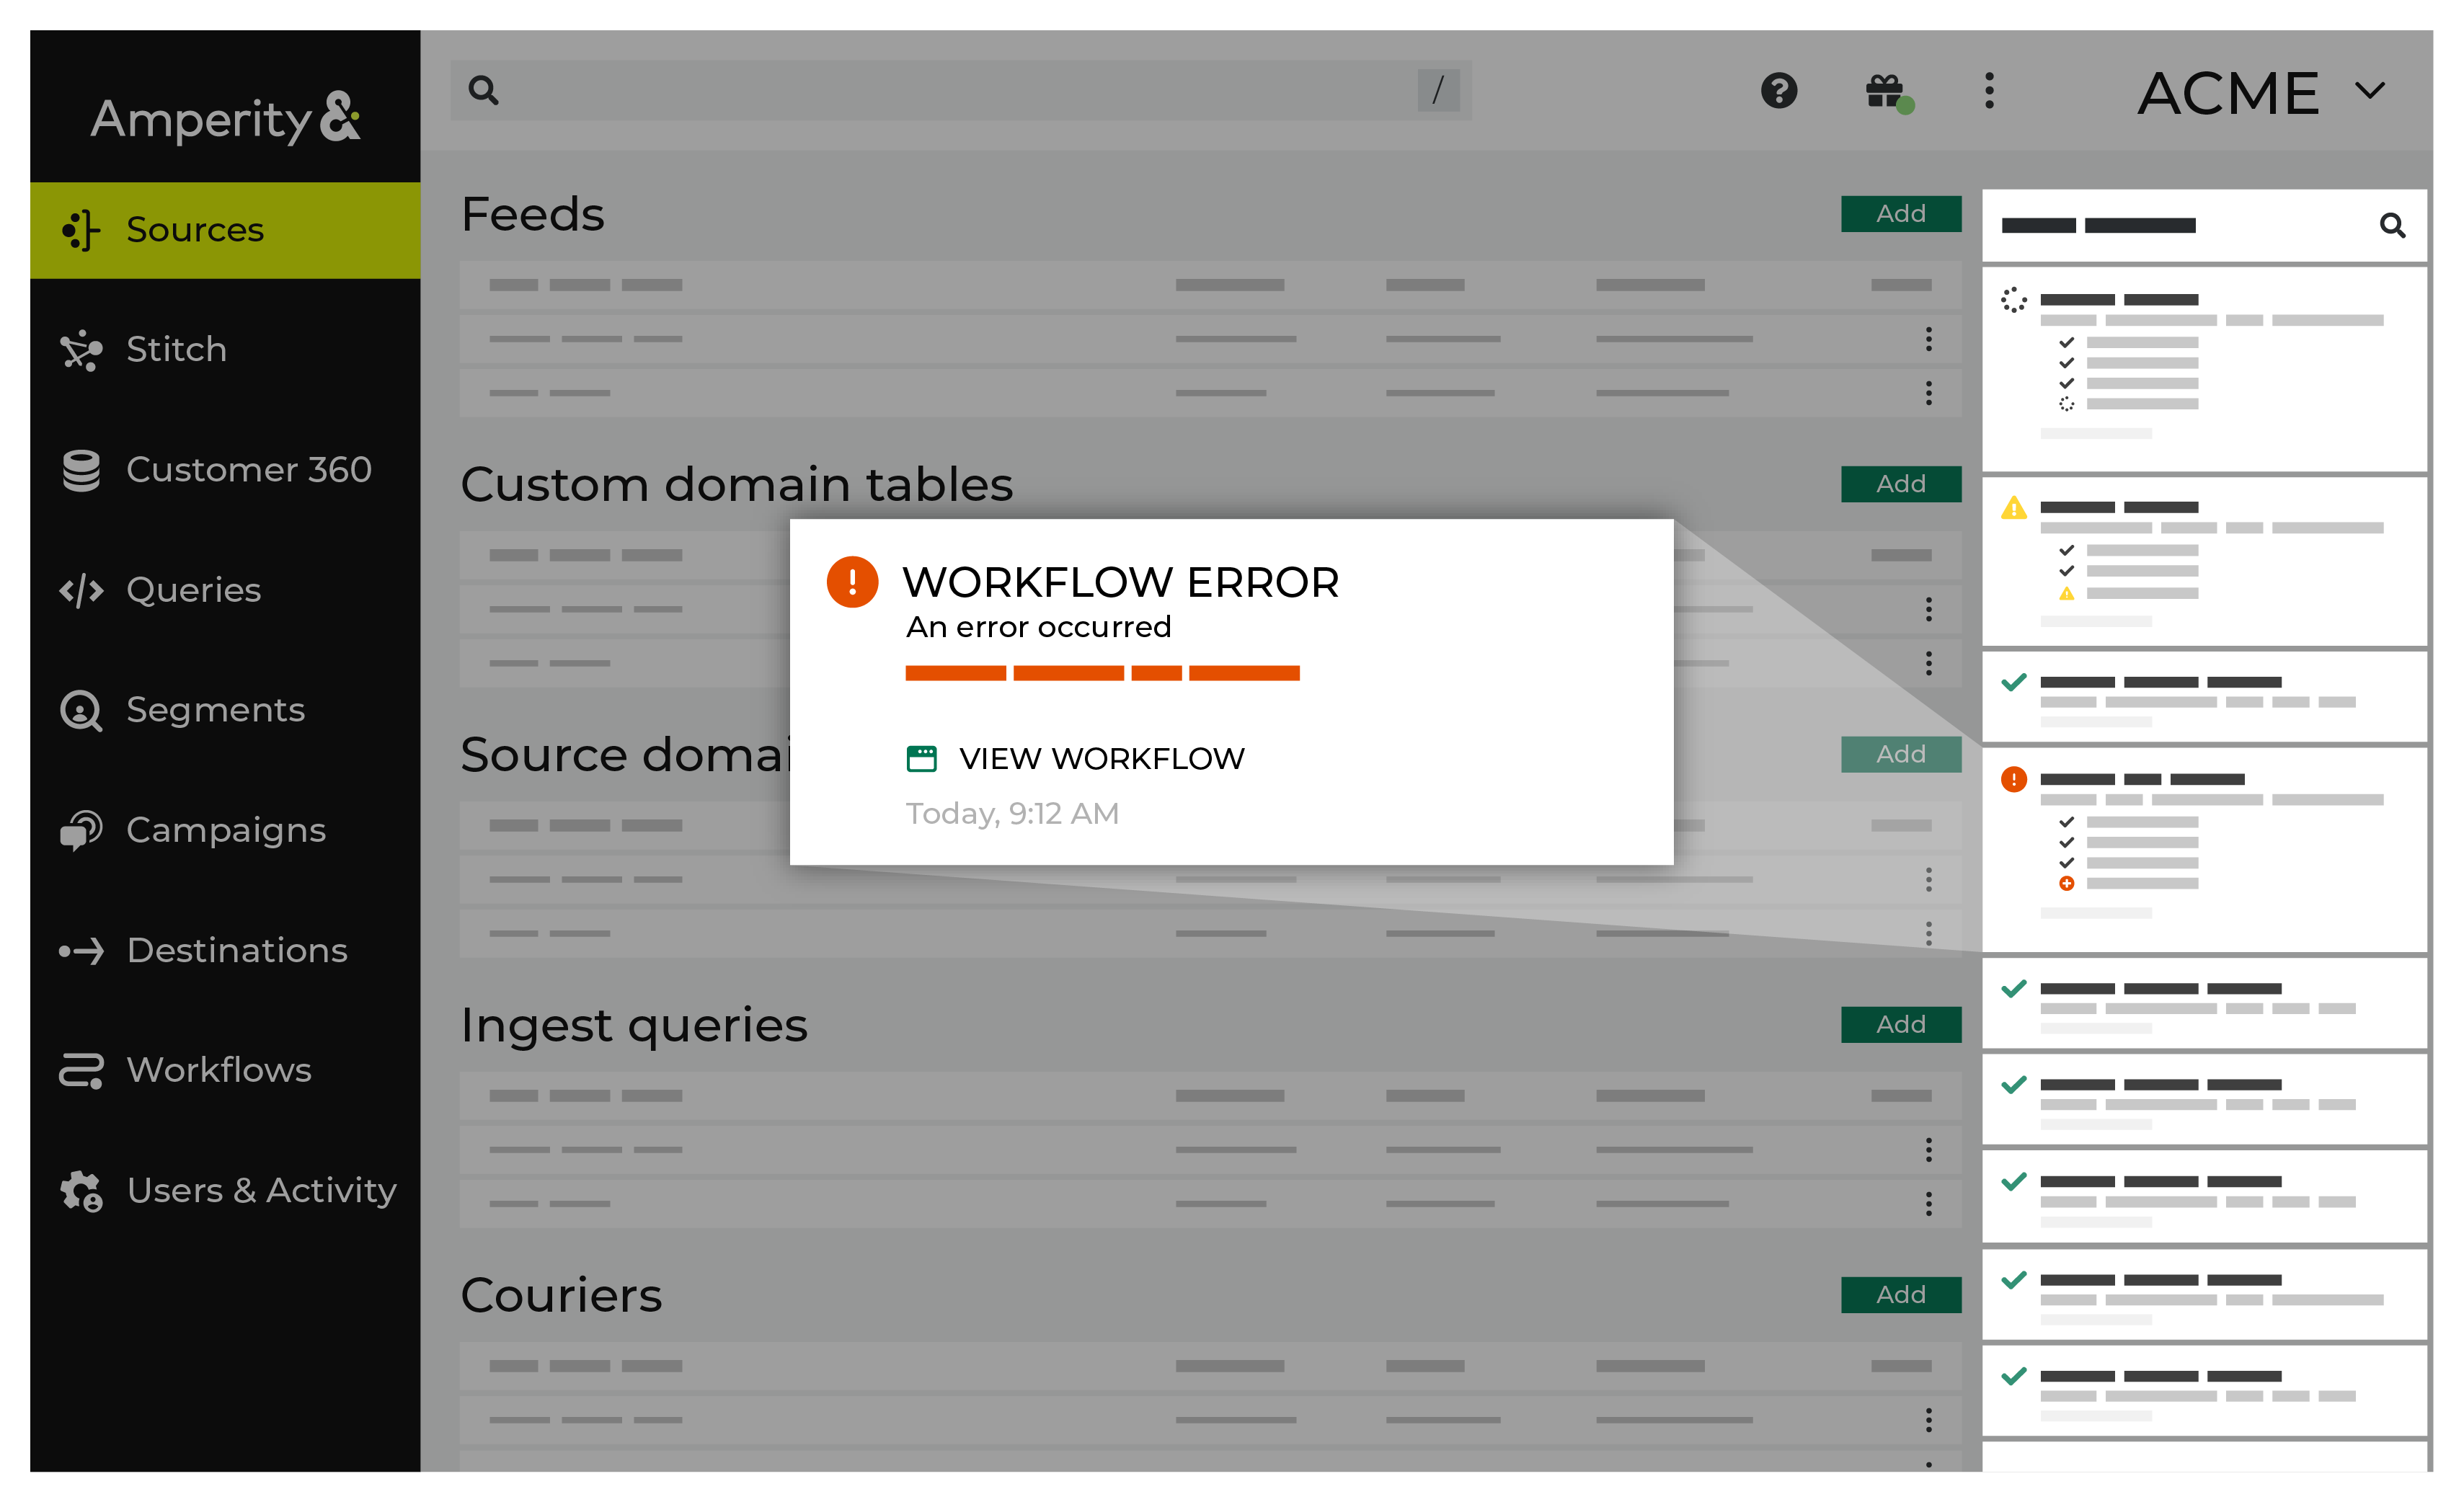
If you receive a notification error, review the details, and then click the View Workflow link to open this notification error in the Workflows page. |
|
|
On the Workflows page, review the individual steps to determine which steps have errors that require your attention, and then click Show Resolutions to review the list of workflow actions generated for this error. 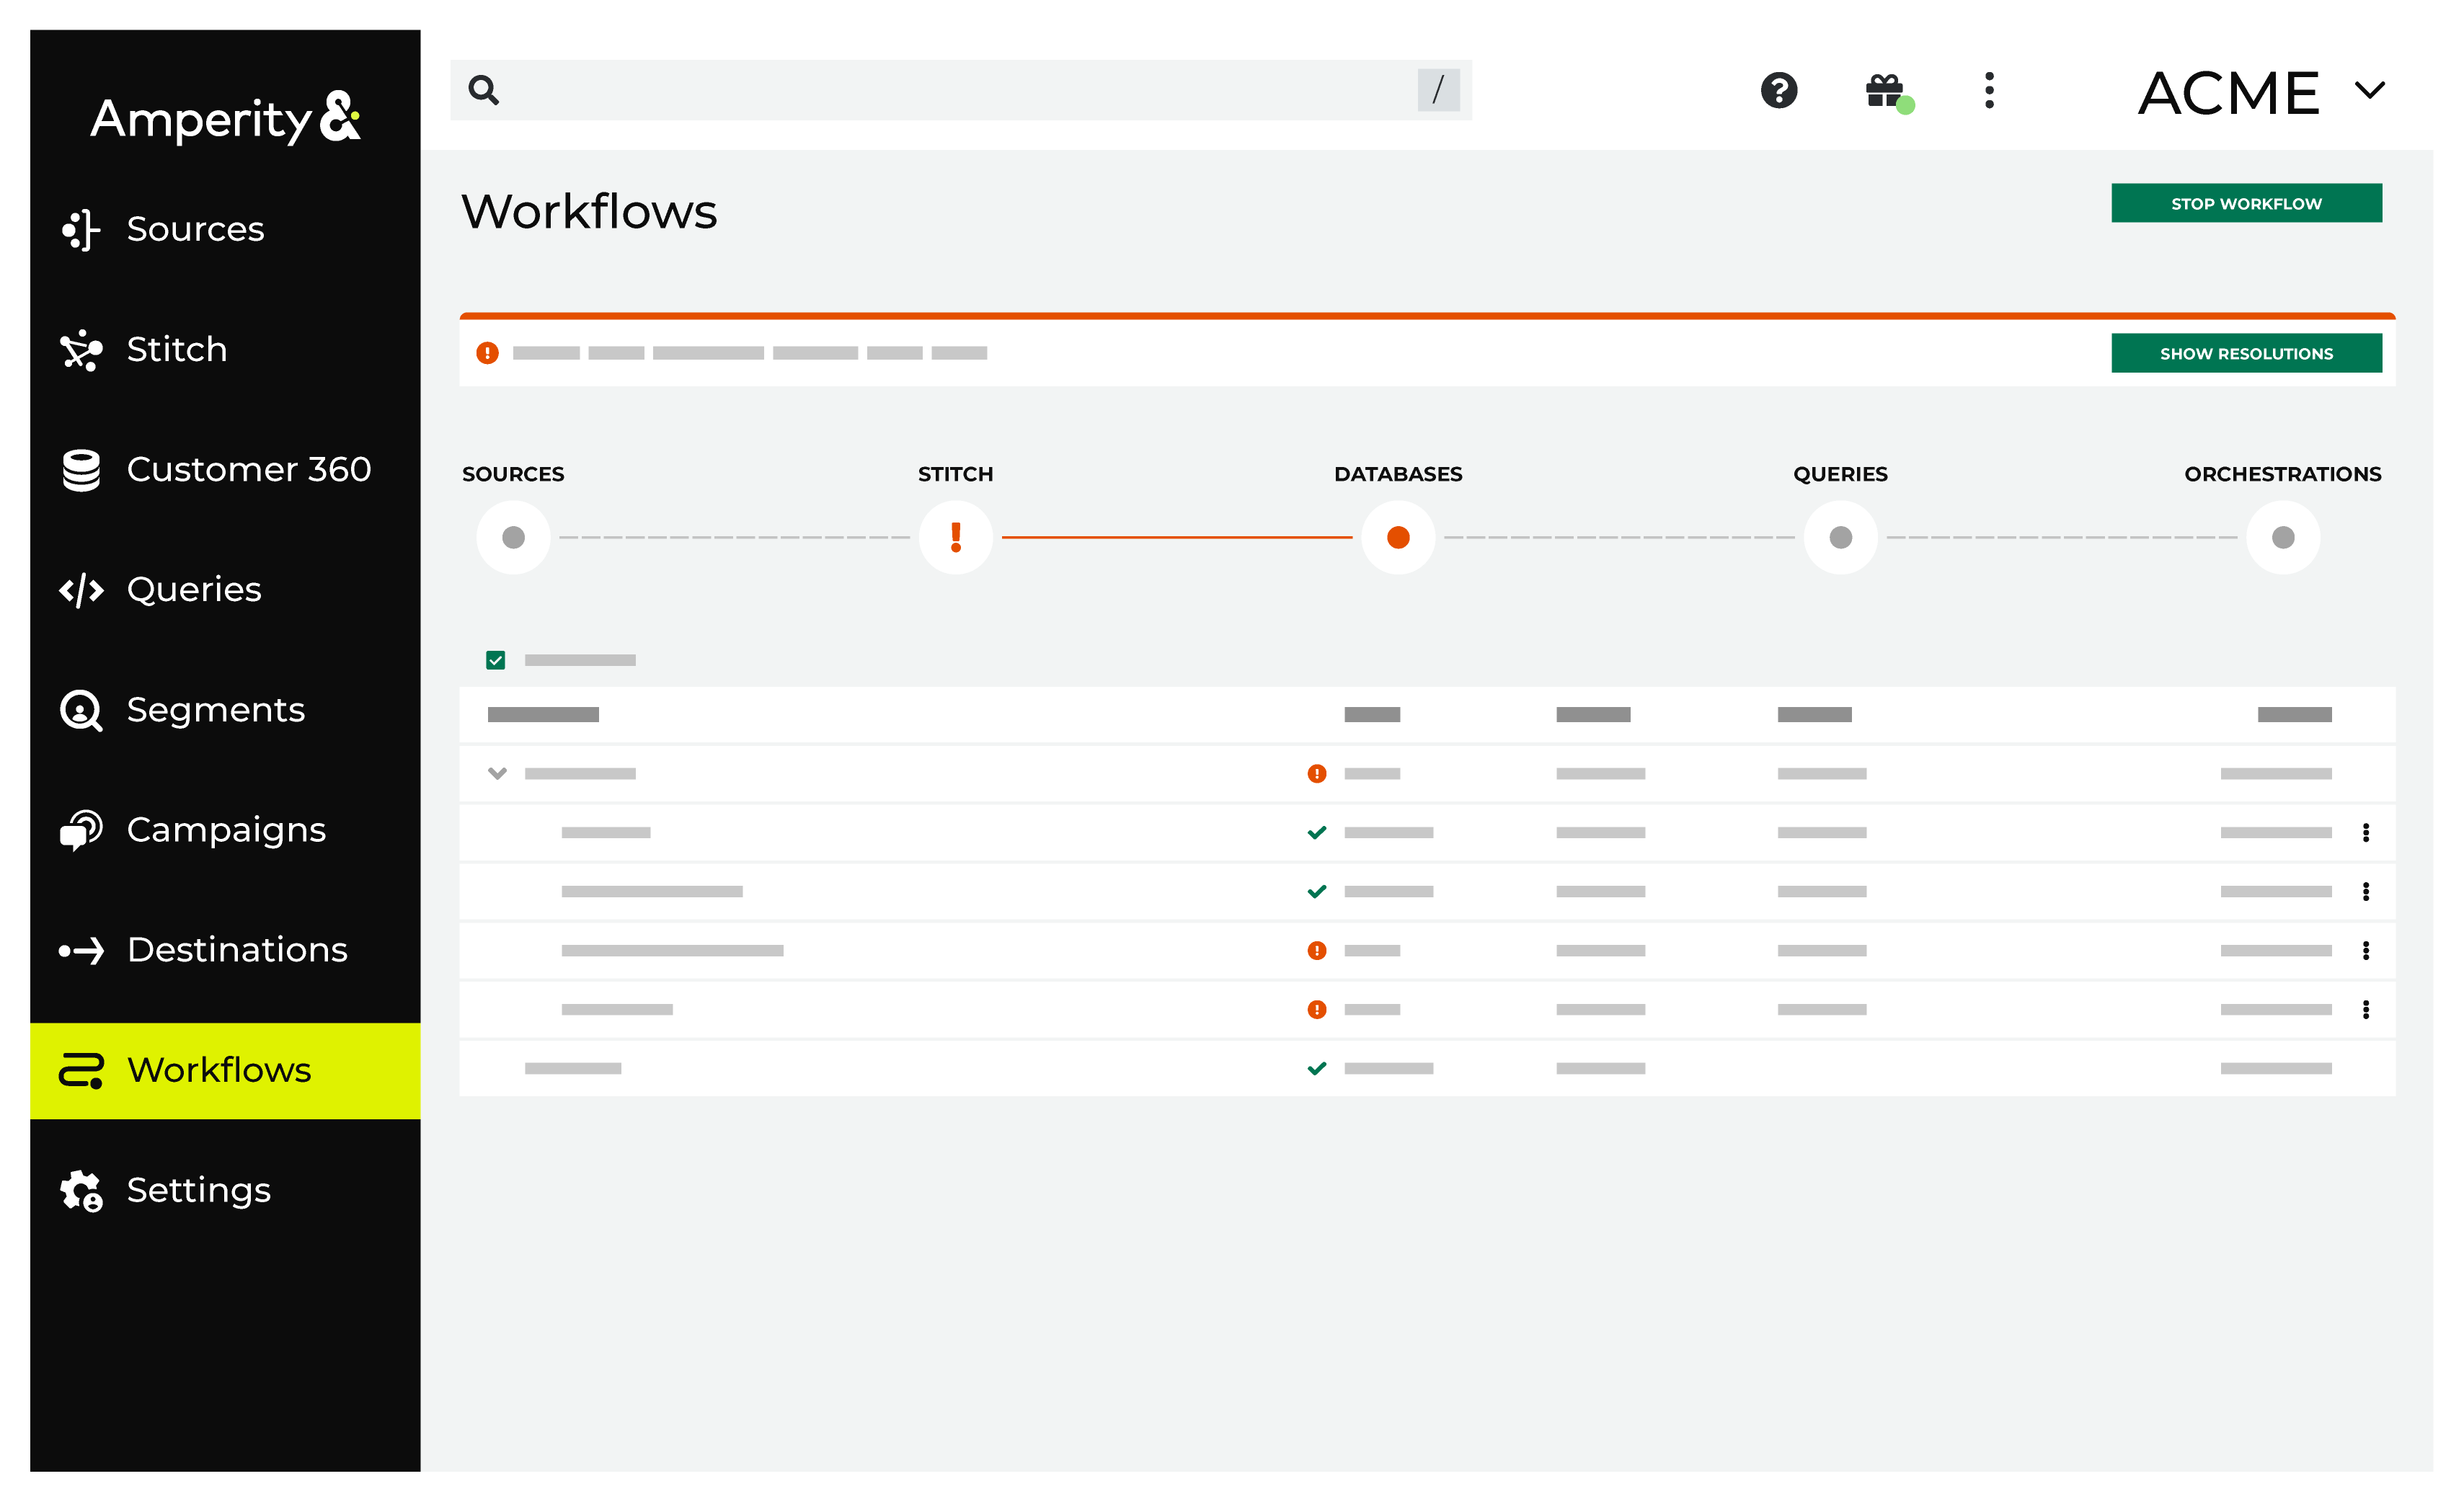
|
|
|
A list of individual workflow actions are shown. Review the list to identify which action you should take. 
Some workflow actions are common across workflows and will often be available, such as retrying a specific task within a workflow or restarting a workflow. These types of actions can often resolve an error. In certain cases, actions are specific and are shown when certain conditions exist in your tenant. These types of actions typically must be resolved and may require steps that must be done upstream or downstream from your Amperity workflow. Amperity provides a series of workflow actions that can help resolve specific issues that may arise with Salesforce Marketing Cloud, including: |
|
|
Select a workflow action from the list of actions, and then review the steps for resolving that error. 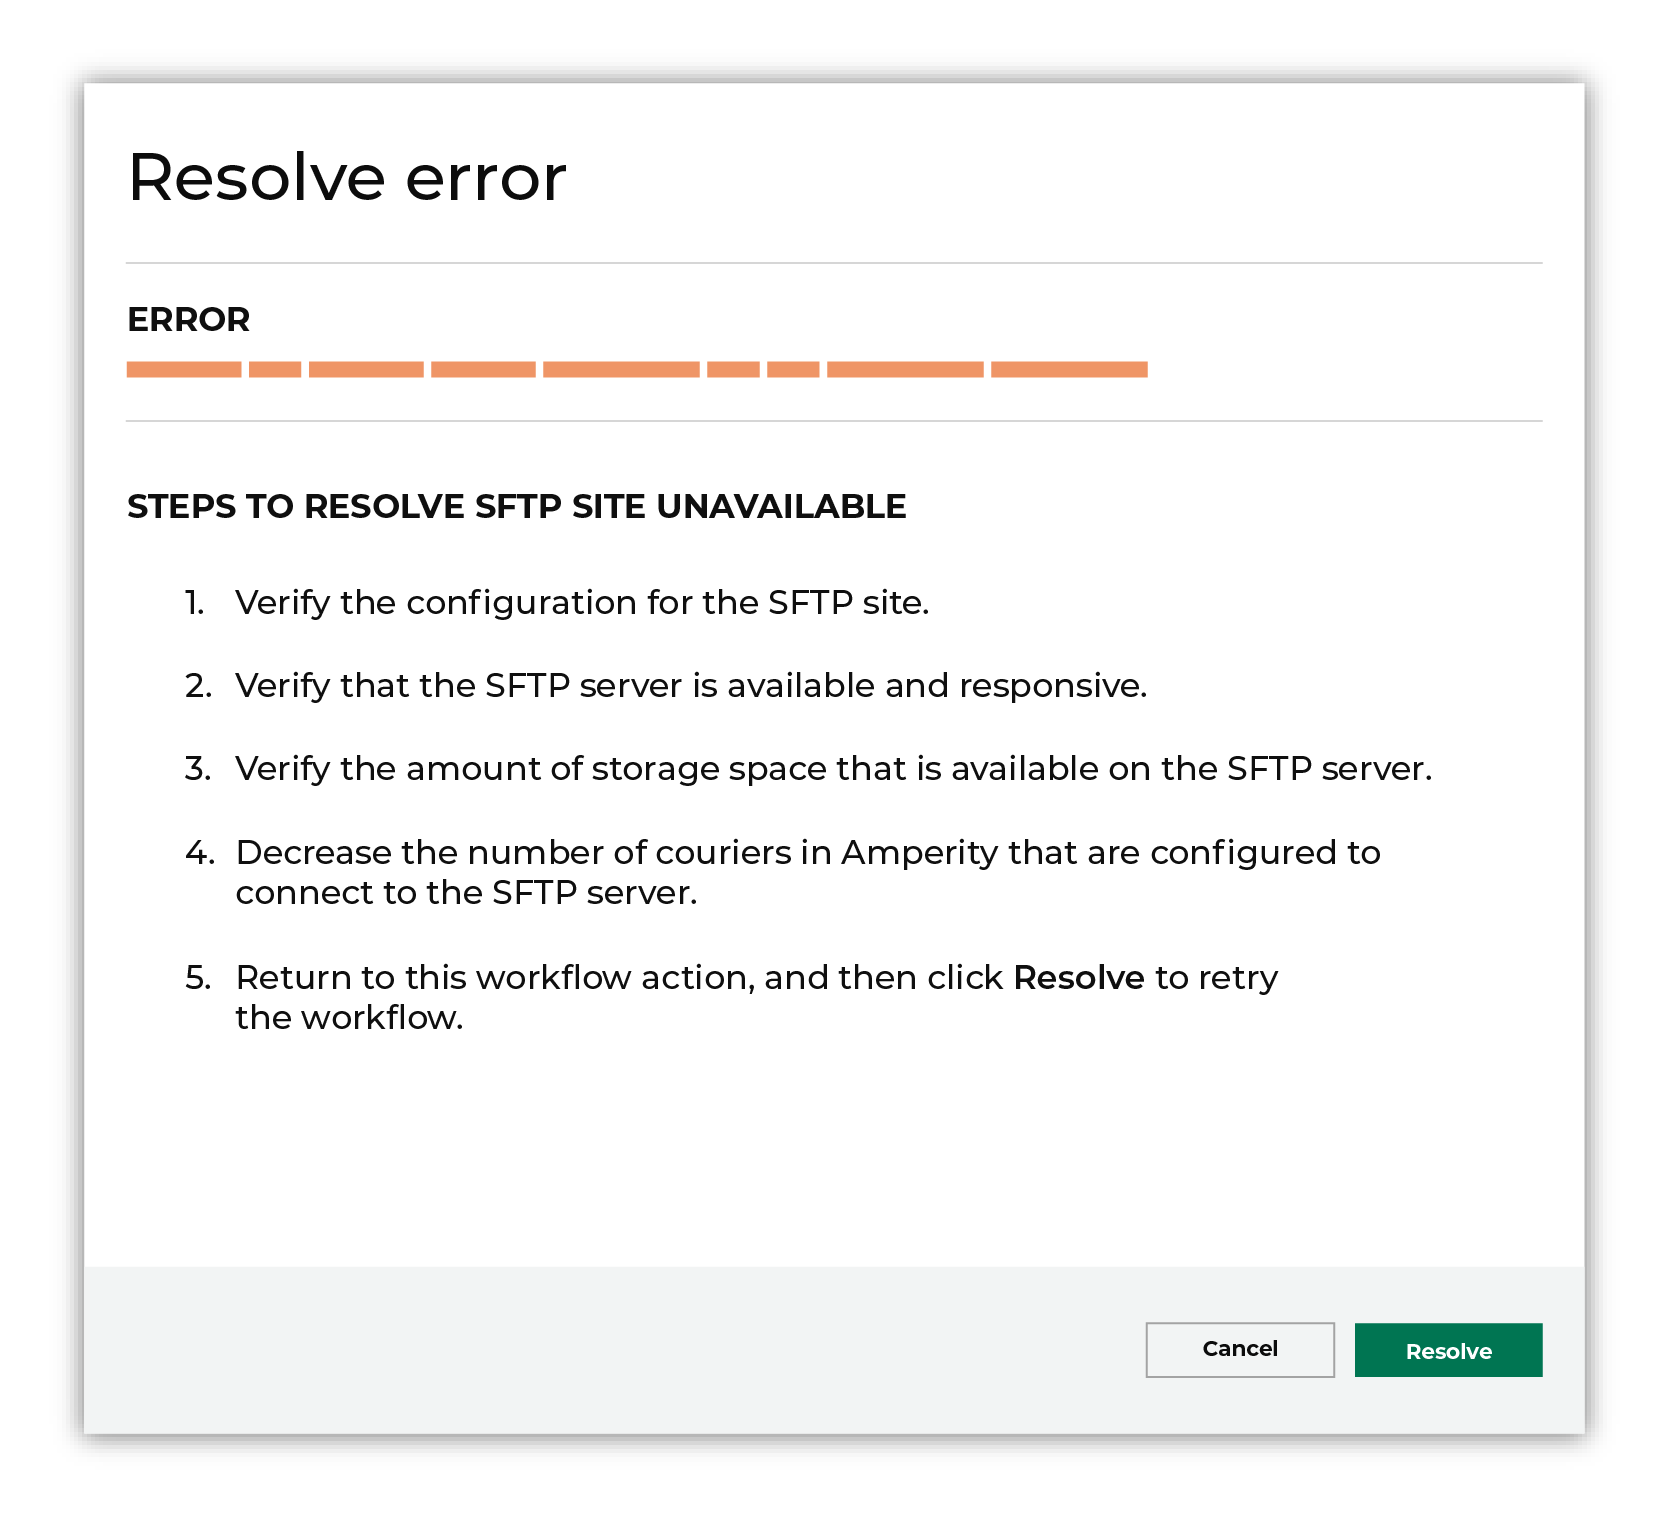
After you have completed the steps in the workflow action, click Continue to rerun the workflow. |
Bad archive
Sometimes the contents of an archive are corrupted and cannot be loaded to Amperity.
To resolve this error, do the following.
Upload a new file to Amperity.
After the file to the workflow action, and then click Resolve to retry this workflow.
Invalid credentials
The credentials that are defined in Amperity are invalid.
To resolve this error, verify that the credentials required by this workflow are valid.
Open the Credentials page.
Review the details for the credentials used with this workflow. Update the credentials for Salesforce Marketing Cloud if required.
Return to the workflow action, and then click Resolve to retry this workflow.
Missing file
An archive that does not contain a file that is expected to be within an archive will return a workflow error. Amperity will be unable to complete the workflow until the issue is resolved.
To resolve this error, do the following.
Add the required file to the archive.
or
Update the configuration for the courier that is attempting to load the missing file to not require that file.
After the file is added to the archive or removed from the courier configuration, click Resolve to retry this workflow.
PGP error
A workflow action is created when a file cannot be decrypted using the provided PGP key.
To resolve this error, verify the PGP key.
Open the Sources page.
Review the details for the PGP key.
If the PGP key is correct, verify that the file associated with this workflow error is encrypted using the correct PGP key. If necessary, upload a new file.
Return to the workflow action, and then click Resolve to retry this workflow.
Unable to decompress archive
An archive that cannot be decompressed will return a workflow error. Amperity will be unable to complete the workflow until the issue is resolved.
This issue may be shown when the name of the archive does not match the name of the configured archive or when Amperity is attempting to decompress a file and not an archive. In some cases, the contents of the archive file may be the reason why Amperity is unable to decompress the archive.
To resolve this error, do the following.
Verify the configuration for the archive, and then verify the contents of the archive.
Update the configuration, if neccessary. For example, when Amperity is attempting to decompress a file, update the configuration to specify a file and not an archive.
In some cases, re-loading the archive to the location from which Amperity is attempting to pull the archive is necessary.
Return to the workflow action, and then click Resolve to retry this workflow.