About orchestrations
An orchestration defines the relationship between query results and a destination, including the destination and the frequency at which an orchestration runs.
An orchestration may be added for an active query or for a database export. An orchestration must be associated to an existing destination. Depending on the data schema required by the destination, a data template may also be necessary.
Note
You may not add an orchestration for a draft query.
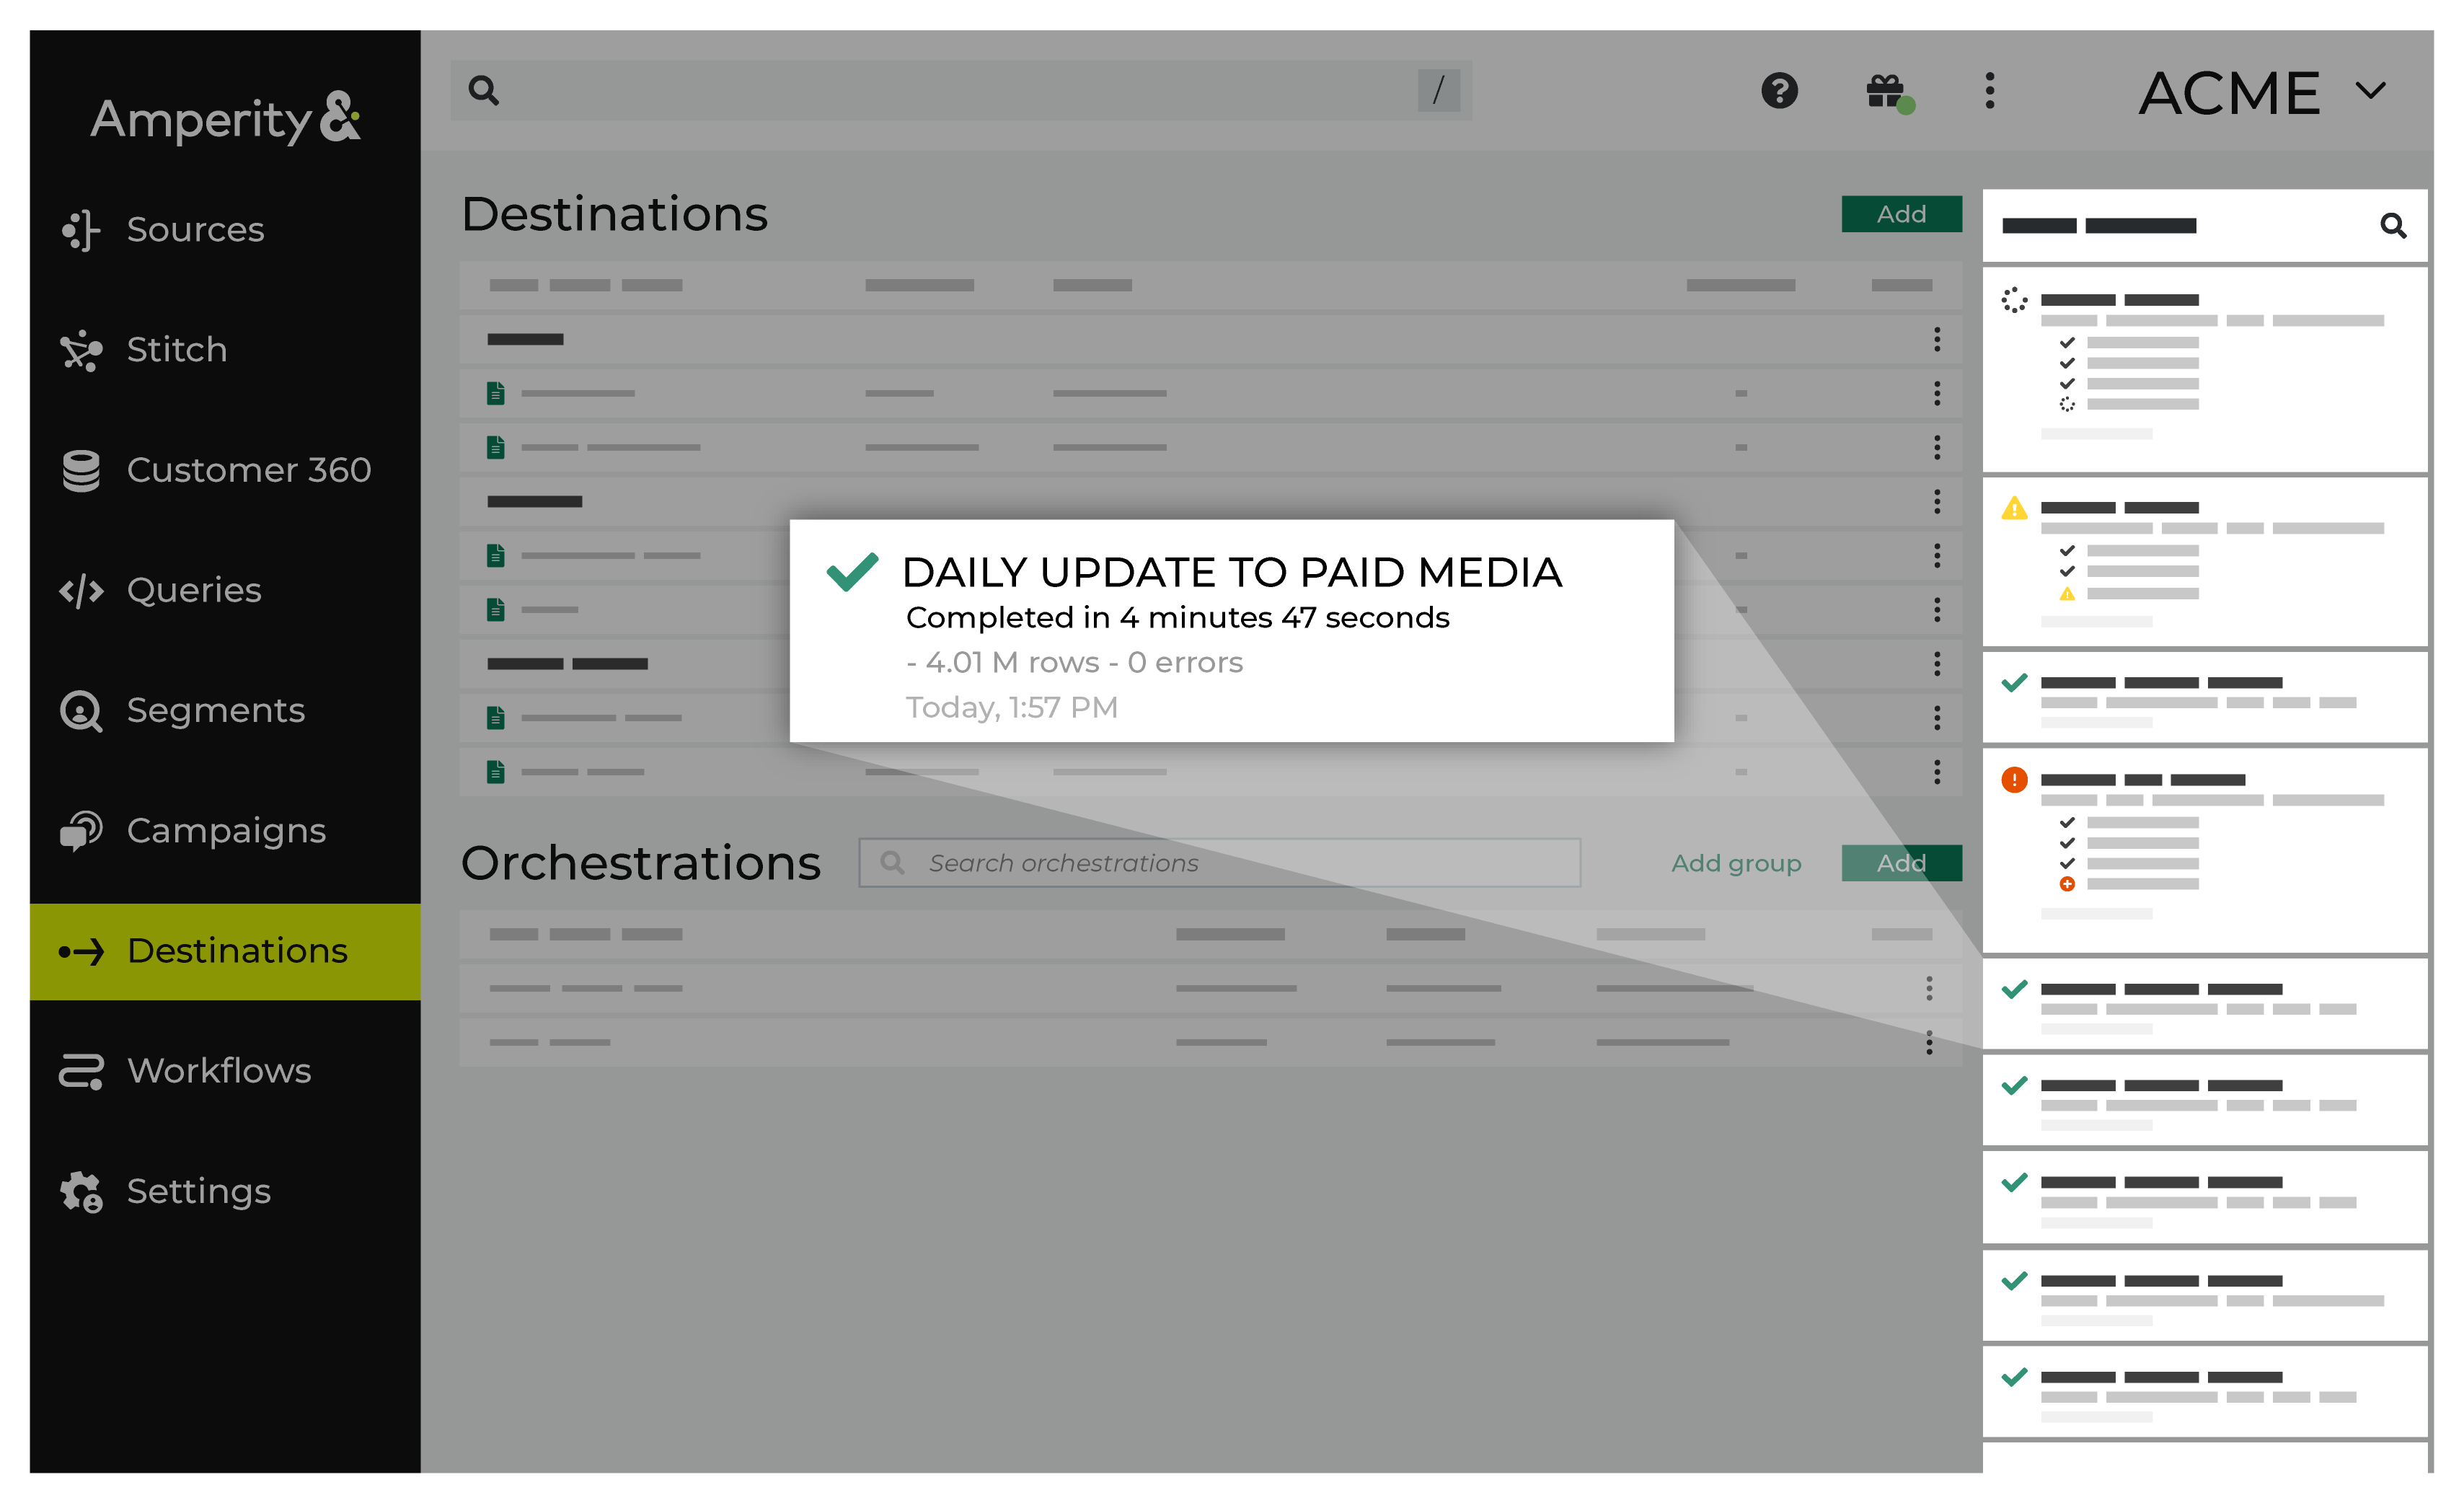
The Destinations page shows the status of every orchestration and orchestration group, including when it last ran or updated, and its current status.
Amperity Learning Lab
Orchestrations send query results to any downstream workflow through configured destinations.
Open Learning Lab to learn more about creating destinations for orchestrations . Registration is required.
How-tos
The Destinations page is the interface for defining destinations for campaigns and orchestrations, the destinations to which individual segments are sent, and automated workflows.
Tasks related to managing orchestrations in Amperity:
Add orchestration
Use the Add Orchestration button to add an orchestration to Amperity. An orchestration should be created for each workflow that sends data from Amperity to an external destination. An orchestration uses a destination and a data template, both of which may be used by other orchestrations.
To add an orchestration
From the Destinations page click Add Orchestration. This opens the Add Orchestration dialog box.
From the Object Type dropdown, select Query or Database Export.
From the Object dropdown, select the name of the query or database export that is sent to a destination.
Note
This name will also be the name of the orchestration.
From the Destination dropdown, select the name of a destination that is configured to send data.
From the Data Template dropdown, select a data template.
Verify any destination-specific settings.
Settings are determined by the destination and data template
Orchestration settings vary depending on which destination and data template are associated with it.
Set the workflow to Manual. You can change this to automatic later, after verifying the end-to-end workflow.
Click Save.
Assign database export
Database tables and databases can be sent from Amperity as a data export. A data export is configured from the Customer 360 page, and then added to an orchestration from the Destinations page.
To assign a database export to an orchestration
From the Destinations page click Add Orchestration. This opens the Add Orchestration dialog box.
From the Object Type dropdown, select Database Export.
Select a destination and complete the rest of the orchestration settings.
Click Save.
Assign query
A query orchestration sends the results of one or more active queries built using the visual Query Editor or SQL Query Editor to filedrop, REST API, and warehouse locations.
To assign a query to an automated workflow
From the Destinations page, under Orchestrations, open the menu in the same row as the orchestration to be edited, and then select Edit.
Under Workflow, select Automatically, and then select the name of a query.
Click Save.
Delete orchestration
Use the Delete option to remove an orchestration from Amperity. Verify that both upstream and downstream processes no longer depend on this orchestration before deleting it. This action will not delete the data template or destination associated with the orchestration.
To delete an orchestration
From the Destinations page, open the menu for an orchestration, and then select Delete.
Click Delete to confirm.
Edit orchestration
Use the Edit option to modify the settings for an orchestration. Verify that both upstream and downstream processes that depend on this orchestration continue to work after the changes are saved. This action will not modify the data template or destination associated with the orchestration.
To edit an orchestration
From the Destinations page, open the menu for an orchestration, and then select Edit.
Make your changes.
Click Save.
Run orchestration
Amperity sends the results to any number of downstream workflows via orchestrations. An orchestration has query data or a database export, a schedule, data templates, and a destination that is configured with the credentials Amperity needs to be able to write data.
From the Destinations page, open the menu for an orchestration, and then select Run.
The Status column for the orchestration group updates to say “Waiting to start”, after which the notifications pane updates to include a notification that shows the status of the orchestration.
When the orchestration has run successfully, its status is updated to “Completed”.
Orchestrations can be run in the following ways:
Automatically
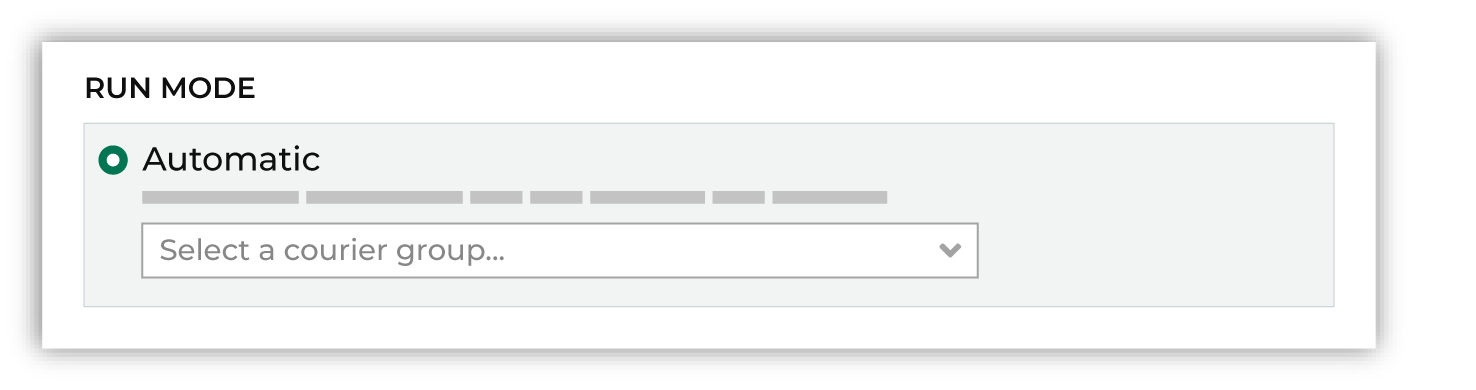
An orchestration can be configured to run after a courier when the run mode is set to Automatic and an active courier group is selected from the dropdown menu.
Manually
A manual orchestration only runs when a user selects the Run option from the orchestrations list in the Destinations page.
To configure an orchestration to run manually
From the Destinations page, under Orchestrations, open the menu in the same row as the orchestration to be edited, and then select Edit.
Under Workflow, select Manual.
Click Save.
Scheduled, always run
An orchestration can be scheduled to run every day, regardless of changes to upstream data.
To configure an orchestration to run daily on a schedule
From the Destinations page, under Destinations, open the menu in the same row as the destination to be edited, and then select Edit.
Enter a schedule.
Click Save.
From the Destinations page, under Orchestrations, open the menu in the same row as the orchestration to be edited, and then select Edit.
Under Workflow, select Automatically, and then select the name of a query.
Click Save.
Scheduled, wait for changes
An orchestration can be scheduled to run every day, but then only start the run if upstream data has changed.
To configure an orchestration to run on a schedule, but only when data changes
From the Destinations page, under Destinations, open the menu in the same row as the destination to be edited, and then select Edit.
Enter a schedule, the courier group constraint, and an offset. The specified courier group must have updated data. The orchestration group will check for updated data at the scheduled time, but runs only when there is updated data.
Click Save.
From the Destinations page, under Orchestrations, open the menu in the same row as the orchestration to be edited, and then select Edit.
Under Workflow, select Automatically, and then select the name of a query.
Click Save.
Wait for changes
An orchestration can be scheduled to run only when upstream data changes.
To configure an orchestration to wait for data changes before running
From the Destinations page, under Destinations, open the menu in the same row as the destination to be edited, and then select Edit.
Enter a schedule (optional), the courier group constraint, and an offset. The specified courier group must have updated data for this orchestration group to run.
Click Save.
From the Destinations page, under Orchestrations, open the menu in the same row as the orchestration to be edited, and then select Edit.
Under Workflow, select Automatically, and then select the name of a query.
Click Save.
View notifications
Notifications for the Orchestrations page appear after Amperity added an orchestration to an active query or for a database export. Less often, notifications contain details for non-successful outcomes, such as failures related to upstream or downstream processes.
If a notification is about a non-successful outcome, the details for why and what happened can be found in the notification itself. Click More to view the full notification. Click View Workflow to open the workflow in the Workflows page.
In some cases viewing the log files may be helpful. In many cases, fix the root cause of the non-successful outcome, and then rerun the process manually. The Workflows page provides a set of workflow actions that you can initiate directly.