Configure destinations for Throtle
Throtle provides brands and marketers a complete view of their customers and accurate targeting across all devices and channels. Target customers using connected TVs, cookieless identities, and mobile advertising IDs (MAIDs), such as the Identifier for Advertising (IDFA) from Apple and the Google Advertising ID (GAID) from Google.
Get details
Amperity can be configured to send data to a customer-managed Amazon S3 bucket using cross-account roles, and then connect Throtle to that Amazon S3 bucket.
Configure cross-account roles
Amperity prefers to pull data from and send data to customer-managed cloud storage.
Amperity requires using cross-account role assumption to manage access to Amazon S3 to ensure that customer-managed security policies control access to data.
This approach ensures that customers can:
Directly manage the IAM policies that control access to data
Directly manage the files that are available within the Amazon S3 bucket
Modify access without requiring involvement by Amperity. Access may be revoked at any time by either Amazon AWS account, after which data sharing ends immediately
Directly troubleshoot incomplete or missing files
Note
After setting up cross-account role assumption, a list of files by filename and file type, along with any sample files, must be made available to allow for feed creation. These files may be placed directly into the shared location after cross-account role assumption is configured.
Can I use an Amazon AWS Access Point?
Yes, but with the following limitations:
The direction of access is Amperity access files that are located in a customer-managed Amazon S3 bucket
A credential-free role-to-role access pattern is used
Traffic is not restricted to VPC-only
To configure an S3 bucket for cross-account role assumption
The following steps describe how to configure Amperity to use cross-account role assumption to pull data from or push data to a customer-managed Amazon S3 bucket.
Important
These steps require configuration changes to customer-managed Amazon AWS accounts and must be done by users with administrative access.

|
Open the Destinations tab to configure credentials for Throtle. Click the Add destination button to open the Add destination dialog box. 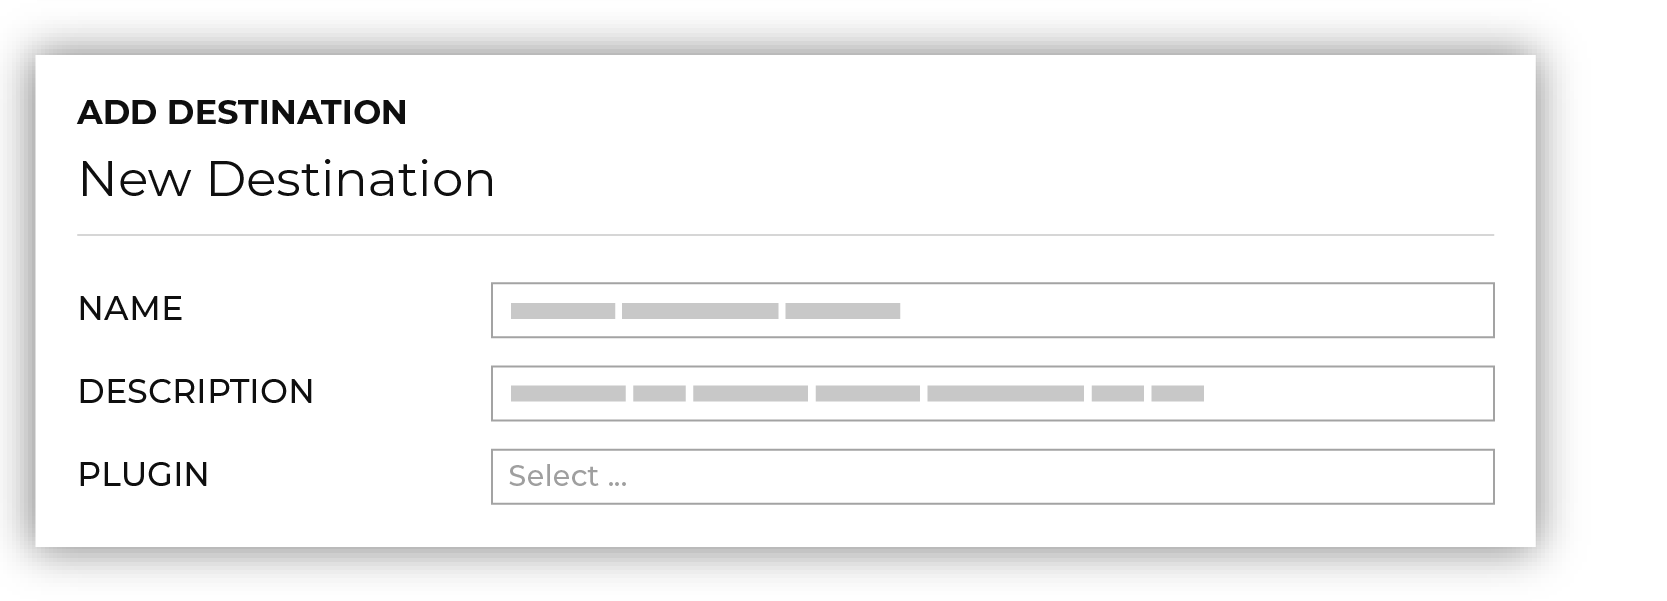
Select Throtle from the Plugin dropdown. |

|
From the Credentials dialog box, enter a name for the credential, select the iam-role-to-role credential type, and then select “Create new credential”. 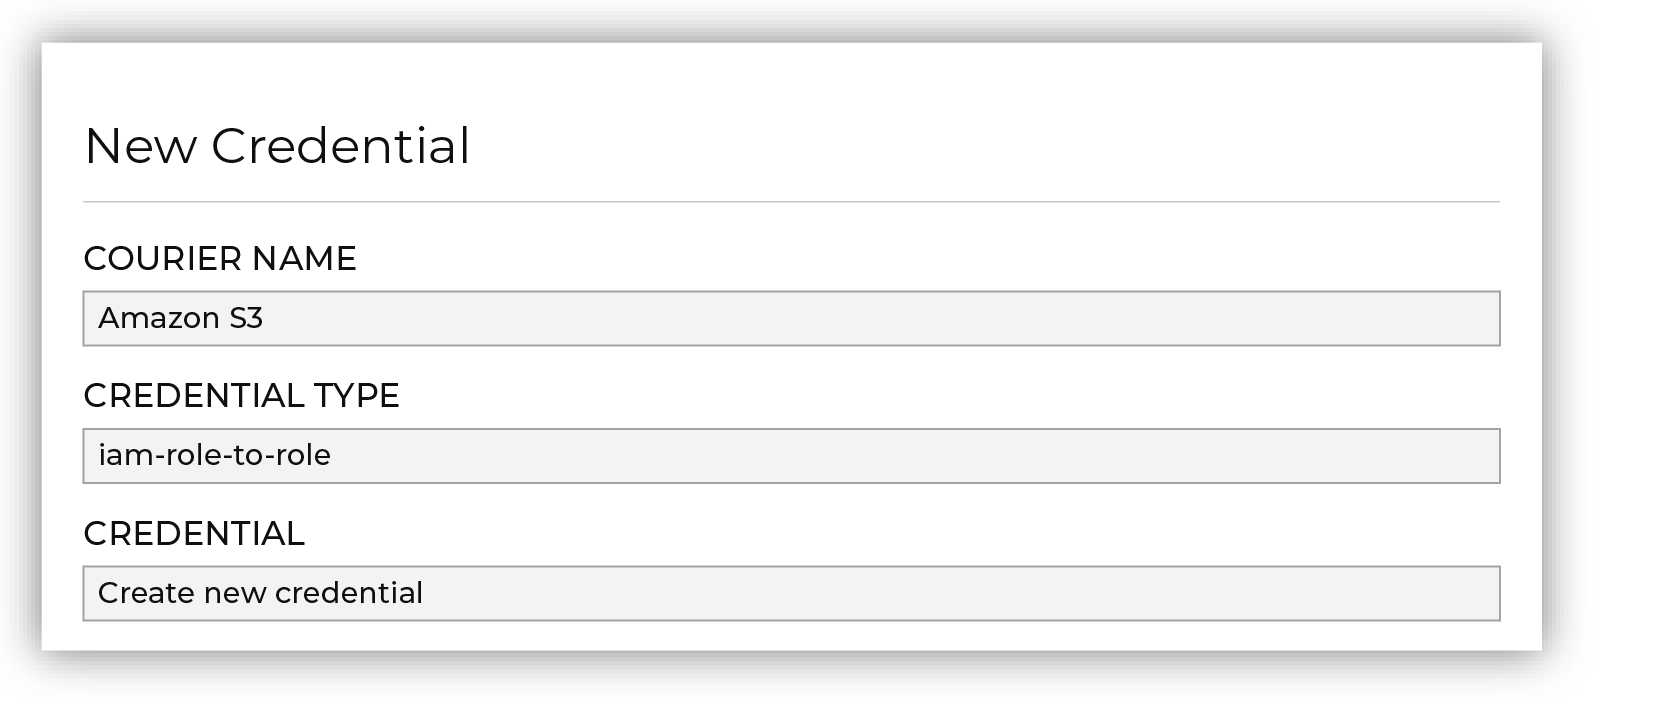
|

|
Next configure the settings that are specific to cross-account role assumption. 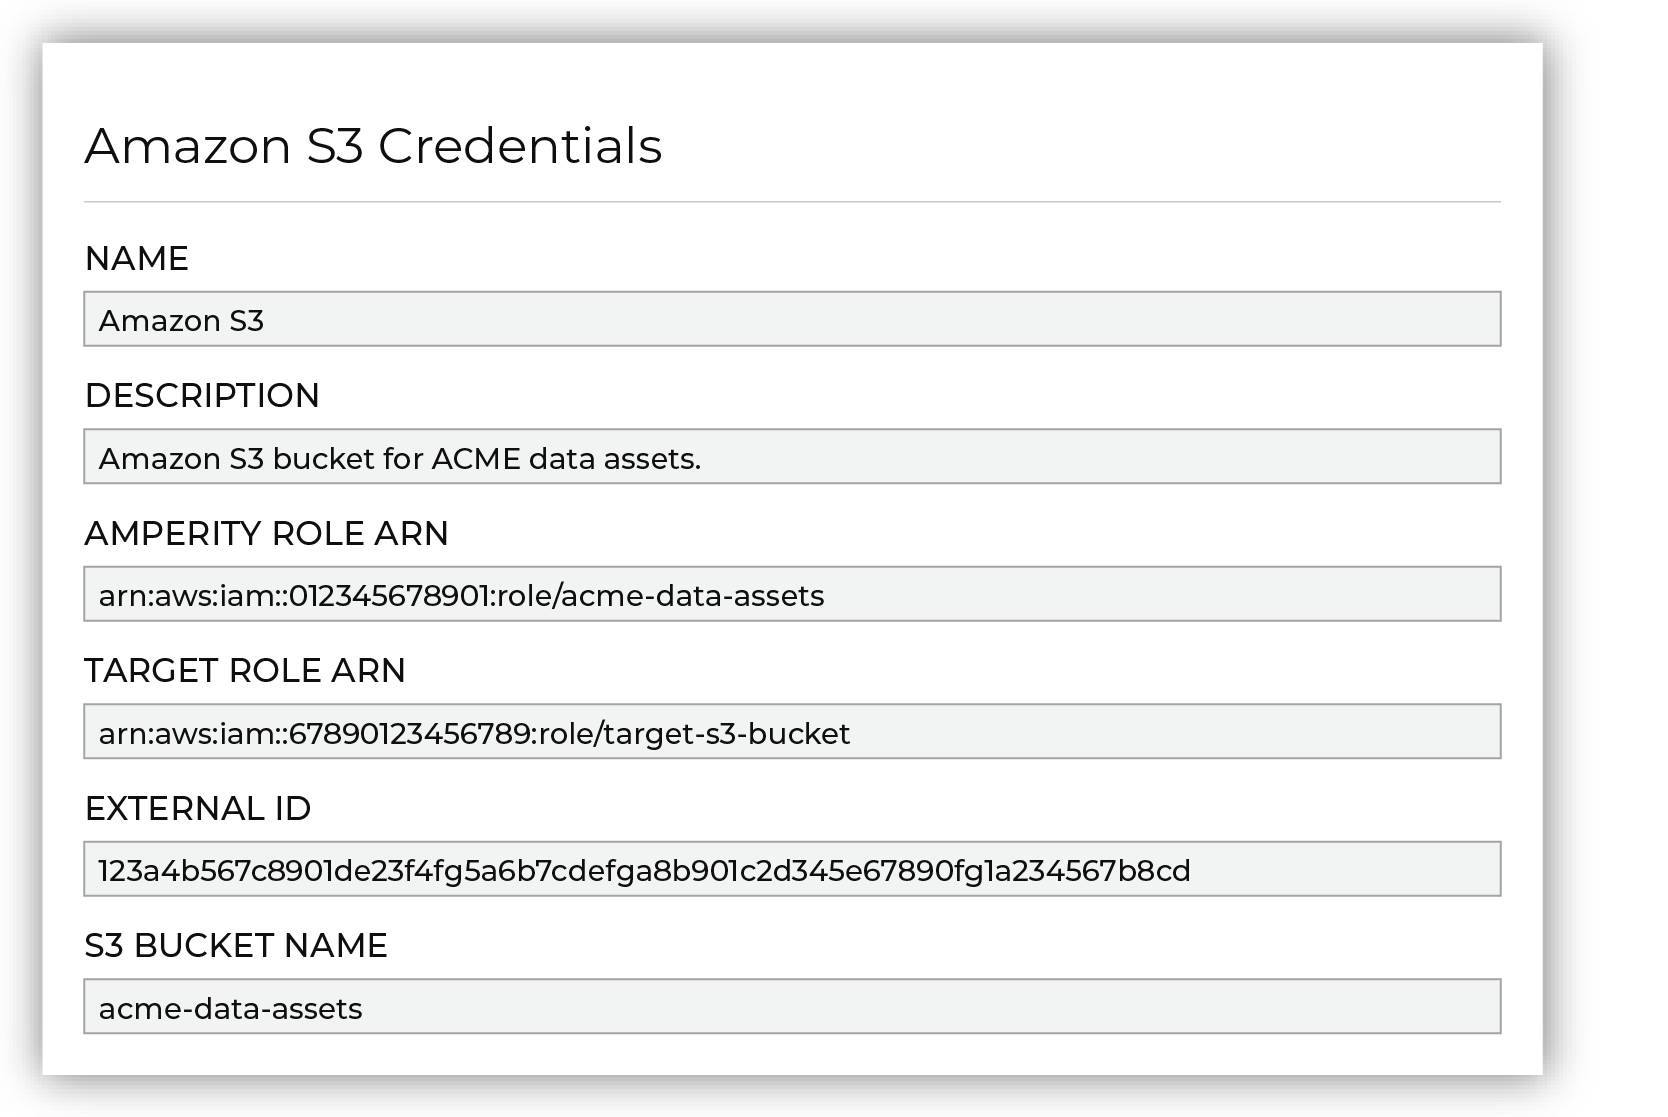
The values for the Amperity Role ARN and External ID fields – the Amazon Resource Name (ARN) for your Amperity tenant and its external ID – are provided automatically. You must provide the values for the Target Role ARN and S3 Bucket Name fields. Enter the target role ARN for the IAM role that Amperity uses to access the customer-managed Amazon S3 bucket, and then enter the name of the Amazon S3 bucket. |

|
Review the following sample policy, and then add a similar policy to the customer-managed Amazon S3 bucket that allows Amperity access to the bucket. Add this policy as a trusted policy to the IAM role that is used to manage access to the customer-managed Amazon S3 bucket. The policy for the customer-managed Amazon S3 bucket is unique, but will be similar to: 1{
2 "Statement": [
3 {
4 "Sid": "AllowAmperityAccess",
5 "Effect": "Allow",
6 "Principal": {
7 "AWS": "arn:aws:iam::account:role/resource"
8 },
9 "Action": "sts:AssumeRole",
10 "Condition": {
11 "StringEquals": {
12 "sts:ExternalId": "01234567890123456789"
13 }
14 }
15 }
16 ]
17}
The value for the role ARN is similar to: arn:aws:iam::123456789012:role/prod/amperity-plugin
An external ID is an alphanumeric string of 2-1224 characters without spaces and may include the following symbols: plus (+), equal (=), comma (,), period (.), at (@), colon (:), forward slash (/), and hyphen (-). |

|
Click Continue to test the configuration and validate the connection to the customer-managed Amazon S3 bucket, after which you is able to continue the steps for adding a courier. |
Add destination
Use a sandbox to configure a destination for Throtle. Before promoting your changes, send a sample audience, and then verify the results in Throtle. After verifying the end-to-end workflow, push the destination from the sandbox to production.
To add a destination for Throtle
|
|
Open the Destinations page, select the New destinations button, and then select Orchestration. 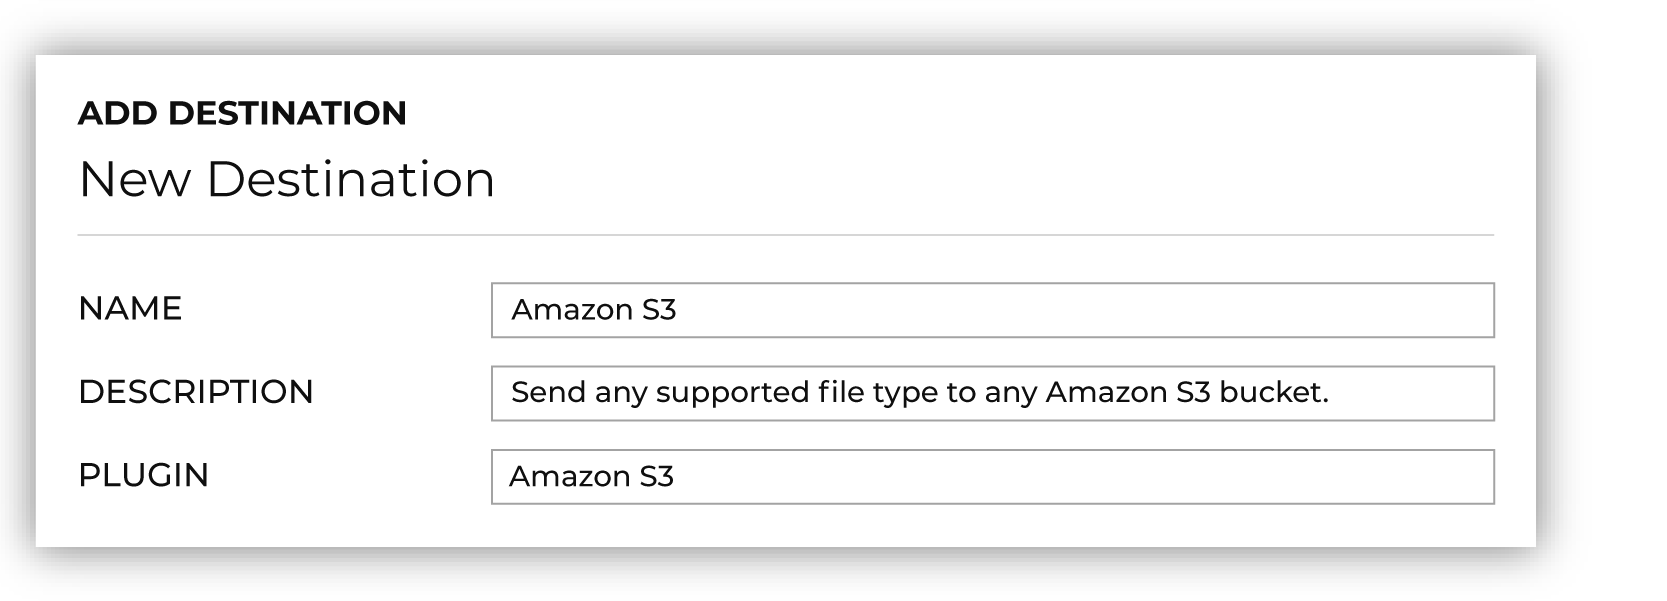
To configure a destination for Throtle, do one of the following:
|
|
|
Select the credential for Throtle from the Credential dropdown, and then click Continue. Tip Amperity validates the connection when the destination is saved. If the connection cannot be validated, an error is shown and the destination is not saved. |
|
|
In the “Destination settings” dialog box, assign the destination a name and description that ensures other users of Amperity can recognize when to use this destination. Configure business user access By default a destination is available to all users who have permission to view personally identifiable information (PII). Enable the Admin only checkbox to restrict access to only users assigned to the Datagrid Operator and Datagrid Administrator policies. Enable the PII setting checkbox to allow limited access to PII for this destination. Use the Restrict PII access policy option to prevent users from viewing data marked as PII anywhere in Amperity and from sending data to downstream workflows. |
|
|
Configure the following settings, and then click “Save”. Compression
Escape character
File format
Filename template
Header
PGP public key
Quote mode
S3 prefix
Success file
Split outputs
Use Zip64?
Row Number
|
|
|
After configuring this destination users may use:
|

|
Validate the audience with Throtle by using a sample audience with a very small membership. For example: 10 or 100 members or the minimum audience size recommended by Throtle. Send the sample audience to Throtle and verify the sample audience is correct in Throtle. Make adjustments if necessary. Only send full audiences after validation is complete. |