Configure destinations for Braze Cohorts
Use Braze Cohorts to send a list of user IDs from Amperity to Braze using the User cohort endpoint, after which they are automatically added to a named cohort. You can then use that cohort with Braze campaigns and canvases.
Amperity manages the full sync process: creating the cohort in Braze if it does not exist, sending user IDs in optimized batches, and reporting results back to your workflow.
Note
This destination only syncs user ID lists into cohorts. It does not sync profile attributes, events, or purchase data.
To send customer profile attributes to Braze, use the Braze destination .
Note
This destination does not create new user profiles in Braze. Users who do not already have a Braze profile are omitted from the cohort.
About Braze Cohorts
A cohort in Braze is a group of users identified by their user IDs. When you send an audience from Amperity to Braze Cohorts:
The cohort is created in Braze if it does not already exist
The cohort is updated if it already exists
Only user IDs are sent; no profile attributes or event data
Users with a NULL value in the ID field are automatically skipped
Note
The cohort sync only adds users who already have a profile in Braze. Users included in the Amperity audience who do not have an existing Braze profile will be omitted from the cohort, and there is no automatic creation of a new profile for them in Braze.
Cohorts sent from Amperity are available in the Braze dashboard under Segments, where you can filter by cohort name to verify users were imported.
Note
The cohort name you enter is used as the cohort ID when syncing to Braze. The cohort appears in the Braze dashboard under the name you entered.
Get details
Review the following details before configuring credentials for Braze Cohorts and before configuring Amperity to send audience lists to Braze Cohorts.

|
Credential settings The Client Data Import Key for your Braze account. This key is found in the Braze dashboard under Partner Integrations > Technology Partners > Amperity. Get the Client Data Import Key Log in to the Braze dashboard and navigate to Partner Integrations > Technology Partners > Amperity. The exact path may vary by Braze version and sometimes is under Integrations > Technology Partners. Copy the Data Import Key. This value is used to configure credentials in Amperity. |
||||||||||||||||||||
|
|
Required configuration settings Instance
|
||||||||||||||||||||
|
|
Cohort settings Cohort Name
User ID Field
|
Configure credentials
Configure credentials for Braze Cohorts before adding a destination.
An individual with access to Braze Cohorts should use SnapPass to securely share “Client Data Import Key” details with the individual who configures Amperity.
To configure credentials for Braze Cohorts

|
From the Settings page, select the Credentials tab, and then click the Add credential button. |
|
In the Credentials settings dialog box, do the following: From the Plugin dropdown, select Braze Cohorts. Assign the credential a name and description that ensures other users of Amperity can recognize when to use this credential. |
|
Configure the following settings, and then click Save. Client Data Import Key
Instance
|
Add destination
Use a sandbox to configure a destination for Braze Cohorts. Before promoting your changes, send a sample audience, and then verify the results in Braze Cohorts. After verifying the end-to-end workflow, push the destination from the sandbox to production.
To add a destination for Braze Cohorts
|
|
Open the Destinations page, select the New destinations button, and then select Orchestration. 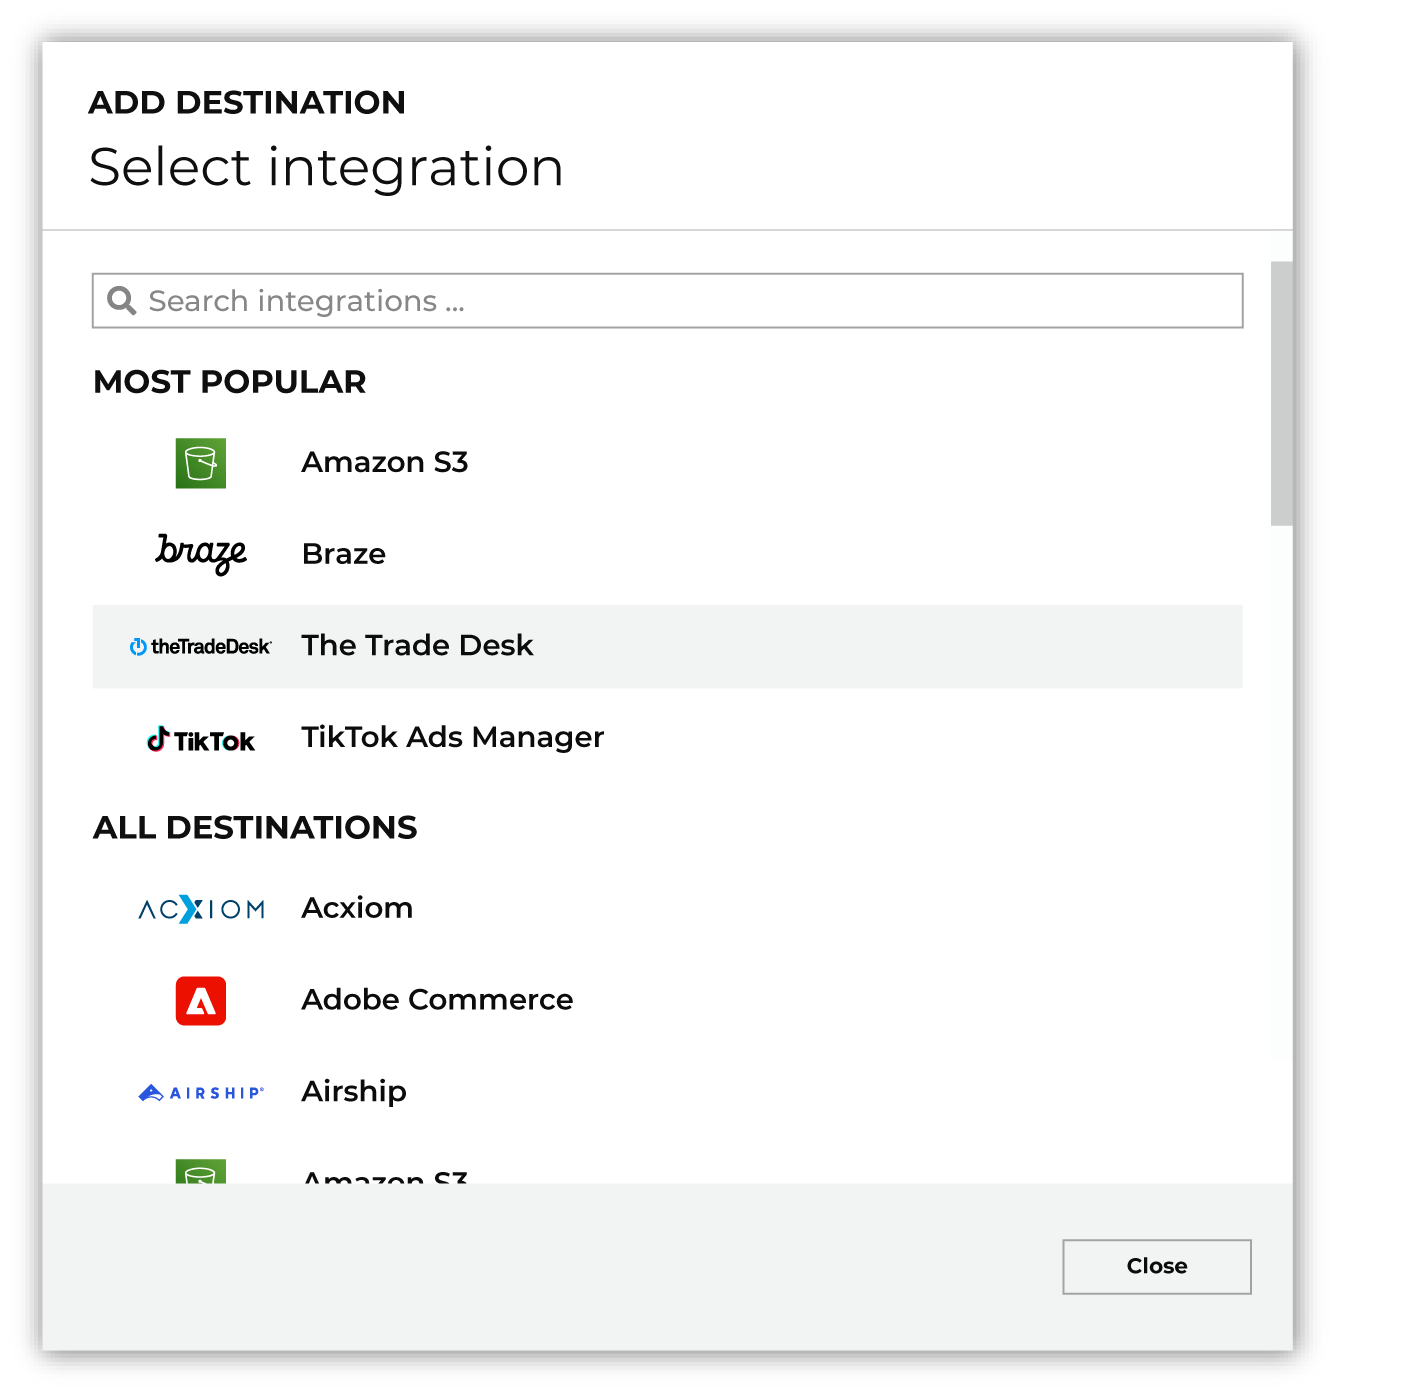
To configure a destination for Braze Cohorts, do one of the following:
|
|
|
Select the credential for Braze Cohorts from the Credential dropdown, and then click Continue. Tip Amperity validates the connection when the destination is saved. If the connection cannot be validated, an error is shown and the destination is not saved. |
|
|
In the “Destination settings” dialog box, assign the destination a name and description that ensures other users of Amperity can recognize when to use this destination. Configure business user access By default a destination is available to all users who have permission to view personally identifiable information (PII). Enable the Admin only checkbox to restrict access to only users assigned to the Datagrid Operator and Datagrid Administrator policies. Enable the PII setting checkbox to allow limited access to PII for this destination. Use the Restrict PII access policy option to prevent users from viewing data marked as PII anywhere in Amperity and from sending data to downstream workflows. |

|
Configure the following settings, and then click “Save”. Cohort Name
User ID Field
|

|
After configuring this destination users may use orchestrations to send query results Braze Cohorts. |

|
Validate the audience with Braze Cohorts by using a sample audience with a very small membership. For example: 10 or 100 members or the minimum audience size recommended by Braze Cohorts. Send the sample audience to Braze Cohorts and verify the sample audience is correct in Braze Cohorts. Make adjustments if necessary. Only send full audiences after validation is complete. |
Build a query
Build a query that returns a list of users matched by their external_id, device_id, or an alias.
external_id and alias should be used with known users
device_id should be used with anonymous users
SQL example
SELECT
  external_id
FROM Customer360
WHERE email IS NOT NULL
Using a different ID field
If your Braze users are identified by email or a custom field, return that column and set the User ID Field setting to match:
SELECT
  c360.email AS external_id
FROM Customer360 c360
For example associating anonymous web traffic with the device_id:
SELECT
  web_device_id AS device_id
FROM Web_Events_Table
Tip
Test with a small audience first (for example, add LIMIT 100) before running a full sync.
Important
Users with a NULL value in the ID field are automatically skipped and not sent to Braze.
Add orchestration
To send cohorts to Braze, add an orchestration that connects your query or segment to the Braze Cohorts destination.
To add an orchestration for Braze Cohorts
|
|
Navigate to the Activations page and click Add orchestration. |
|
|
Select the query or segment you built that returns user IDs. |
|
|
Select the Braze Cohorts destination. |
|
|
Configure the destination settings:
|
|
|
Set the workflow to Manual initially. Click Save. |
|
|
From the Activations page, select your orchestration and click Run. Monitor status. When complete, the cohort will be available in Braze. In the Braze dashboard, navigate to Segments and filter by the cohort name to verify users were imported. |
Workflow actions
A workflow will occasionally show an error that describes what prevented a workflow from completing successfully. These first appear as alerts in the notifications pane. The alert describes the error, and then links to the Workflows tab.
Open the Workflows page to review a list of workflow actions, choose an action to resolve the workflow error, and then follow the steps that are shown.
|
|
You may receive a notifications error for a configured Braze Cohorts destination. This appears as an alert in the notifications pane on the Destinations tab. 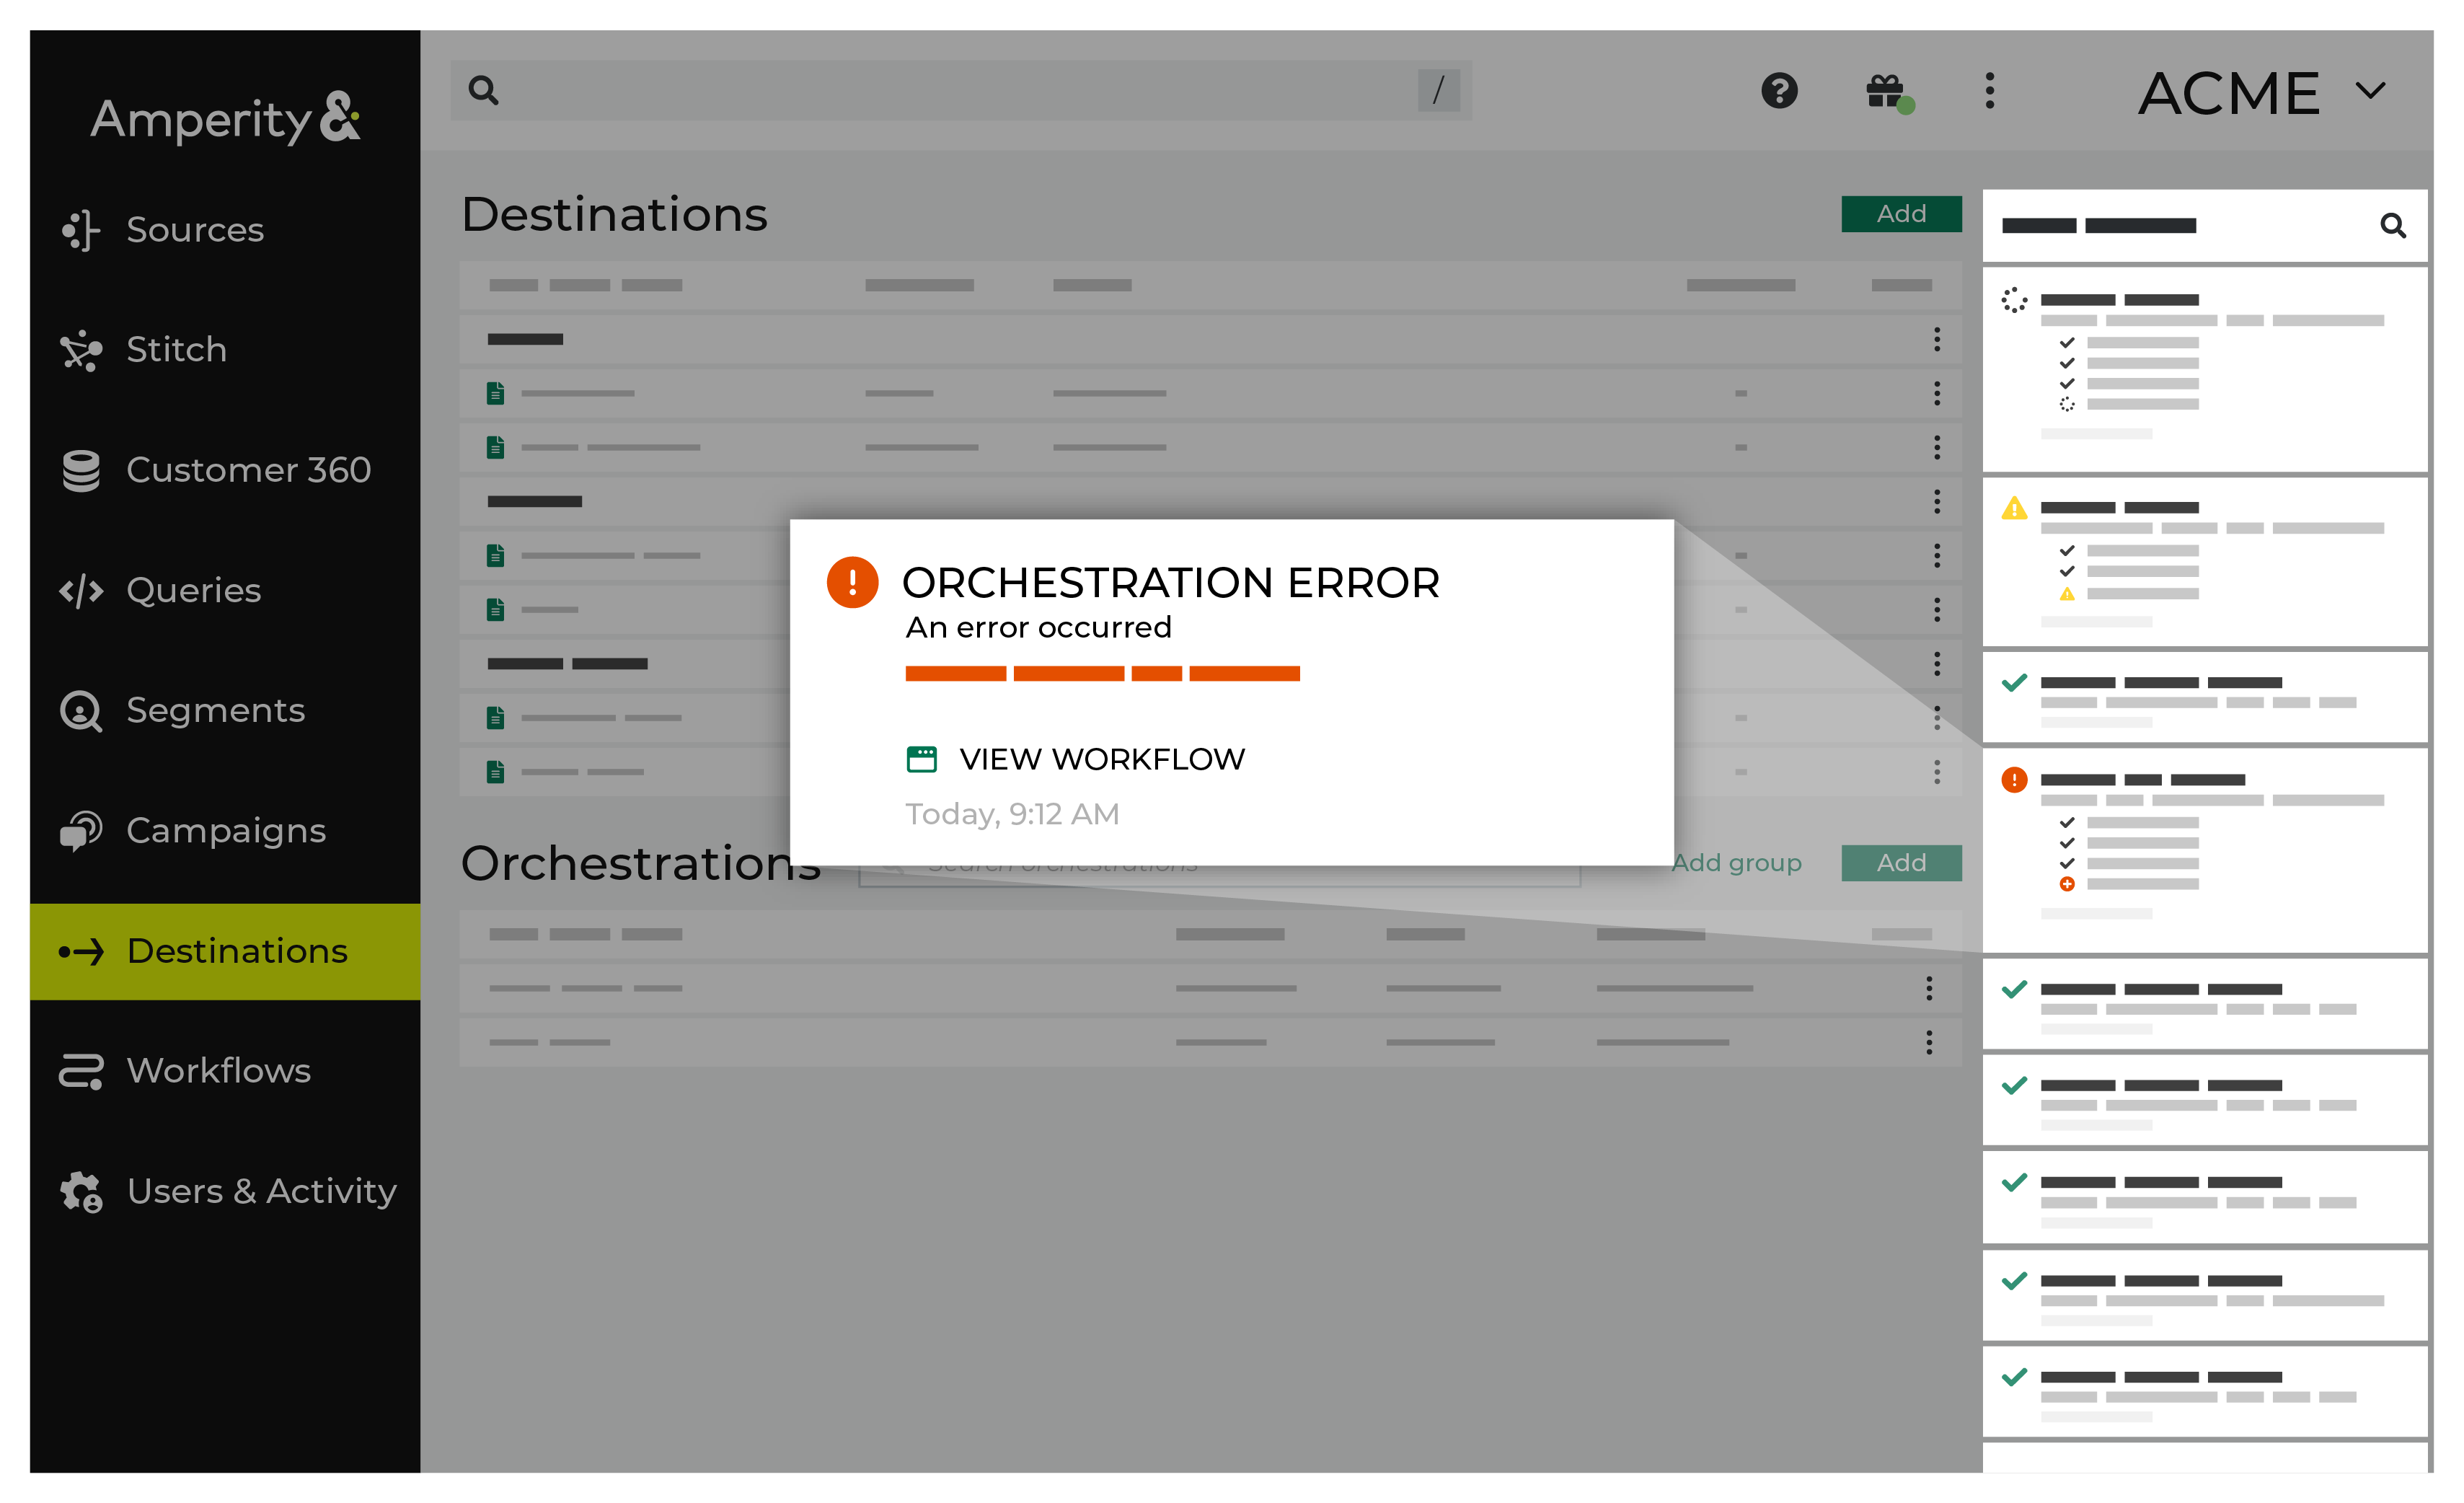
If you receive a notification error, review the details, and then click the View Workflow link to open this notification error in the Workflows page. |
|
|
On the Workflows page, review the individual steps to determine which steps have errors that require your attention, and then click Show Resolutions to review the list of workflow actions generated for this error. 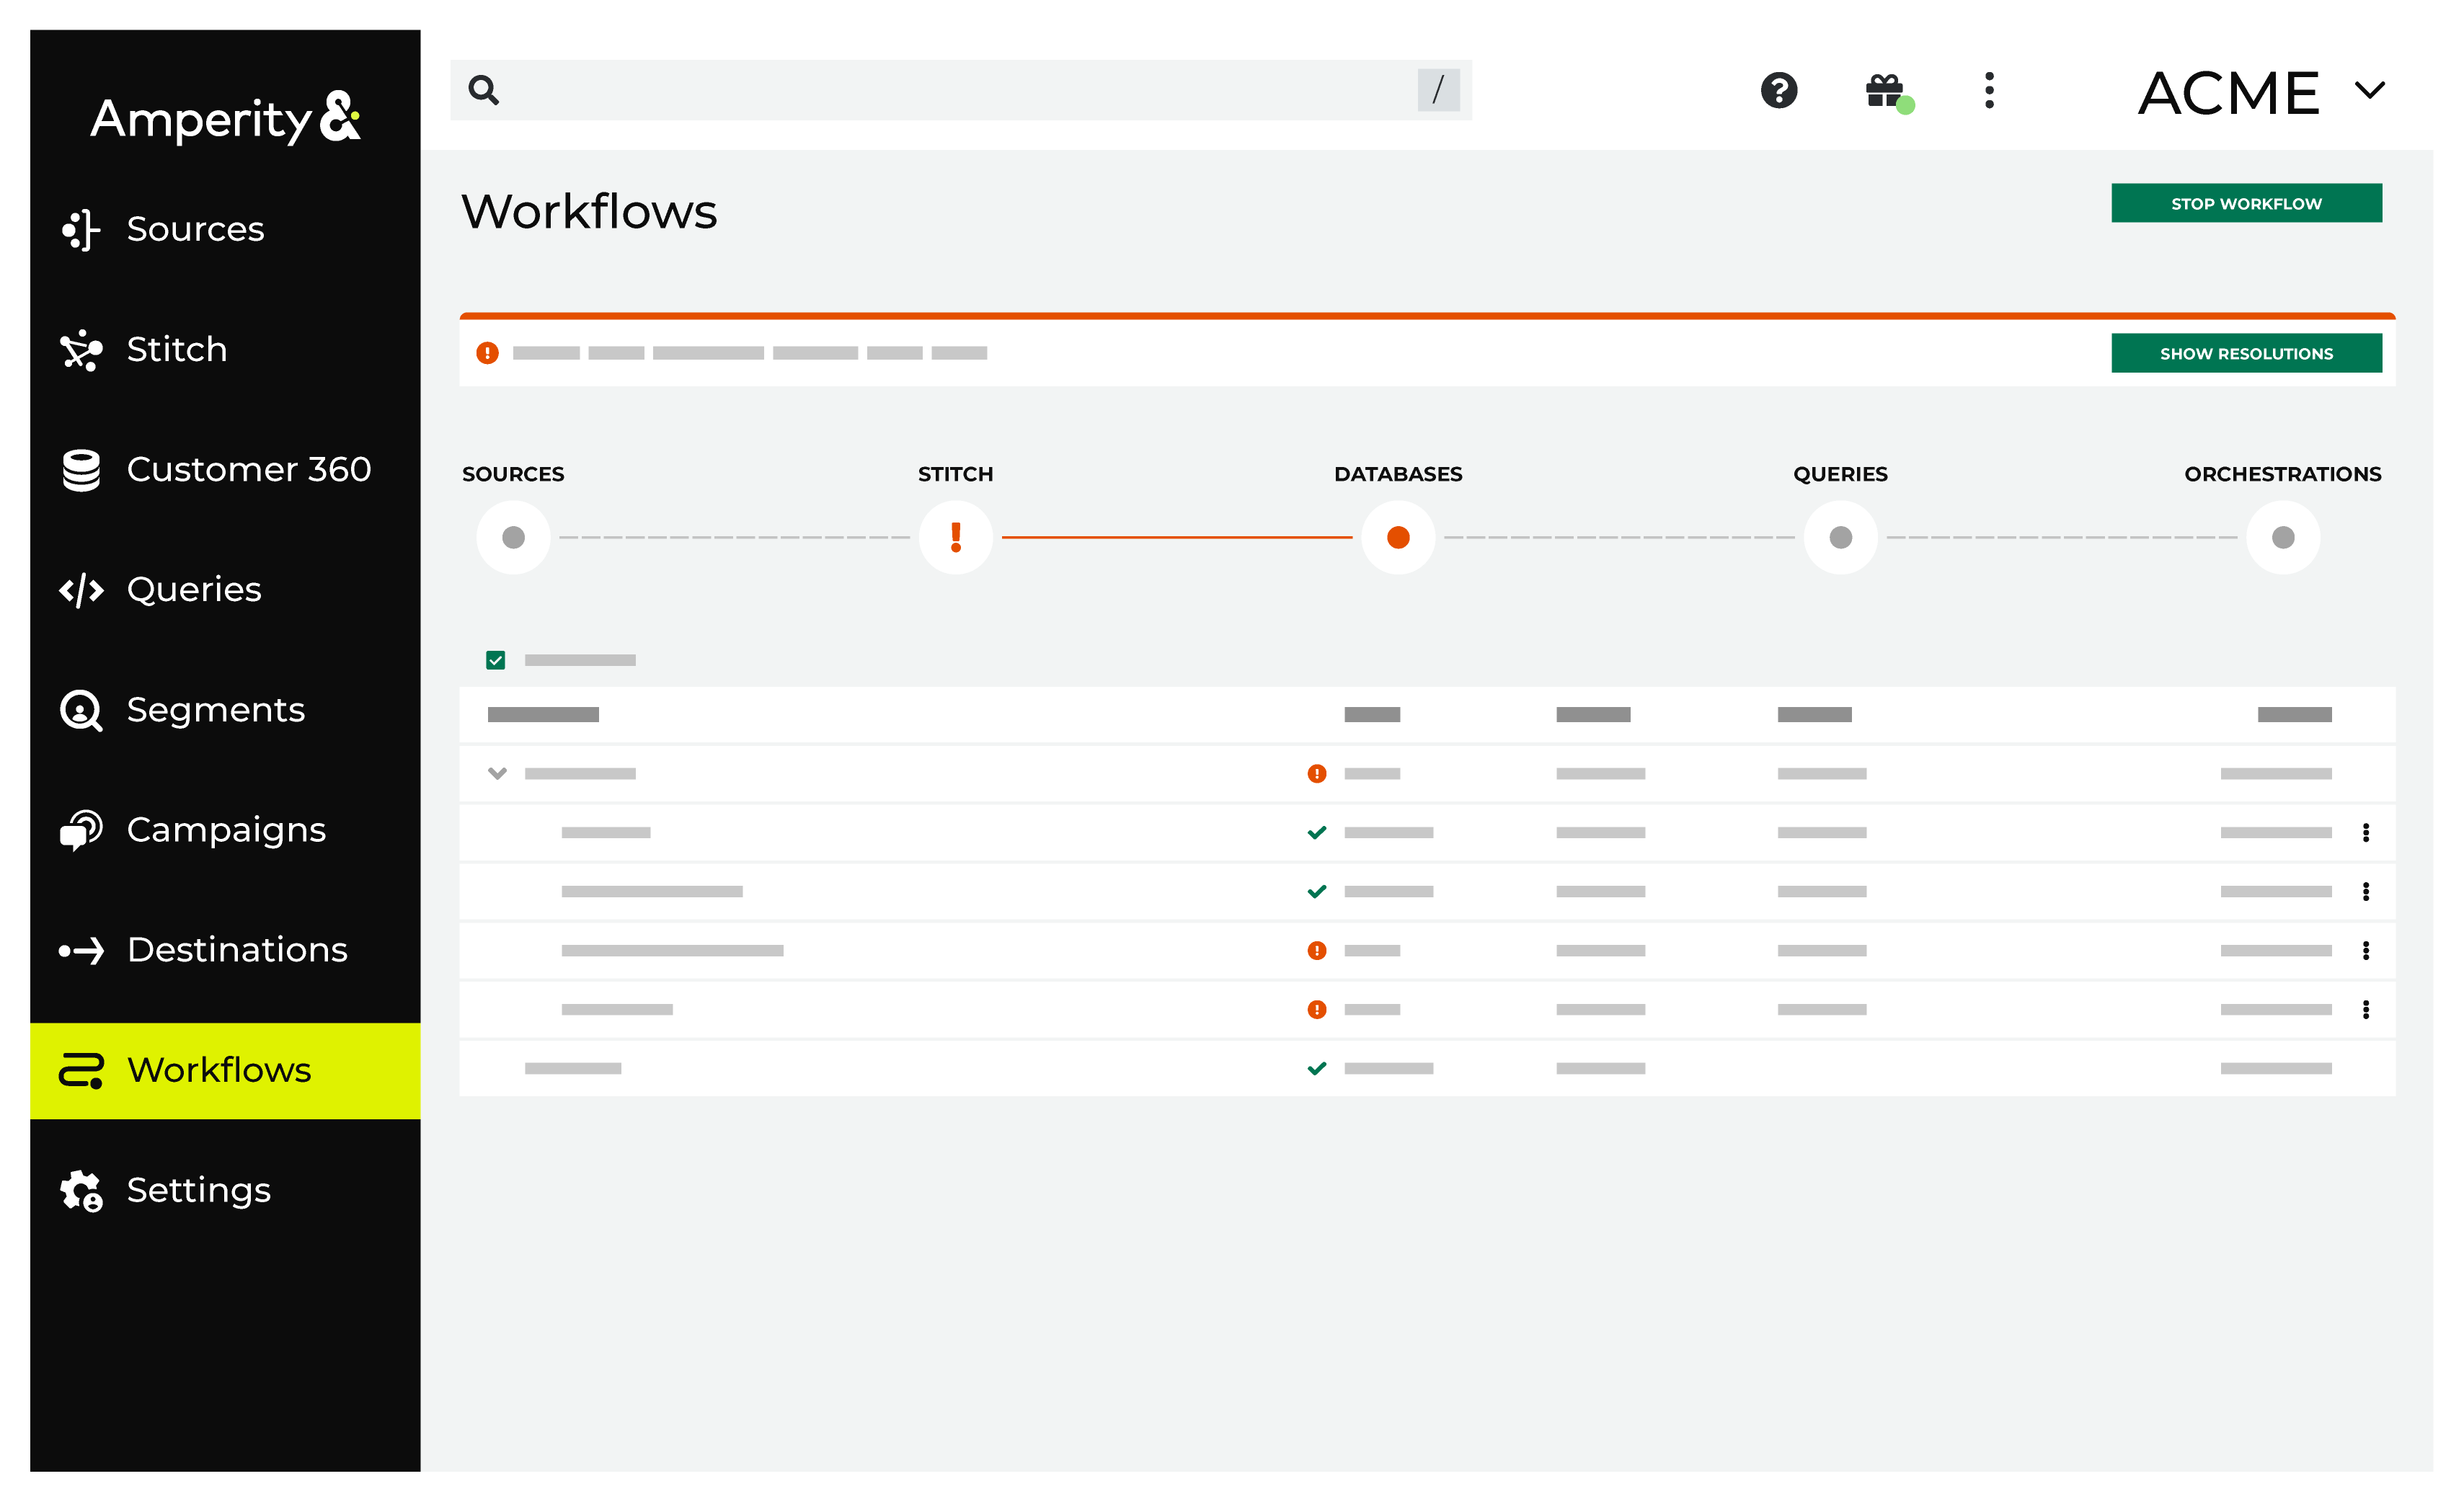
|
|
|
A list of individual workflow actions are shown. Review the list to identify which action you should take. Some workflow actions are common across workflows and will often be available, such as retrying a specific task within a workflow or restarting a workflow. These types of actions can often resolve an error. In certain cases, actions are specific and are shown when certain conditions exist in your tenant. These types of actions typically must be resolved and may require steps that must be done upstream or downstream from your Amperity workflow. Amperity provides a series of workflow actions that can help resolve specific issues that may arise with Braze Cohorts, including: |
|
|
Select a workflow action from the list of actions, and then review the steps for resolving that error. After you have completed the steps in the workflow action, click Continue to rerun the workflow. |
Invalid credentials
The Client Data Import Key is incorrect or has expired.
To resolve this error:
Log in to the Braze dashboard.
Navigate to Partner Integrations > Technology Partners > Amperity.
Verify the Data Import Key is correct and has not expired.
Open the Credentials page in Amperity and update the credential if required.
Return to the workflow action, and then click Resolve to retry this workflow.
Wrong instance
A 401 error may occur if the Instance value does not match your account’s actual region.
To resolve this error:
Verify the instance string matches your Braze account region.
The instance can be found in your Braze dashboard URL. For example, if your URL is
https://dashboard-03.braze.com, the instance is “US-03”.Open the destination settings in Amperity and update the Instance value if required.
Return to the workflow action, and then click Resolve to retry this workflow.
Users not appearing in Braze
Users may not appear in cohorts in Braze if the external_id values in Amperity do not match the IDs in Braze.
To resolve this error:
Verify the user ID field configured in Amperity matches how users are identified in your Braze account.
Check that your query returns the correct user ID column.
Ensure users in Amperity have matching records in Braze.
Return to the workflow action, and then click Resolve to retry this workflow.
Note
The cohort sync does not create new user profiles in Braze. Users included in the Amperity audience who do not already have a Braze profile will be omitted.