About storage
Amperity stores the following outputs in Amazon S3 storage or Azure Blob Storage, depending on the cloud platform in which your Amperity tenant is provisioned. These outputs include:
Data that was ingested to Amperity, and then loaded to domain tables
Tables that are maintained by Stitch
Stitch reports
Validation reports
Database tables
File uploads
SQL results, including Spark SQL checkpoints
Orchestration and campaign results
User audit logs
Conversations with Amp AI
Warning
Configured storage applies only to new Amperity tenants that are provisioned for Amazon S3 or Microsoft Azure.
Amperity Learning Lab
Amperity stores outputs in Amazon S3 or Azure Blob Storage, depending on your cloud platform.
Open Learning Lab to learn more about configuring Amazon S3 storage and configuring Azure storage for Amperity. Registration is required.
Choose storage location
The location in which Amperity stores outputs is configurable. The first step for a new tenant allows your brand to choose one of the following storage locations:
An Amazon S3 storage location that is owned and managed by your brand.
or
A Microsoft Azure Blob Storage location that is owned and managed by your brand.
An Amazon S3 storage location that is only used by your tenant that is provisioned automatically by default and managed by Amperity.
or
A Microsoft Azure Blob Storage location that is only used by your tenant that is provisioned automatically by default and managed by Amperity.
Provision storage on Amazon AWS
Configure a new tenant to use an Amazon S3 storage location that is owned and managed by your brand.
To provision storage on Amazon AWS

|
Choose a storage location
|
||||||||
|
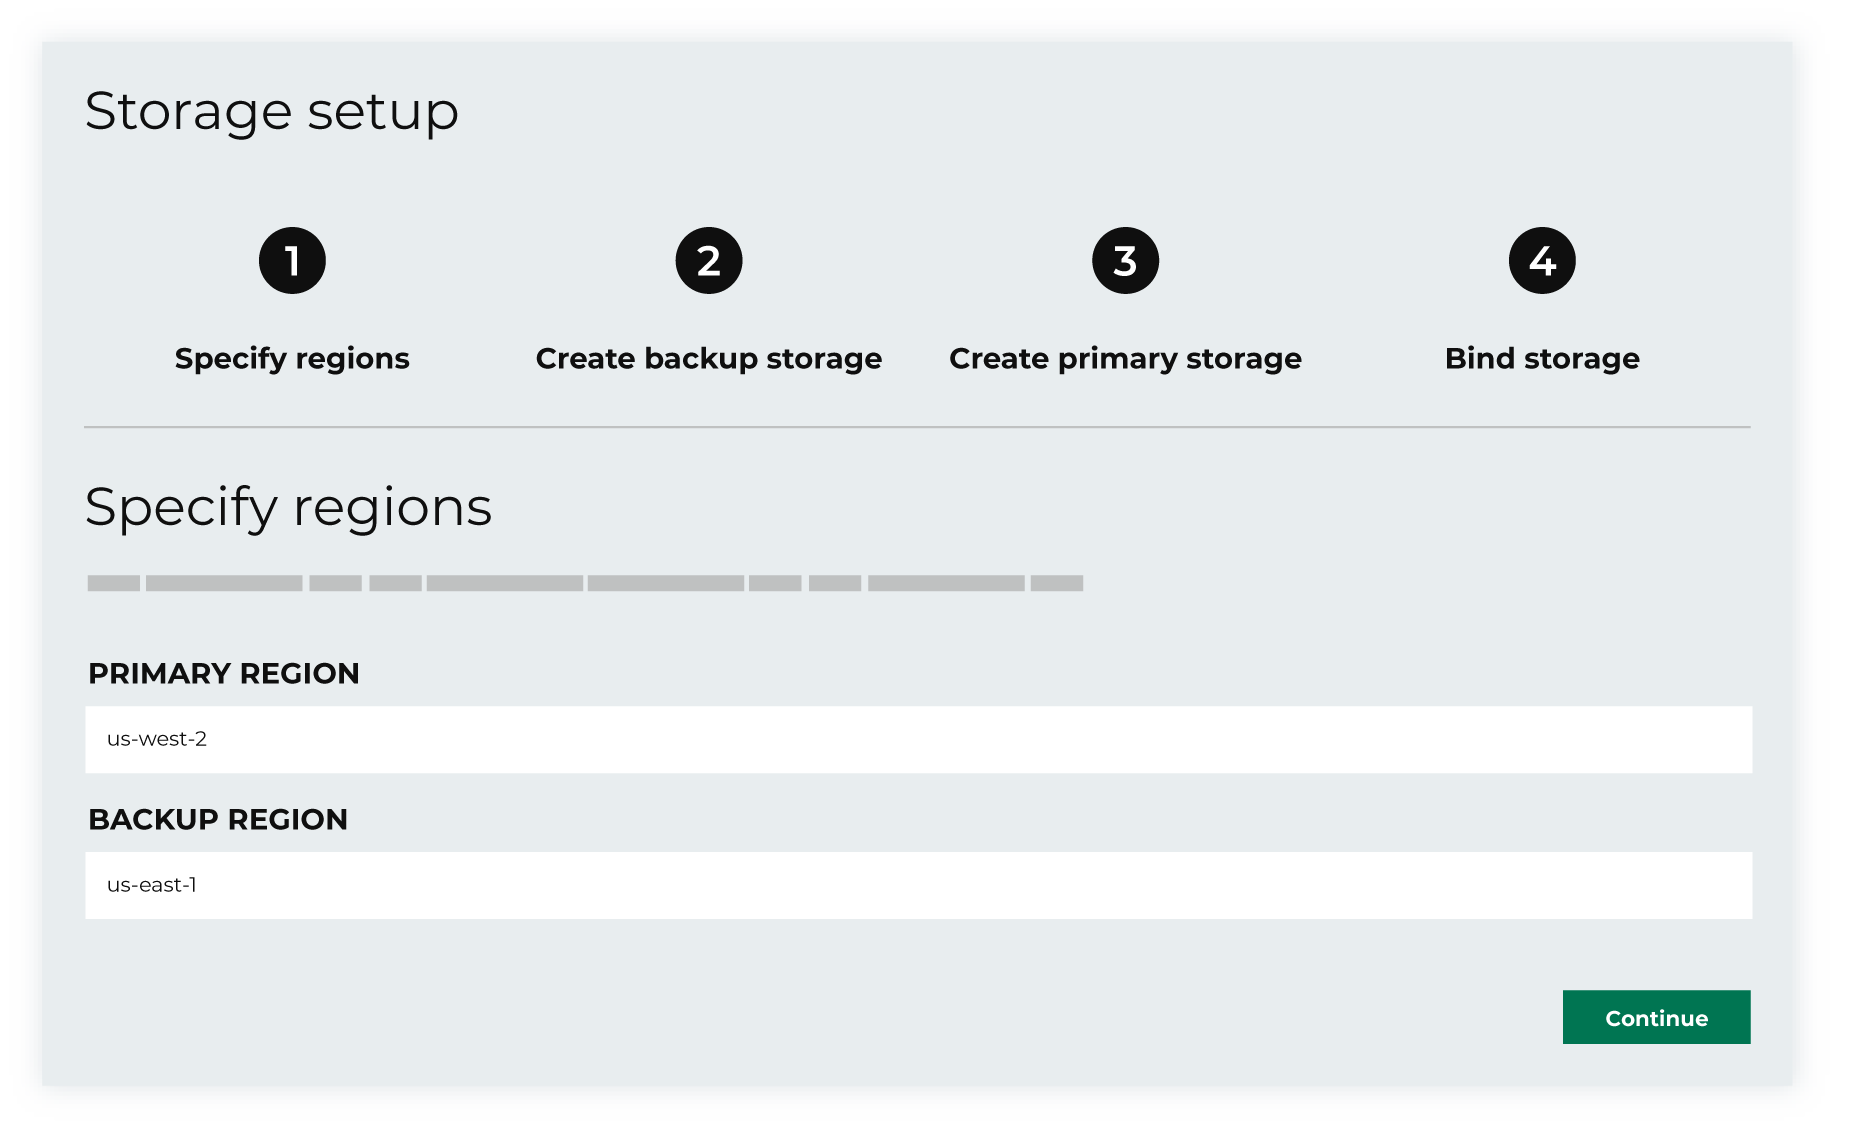
Specify regions Specify the regions in which your brand wants to configure primary and backup storage, and then click Continue. The region for primary storage should be the same region in which Amperity is hosted. Note Amperity is hosted in one of the following Amazon AWS regions:
Cross-region transfer costs will apply when Amazon S3 storage is configured in different region than the one in which your Amperity tenant is hosted and will increase latency. |
||||||||
|
Create backup storage Backup storage is provisioned using AWS CloudFormation.
|
||||||||

|
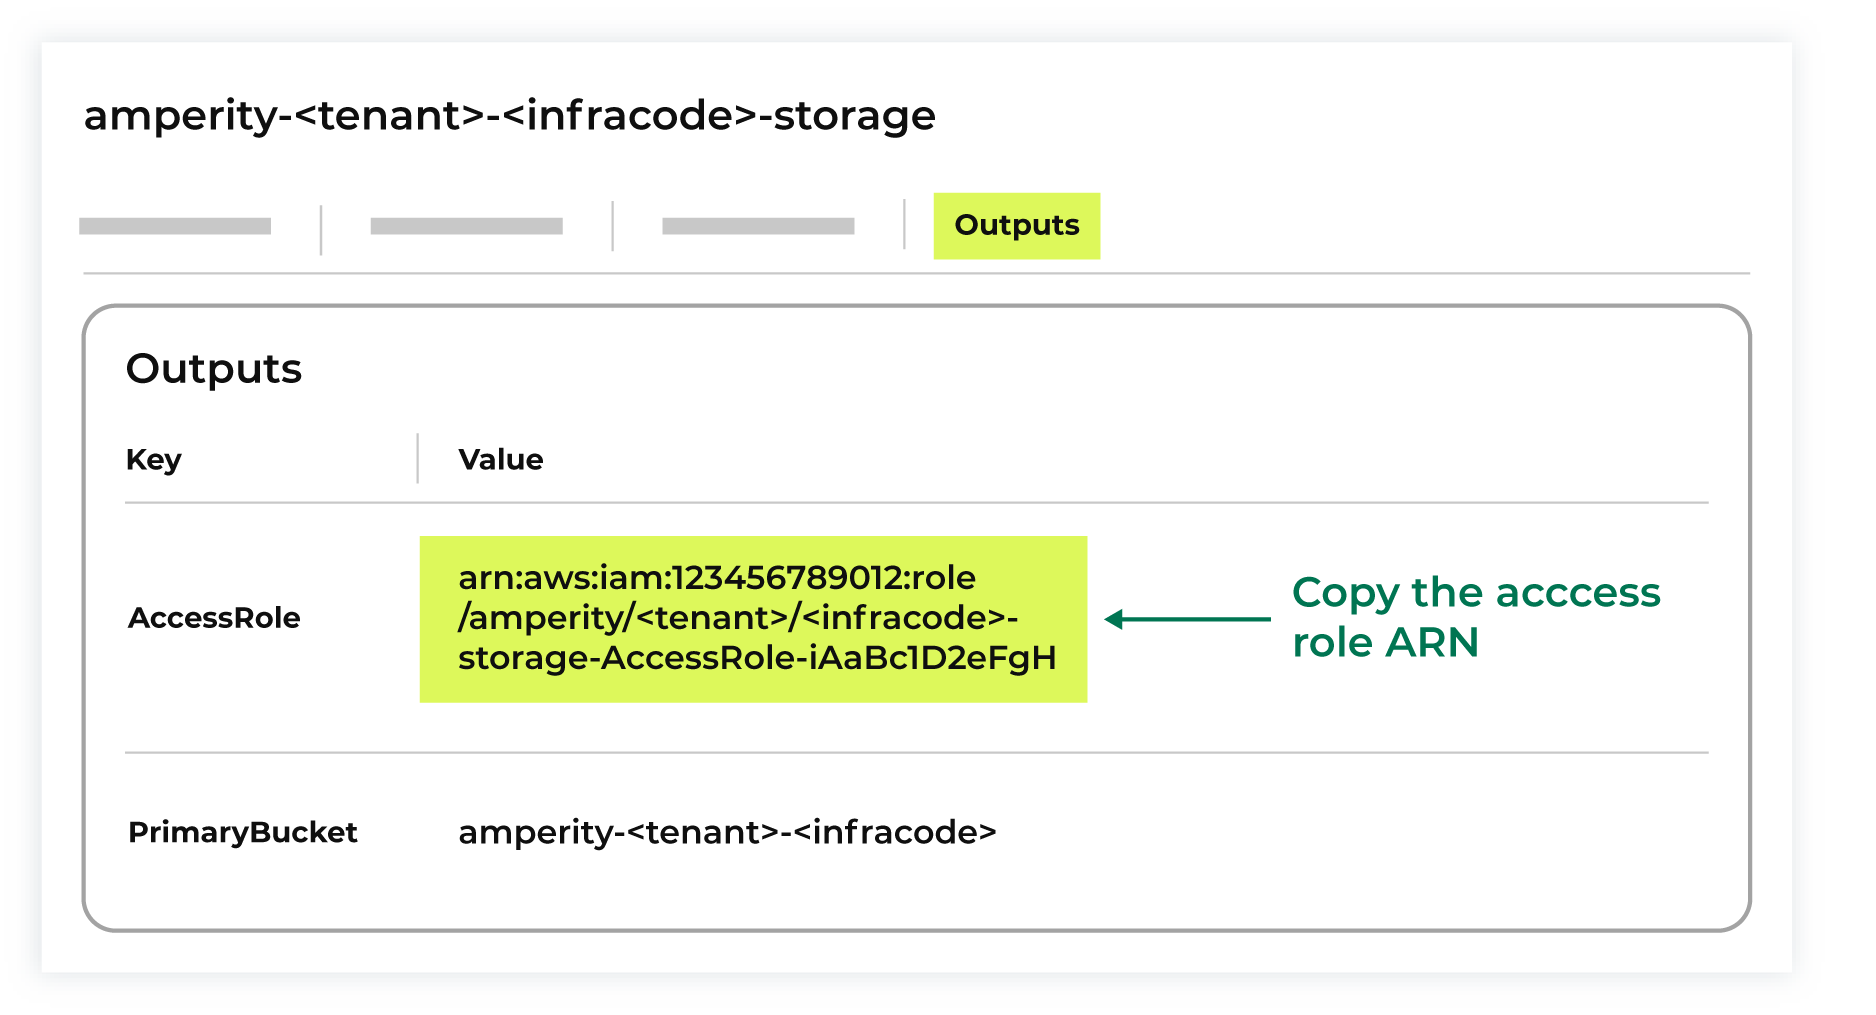
Create primary storage Primary storage is provisioned using AWS CloudFormation. Important The values for primary storage are prepopulated using the information that was provided for backup storage. You may change these values in AWS CloudFormation, if necessary.
|
||||||||

|
Bind storage After backup storage and primary storage are provisioned test the connection between Amperity and provisioned storage.
After the storage setup workflow is finished you are redirected to your tenant and can configure identity resolution. |
Provision storage on Microsoft Azure
Configure a new tenant to use a Microsoft Azure Blob Storage location that is owned and managed by your brand.
To provision storage on Microsoft Azure
|
|
Choose a storage location
|
||||
|
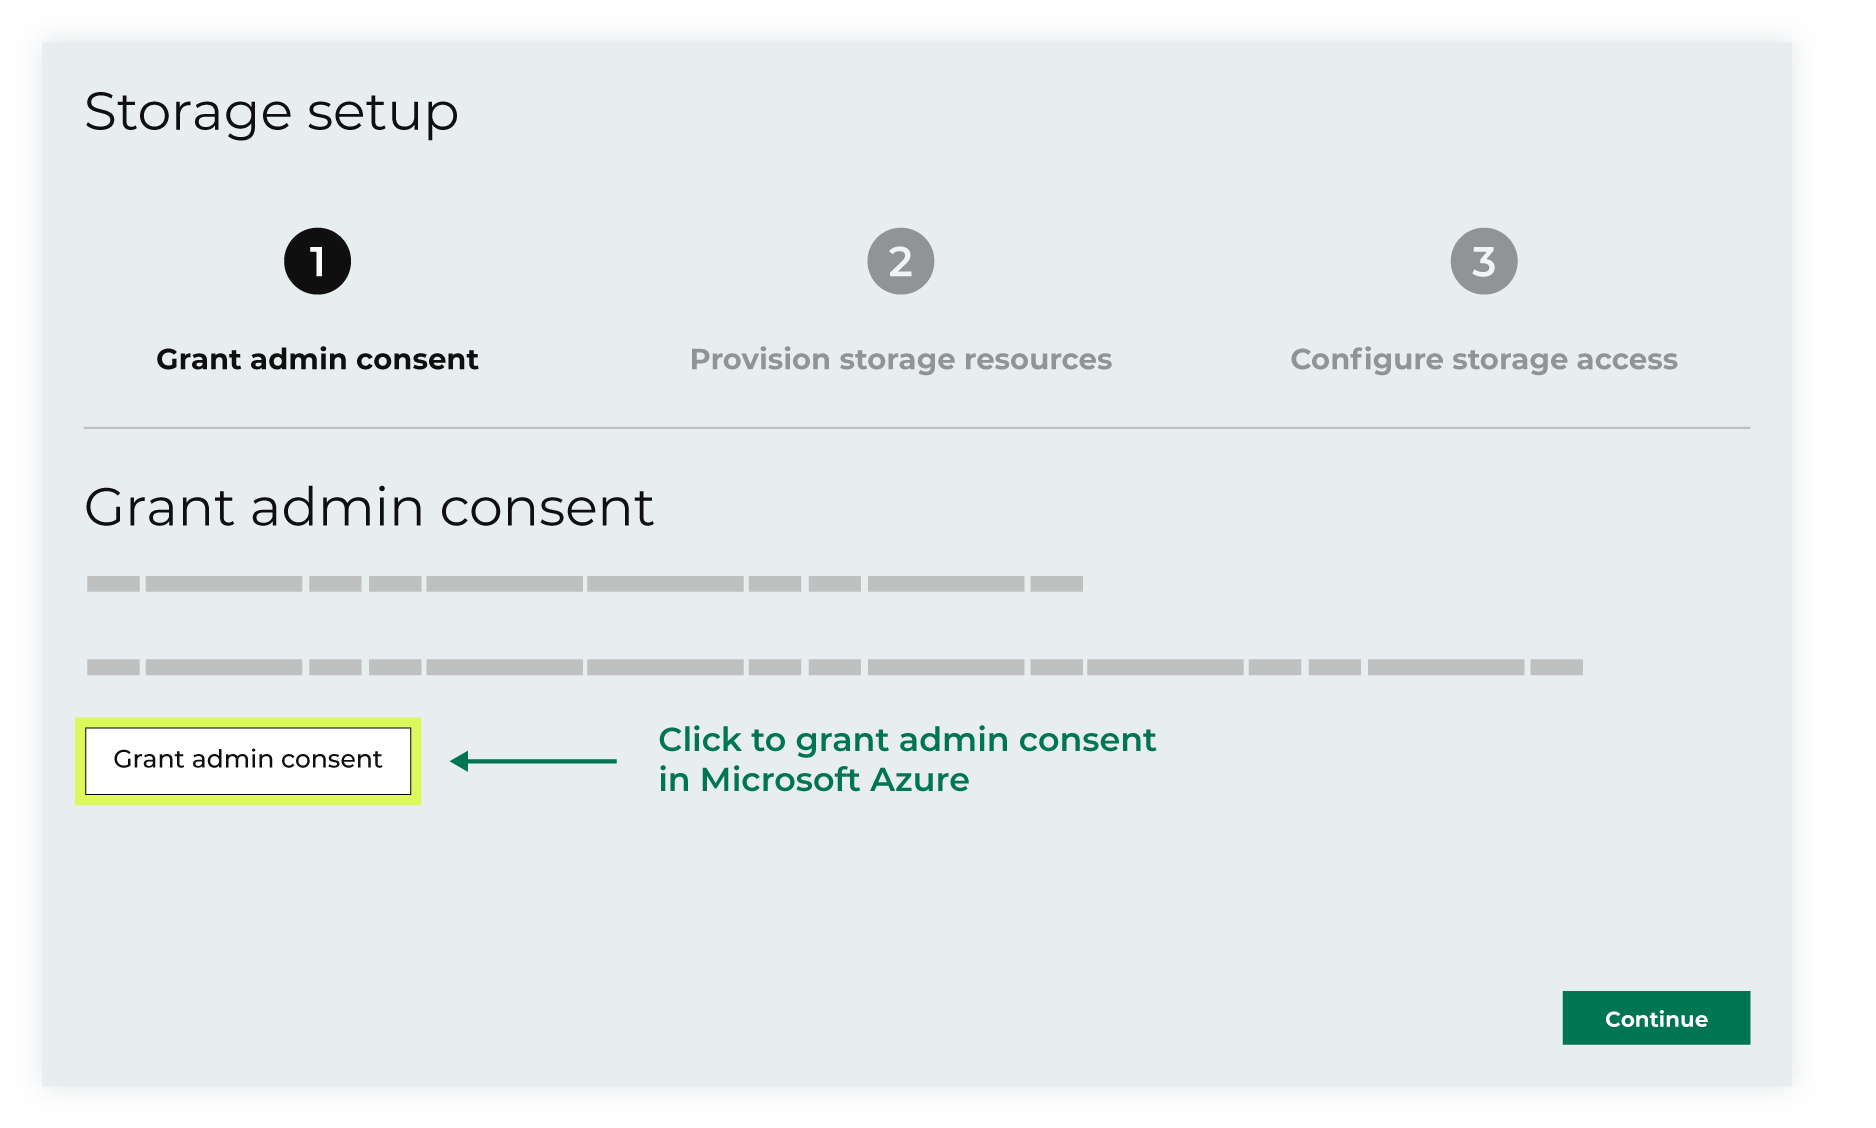
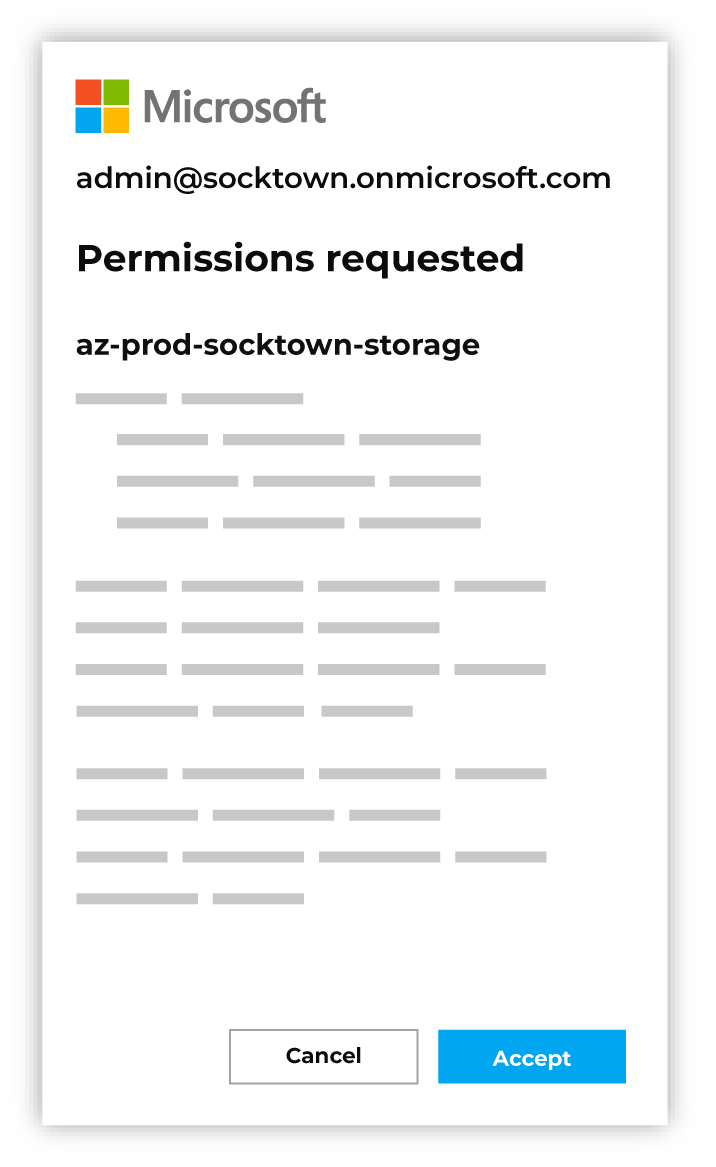
|
Grant admin consent Your brand must allow Amperity as an enterprise application within your Microsoft Azure account by granting Amperity admin consent . Important This step must be done by a Microsoft Azure user account with one of the following administrator roles: “Privileged Role”, “Cloud Application”, or “Application”.
|
||||
|
|
Provision storage resources Amperity requires the Object ID for the Microsoft Azure application to generate a deployment template. Note The Name of the enterprise application is shown on the Provision storage resources page and is a string. For example:
|
||||
|
|
Configure storage access The last step is to configure permission for Amperity to access your brand’s Microsoft Azure storage resources. This requires a tenant ID and a subscription ID. 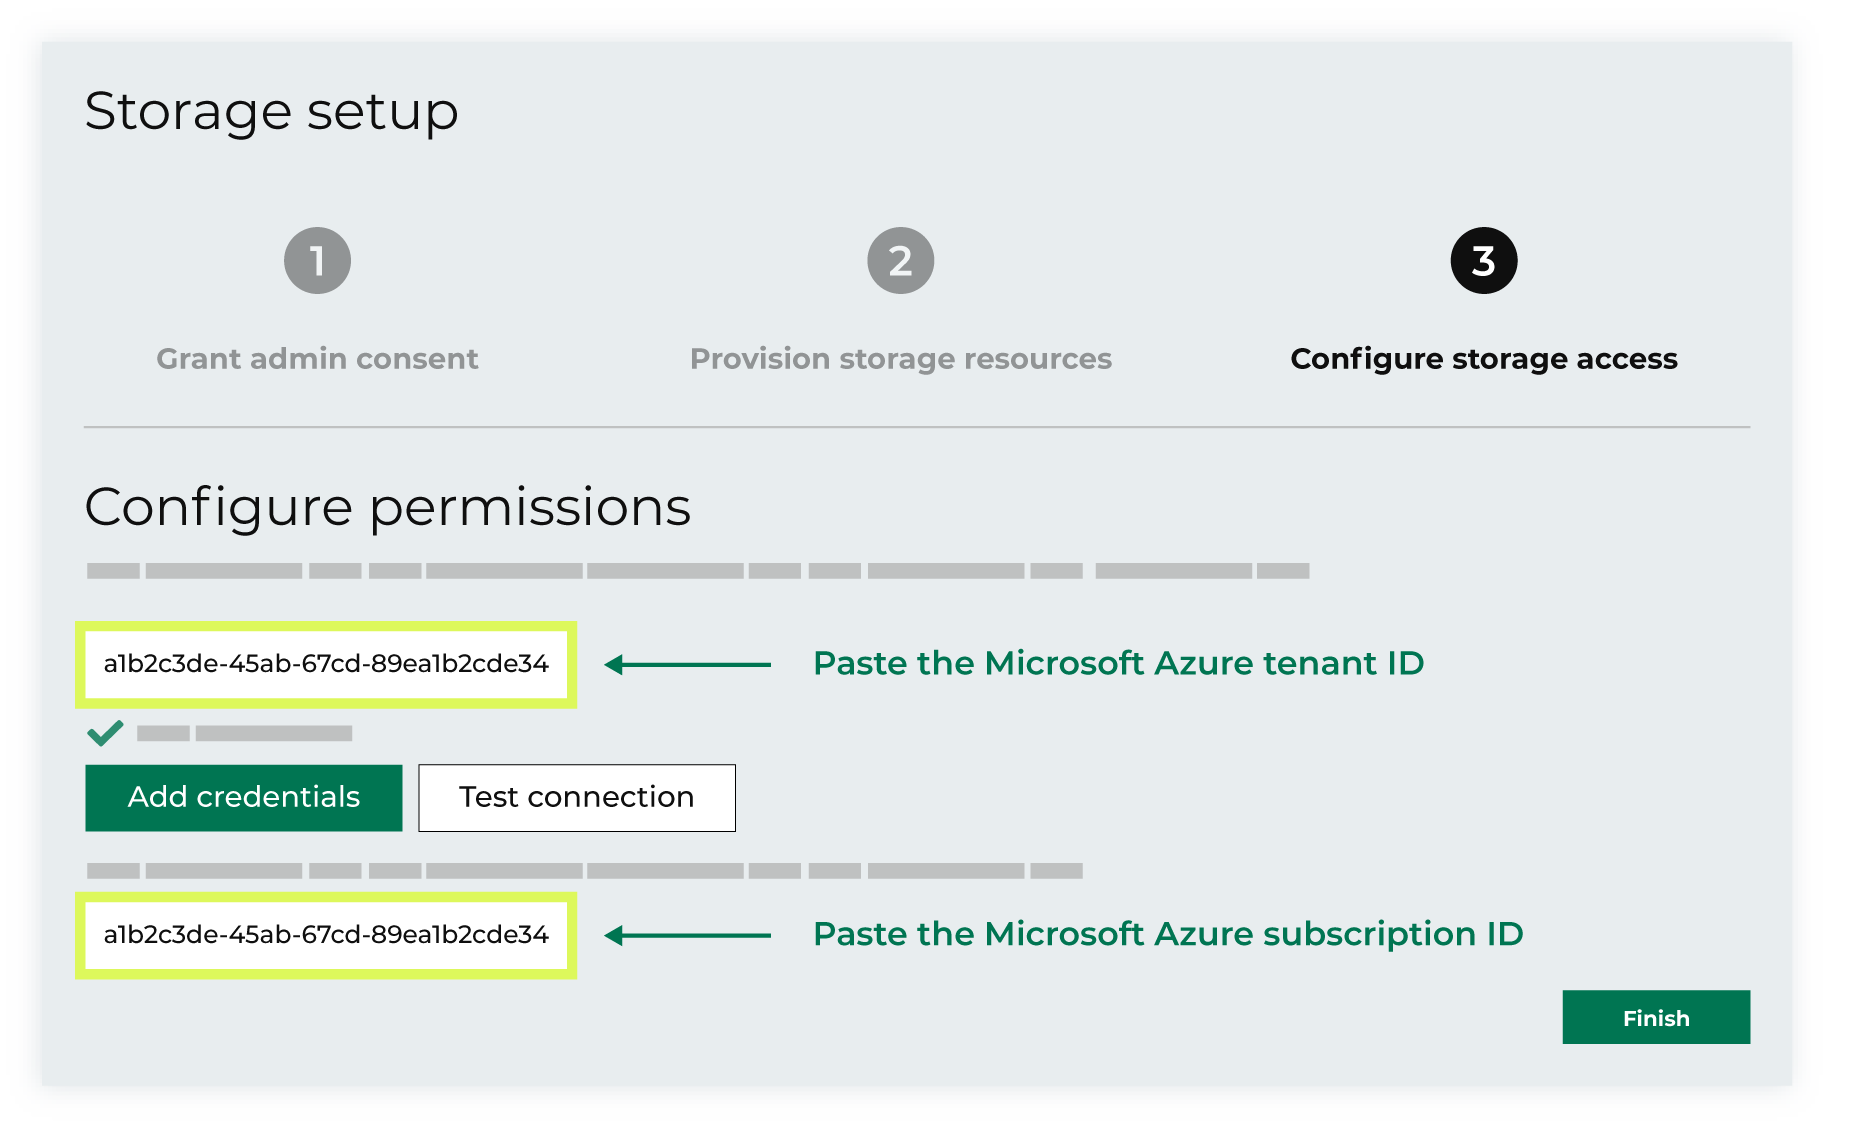
|