
Send data anywhere
Sending data from Amperity is a combination of three things: building a query, linking the results of that query to an orchestration that sends the results to a destination, and then monitoring the workflow to ensure that your data safely makes it downstream.
This is part two of a series of topics that describes how this works.
Build queries using Presto SQL. A SELECT statement, along with standard clauses, operators, and functions, is all you need to return data that support any use case.
An orchestration connects the results of your query to a workflow that sends those results to its destination.
A workflow manages the process of sending that data to the selected destination.
Note
Each workflow is monitored by Amperity. You may see notifications about the state of the workflow within the Queries and Destinations pages. Depending on the type of notification, you may be directed to a workflow actions page that will actively help you troubleshoot issues within that workflow.
The following sections describe the steps you’ll follow to use an orchestration to send the results of a query to a destination.

|
An orchestration connects the results of a query to a workflow that sends those results to a destination. Open the Destinations page, scroll down, and then click the Add Orchestration button to open the New Orchestration dialog box. |
|
The New Orchestration dialog box is a series of picklists. Configuring the orchestration to use a query, and then select the name of the query for which you want to send results. 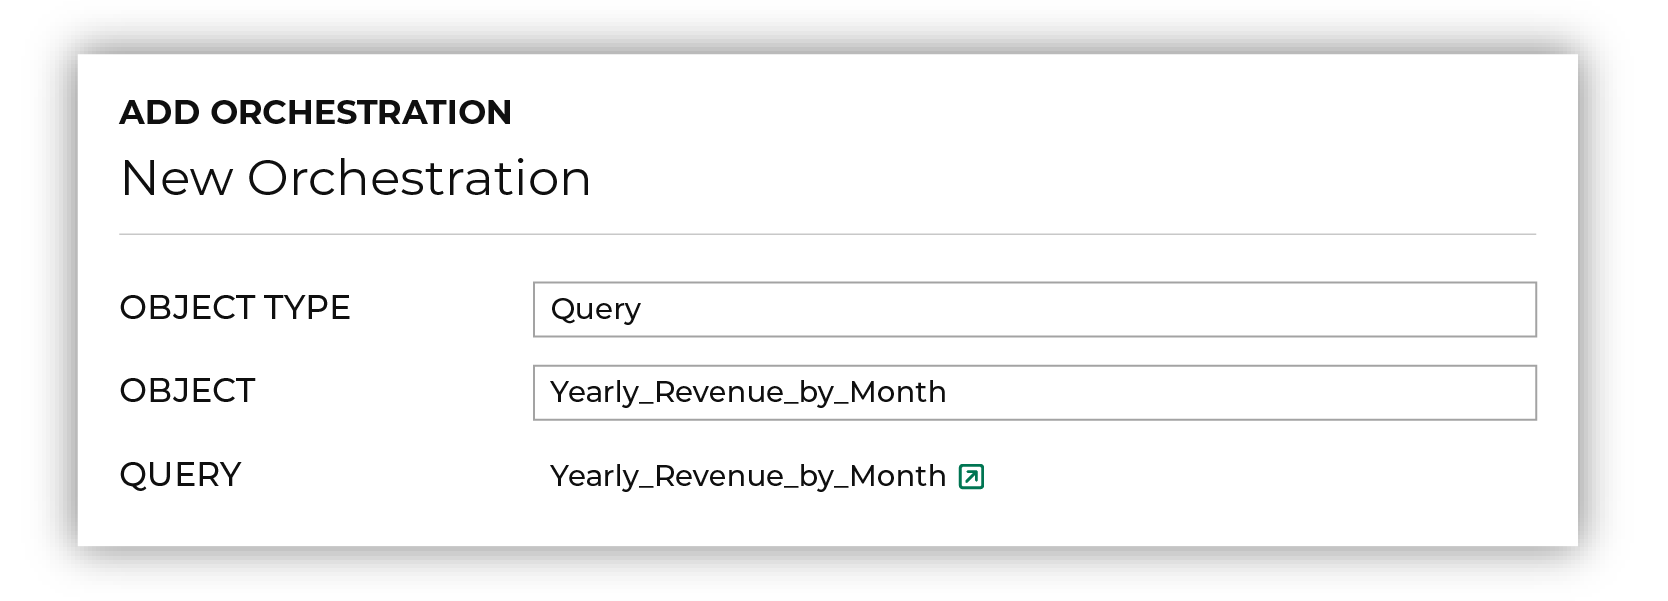
|
|
Each orchestration is configured to send query results to a single destination. This destination must already be configured for your tenant, along with a data template that defines how the results are formatted for this destination. For example, these query results will be sent to a dashboard in Domo. Choose the “Domo S3” destination and the “Domo S3 CSV Files for Dashboards” data template. 
|
|
Each data template has a series of settings that may be configured from an orchestration. When you select the data template, the template-specific settings are shown, many of which are preconfigured with the correct configuration settings. In this example, query results are sent to a customer-managed Amazon S3 bucket, from which the data is loaded to Domo as a DataSet . No updates are required for the template-specific settings because the data template has already configured them with the correct settings. 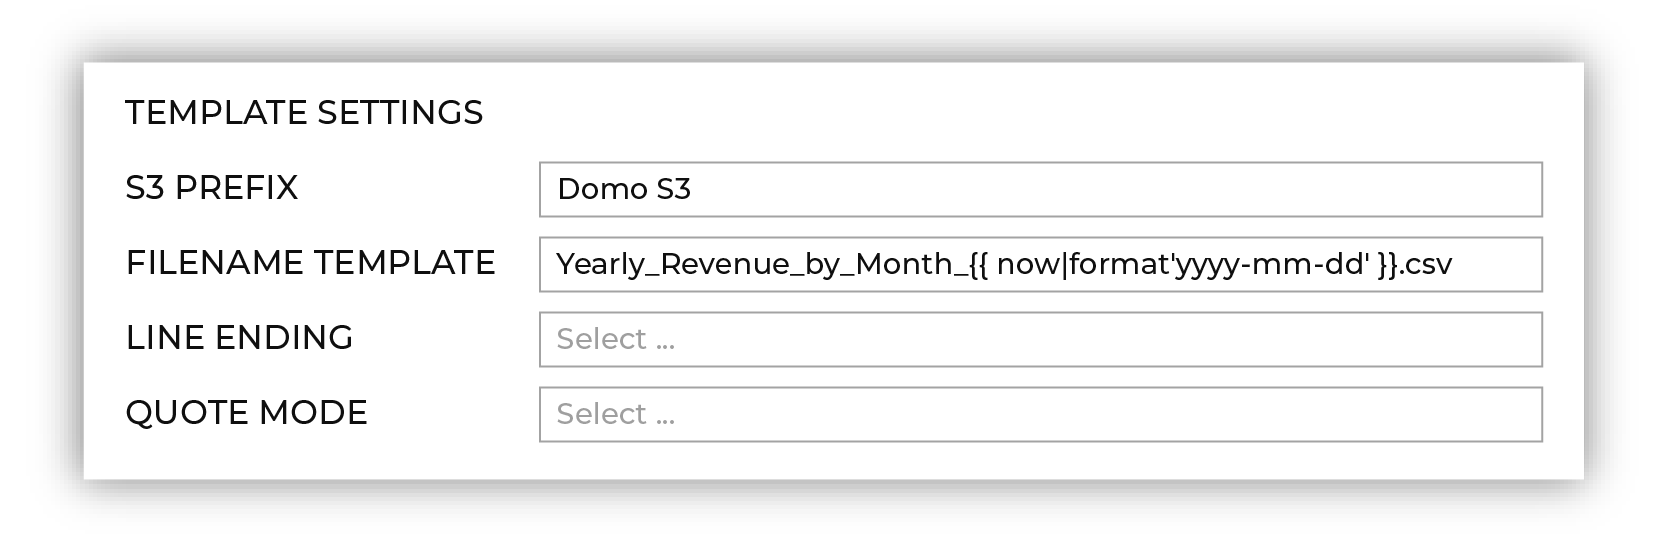
|

|
A good dashboard should always have updated data, which means this orchestration should send data on a regular basis. 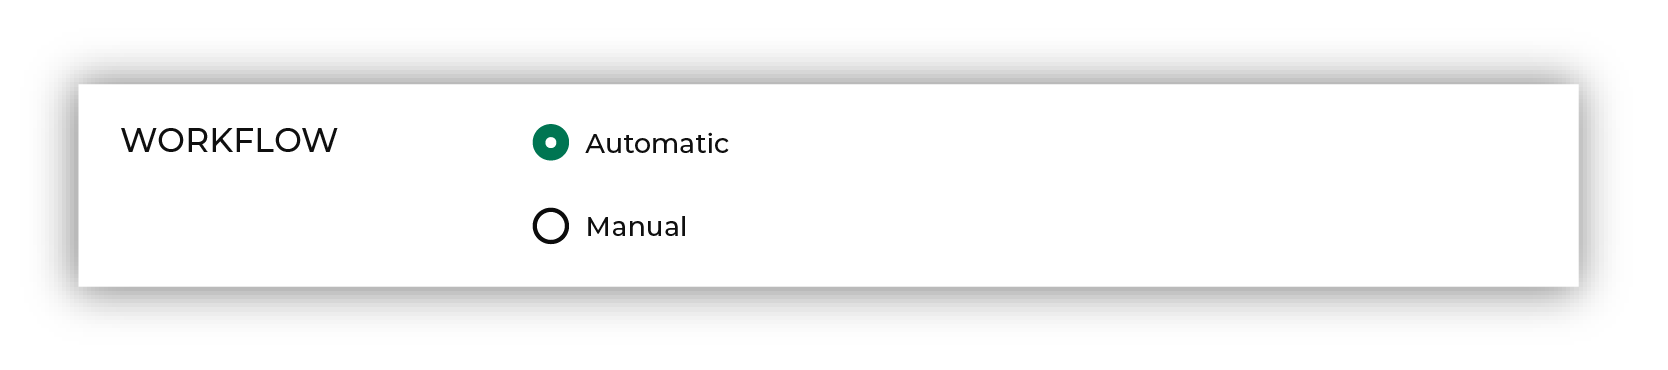
Tip The first time you send data to a destination you should use a “Manual” workflow, but after you have verified that it worked correctly you can set it to “Automatic”. |

|
Review all settings, and then click Save. 
|