
Send audiences to Braze
You can send customer profile and custom attributes to Braze using segments and campaigns. Build a segment that returns a list of active customers, and then associate that list of active customers with the custom attributes that you want to update in Braze. Configure a campaign to send the audience of active customers as often as you need, and then configure a second campaign to send less frequently updates for all custom attributes.
This topic describes the steps required to configure campaigns to send custom attributes to Braze.
Note
Ask your DataGrid Operator or your Amperity representative for help configuring Braze as a destination to which you can send campaigns for customer activation.
About Braze attributes
Attributes in Braze describe your customers.
Profile attributes describe who your customers are. For example: names, birthdates, email addresses, and phone numbers.
Custom attributes describe how your customers have interacted with your brand. For example: purchase histories, loyalty status, and value tiers.
When user profile fields and custom attributes are available in Braze they can be used to build out audience segments and to apply personalization to your campaigns.
Customer profiles
Attributes in Braze describe your customers.
Profile attributes describe who your customers are. For example: names, birthdates, email addresses, and phone numbers.
Custom attributes describe how your customers have interacted with your brand. For example: purchase histories, loyalty status, and value tiers.
When user profile fields and custom attributes are available in Braze they can be used to build out audience segments and to apply personalization to your campaigns.
What about email and phone subscription status?
Braze uses two fields to track email and phone subscription status: email_subscribe and push_subscribe. Braze should be your source of truth for customer consent and for tracking email and phone subscription status.
A campaign can send customer profile data to Braze when attributes are configured to match exactly the names of the user profile fields in Braze:
The following table describes the default user profile fields that are most commonly updated from Amperity:
Braze default field |
Amperity field name |
Description |
|---|---|---|
external_id |
varies |
Required. The external_id is a unique identifer for user profiles in Braze. The external_id is a unique identifier that exists in another system, such as the Amperity ID, a loyalty ID, or some other unique customer identifier. |
first_name |
given_name |
Optional. |
last_name |
surname |
Optional. |
Optional. |
||
phone |
phone |
Optional. |
home_city |
city |
Optional. |
country |
country |
Optional. Must be in ISO 3166-1 alpha-2 format. |
dob |
birthdate |
Optional. Must be in “YYYY-MM-DD” format. |
gender |
gender |
Optional. Accepted values: “M”, “F”, “O” (other), “N” (not applicable), “P” (prefer not to say), or NULL. |
Note
Default user profile fields also exist for alias_name, alias_label, current_location, date_of_first_session, date_of_last_session, email_open_tracking_disabled, email_click_tracking_disabled, email_subscribe, facebook, language, marked_email_as_spam_at, push_subscribe, push_tokens, subscription_groups, time_zone, and twitter.
These fields are not commonly sent to Braze from Amperity, but if your brand chooses to update these user profile fields from Amperity, be sure to use the exact name of the default field name, send the correct value (or values), and to use lowercase.
Custom attributes
Custom attributes in Braze are represented by a set of custom-named fields. The names of these fields are determined by your brand. They may already exist in Braze, in which case you will want to shape the output that is sent from Amperity to align to the names you already have.
The names of custom attributes that can be managed by Amperity are defined by your brand. The names are strings, may contain hyphens, spaces, or underscores, may include numbers, and may contain a mix of lowercase and uppercase letters. For example, custom attribute can have names that:
Already exist within your organization.
Are exactly the same as Amperity standard output, such as “One and Done” or “L12M Monetary” (the “monetary” component of an RFM score), or “Early Repeat Purchaser”.
Align to marketing goals and/or terminology that exists within your brand’s segmentation strategy.
Verify the names of custom attributes that will be sent to Braze from Amperity. Amperity will add a custom attribute whenever there isn’t a matching name.
Tip
Avoid sending custom attributes as duplicates of default user profile fields. For example, birthdates should be sent to Braze as a user profile field named “dob”. If they are sent as “birthday”, “Birthdate”, or any other string, a custom attribute will be created and the values in the “dob” field will not be updated.
Important
Your brand’s list of custom attributes should be a list that is mostly static, remains stable over time, and is focused on your most valuable customers.
Only update custom attributes for customers to which your brand is currently engaged. Define an audience in Amperity that is some combination of “high value” (historical or predicted), “active” (has purchased recently), and are “contactable” (with an opt-in status of true for phone numbers and/or email addresses).
This will help ensure that you are only updating custom attributes for your most valuable customers. Custom attributes will be updated only for those customers have a matching “external_id” or “braze_id” within Braze.
Use in Braze segments
The list of custom attributes that is managed by Amperity is available from the Data Settings page in Braze. Click Data Settings in the left-side navigation, and then choose Custom Attributes. This will open a page similar to:
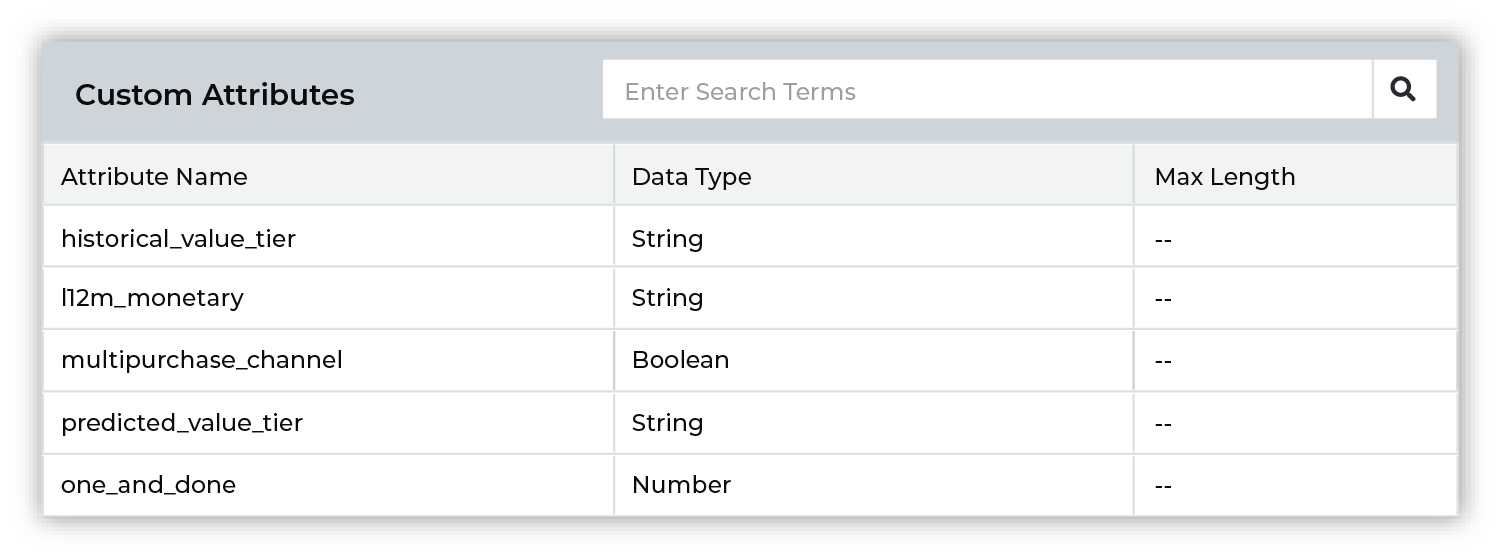
Custom attributes are listed alphabetically and are case-sensitive. For example, One and Done, one and done, and One_and_Done are unique custom attributes within Braze.
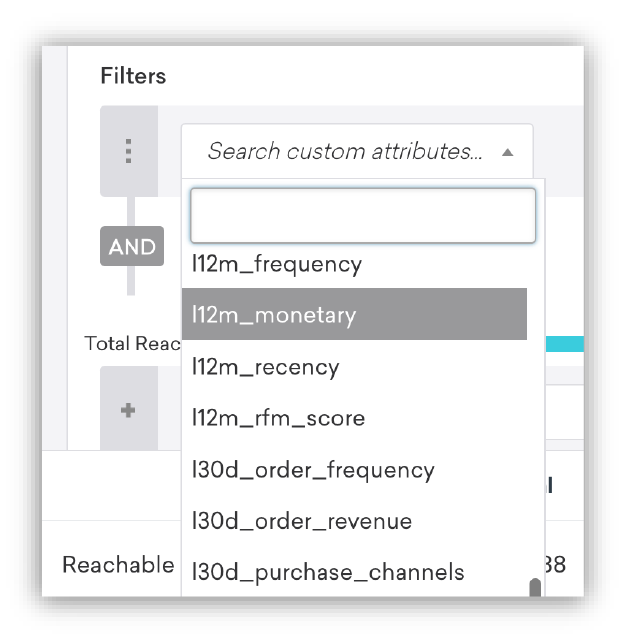
Custom attributes are available from a filter when you build segments in Braze. Add a filter, and then choose Custom Attributes:
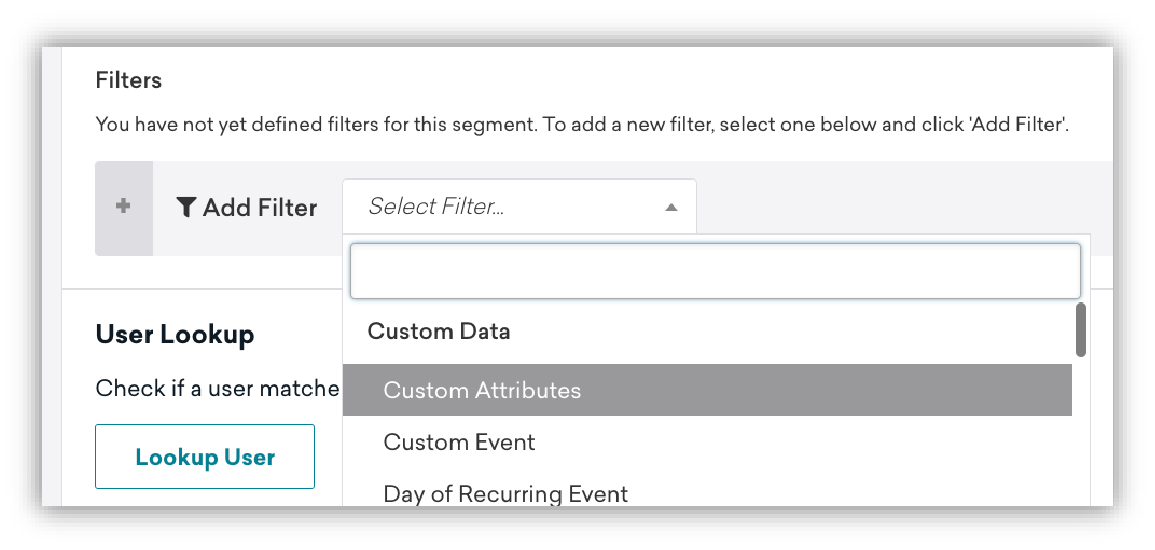
and then select any of your Amperity-managed custom attributes for use in your Braze segment:
About data points
Braze uses data points to determine when to update segment membership, to identify which types of messages should be sent, and how to apply message personalization.
You can send custom attributes to Braze from Amperity by attaching attributes from your customer profiles in Amperity, such as first and last names, email addresses, phone numbers, physical locations, SMS and email consent status, purchase histories, and so on.
Amperity tracks changes as they are sent to Braze and only sends list membership and attribute that have changed since the previous update.
Note
Data points are part of the billing and pricing structure in your Braze contract. Some data points are non-billable; many data points are billable.
Review the lists of non-billable and billable data points , and then review those lists against the attributes you will send to Braze from Amperity to understand which of those attributes are considered billable or non-billable data points.
Important
Connected Content does not write data to user profiles, which means you can use Connected Content to dynamically populate values into messages without consuming data points.
Build a segment
Use the Segment Editor to build any audience using a series of drop-downs and picklists.
As you define the attribute profile for an audience be sure to refresh segment insights to view audience size and to see the value it brings to your business.
When the segment is ready, activate it, and then use it use it in a campaign to send to your preferred destinations for customer activation.
What can you use custom attributes with in Braze?
You can use custom attributes directly within segments, and then use those segments to engage with your customers across a variety of channels, including:
Example segments
The following sections describe a series of use cases for Braze:
An audience of customers who purchased within the previous 24 hours
An audience of high-value customers
An audience that contains all customer profiles
The pattern these use cases describe is one where:
Updates for customers who have interacted with your brand most recently are updated most frequently. Your brand may choose to have several segments like this for a variety of use cases. Each segment may have unique custom attributes or you may have a shared set of custom attributes that work across all segments.
Updates for your most valuable customers are done on a regular basis. These are customers who are likely part of your larger churn prevention, winback, and other types of campaigns and are considered to be within your “active” to “cooling down” phase of marketing.
Updates to a large percentage of custom attributes are done less frequently. This list may include customers who are “lost”, but may still represent value to your brand for future marketing activity. This update should also track where customers are at with regard to how your brand defines customer lifecycle.
Purchased yesterday
Build an audience of customers who purchased yesterday. Configure a recurring campaign to send this audience to Braze on a daily basis. Use this audience in Braze to build segments that help keep your customers engaged with your brand and to help drive their next purchase.
The following sections describe using the Segment Editor to build a segment that returns a list of customers who purchased yesterday.
WHICH CUSTOMERS PURCHASED YESTERDAY?
|
Open the Segment Editor, look in the lower-right of the page and make sure your customer 360 database is selected. 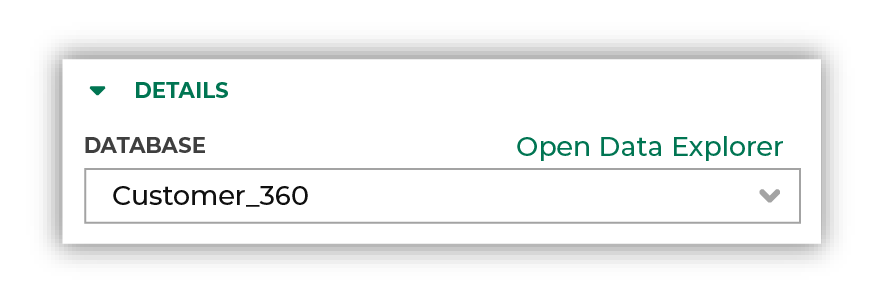
|
|
Identify customers who purchased yesterday using the Has purchased purchase behavior. Set the minimum number of purchases, select the “on” operator, and then define the range as “yesterday”: 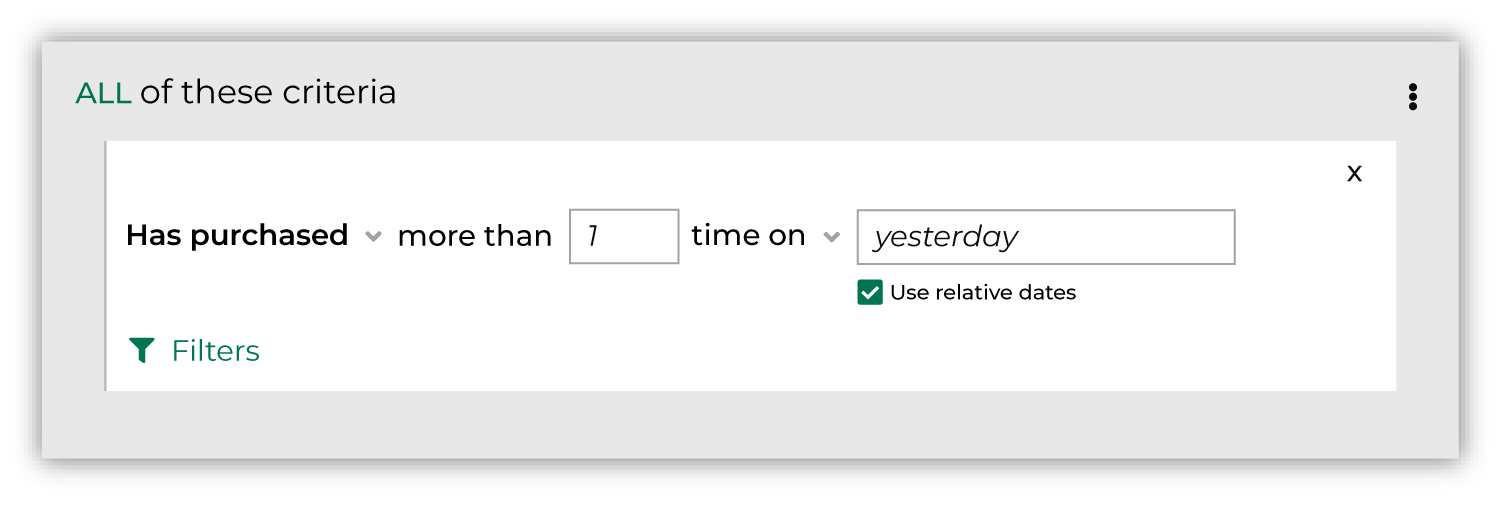
Click the Refresh button located on the right side of the Segment Editor to see how many customers are in your segment. |
|
You’re done building your audience! Click the Save As button in the top right corner of the Segment Editor. Give your segment a name that clearly describes the purpose and audience type for the segment. For example: “Purchased Yesterday” 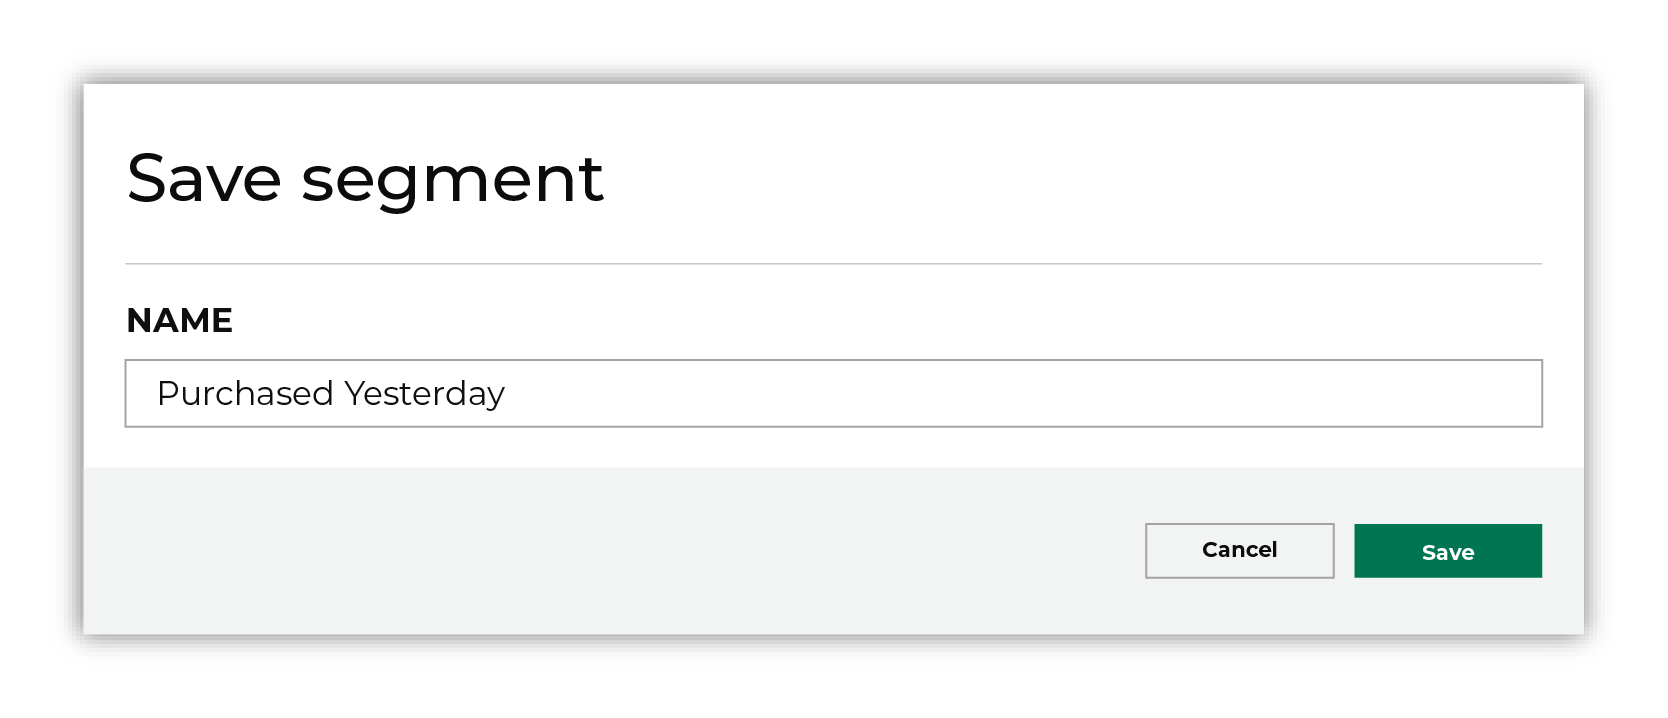
|
|
After your segment is saved the Segment Overview page opens and shows additional details, such as historical and predicted revenue, the percentage of customers that are reachable by email, by phone, on Facebook, and customer trends, such as purchases by channel, revenue by lifetime spend. |
High-value customers
Build an audience of high-value customers. Configure a recurring campaign to send this audience to Braze on a regular basis, such as weekly or bi-weekly. Use this audience maintain the custom attributes that are associated with your most valuable customers.
Note
This example uses Amperity predicted value tiers, but you can use any metric within your customer 360 database that defines your most valuable customers.
The following sections describe using the Segment Editor to build a segment that returns customers who are predicted to be your top 10% highest value customers.
WHO ARE YOUR HIGH-VALUE CUSTOMERS?
|
|
Open the Segment Editor, look in the lower-right of the page and make sure your customer 360 database is selected.
|
|
|
Identify customers whose predicted customer lifetime value is platinum, gold, or silver. Choose the Predicted Customer Lifetime Value Tier attribute from the Predicted CLV Attributes table, select the “is in list” operator, and then select “Platinum”, “Gold”, and “Silver” from the list: 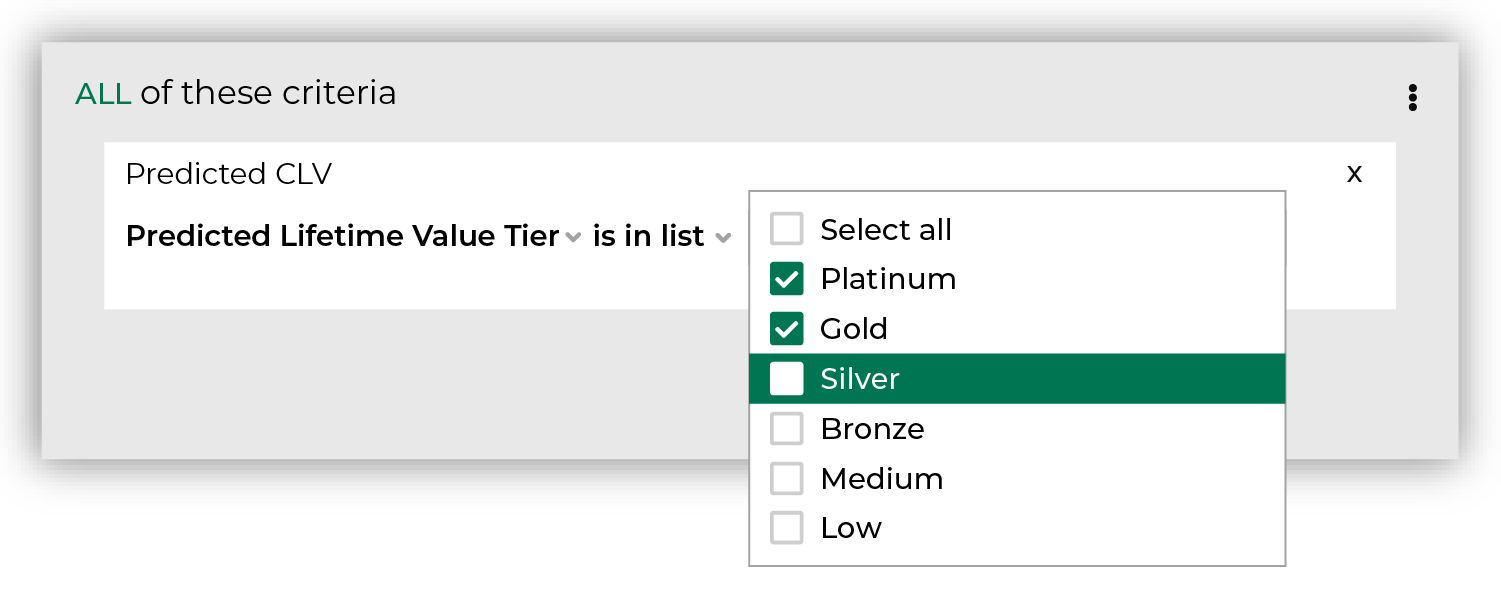
Click the Refresh button located on the right side of the Segment Editor to see how many customers are in your segment, how much they spent in the past year, how many are active, and how many of them should belong to a future campaign. |
|
|
You’re done building your audience! Click the Save As button in the top right corner of the Segment Editor. Give your segment a name that clearly describes the purpose and audience type for the segment. For example: “Predicted Top 10% High Value Customers”. 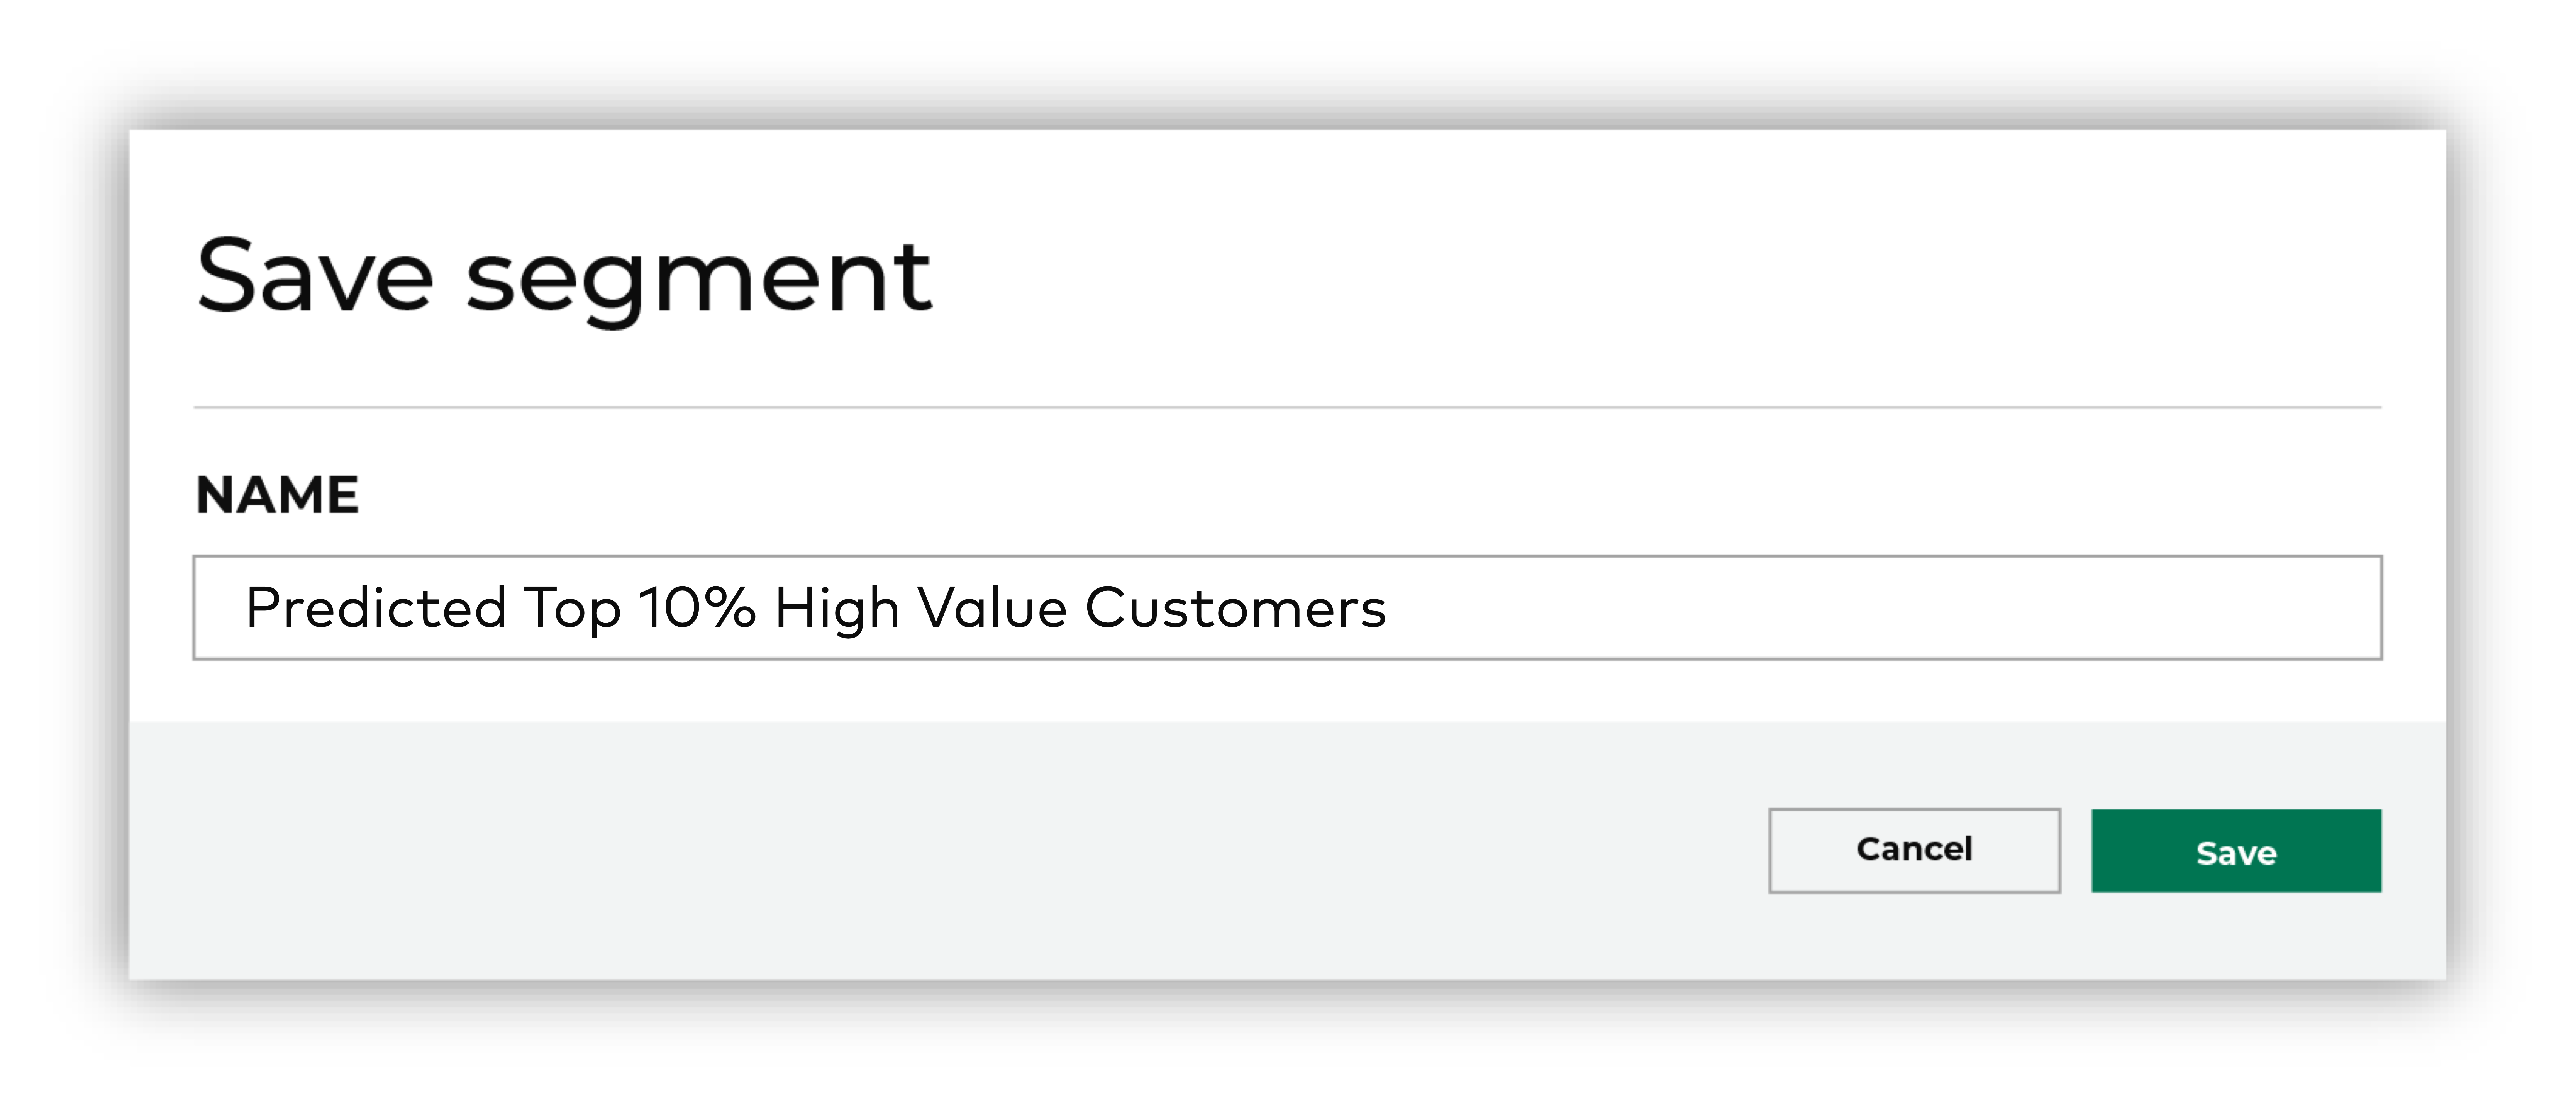
|
Update customer profiles
Build an audience that contains customer profiles – first and last name, email address, phone number, external ID, gender, birthdate, city, and country. This audience should be updated on a regular basis. For example, every 30 days.
Note
This example assumes that your customer 360 database has a table from which a segment can access the Braze external_id. For example, a customer profiles table in your customer 360 database that is unique by Amperity ID and contains all of the default user attributes that you want to update in Braze. This table may also contain custom attributes.
The following sections describe using the Segment Editor to build update Braze user profile attributes with values from customer profiles in Amperity.
UPDATE CUSTOMER PROFILE ATTRIBUTES
|
|
Open the Segment Editor, look in the lower-right of the page and make sure your customer 360 database is selected.
|
|
|
Build an audience of customer profiles to be updated in Braze. Use the External ID attribute from the table that contains Braze attributes, and then select the “is not blank” operator: 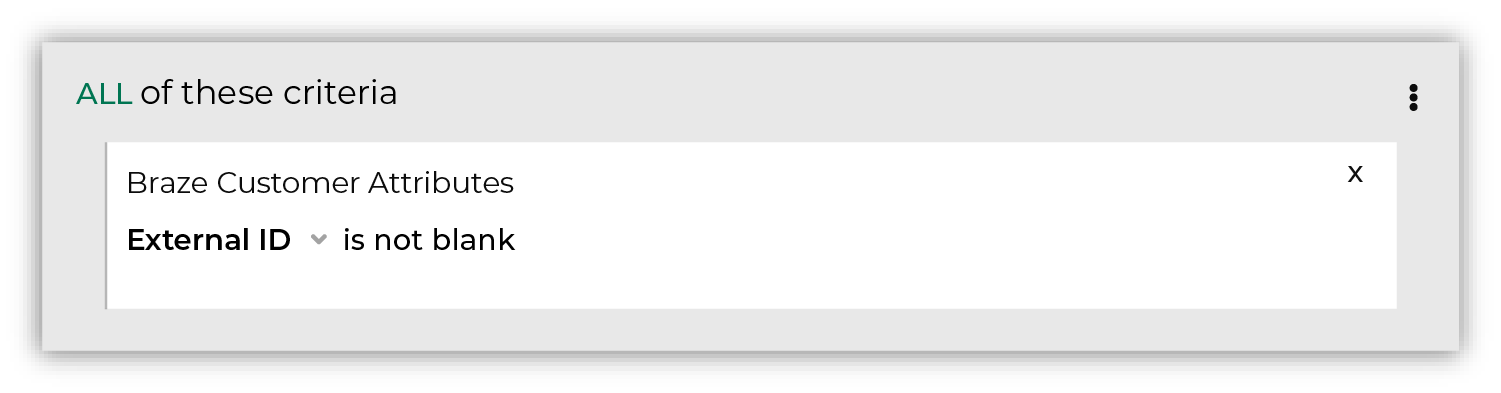
Click the Refresh button located on the right side of the Segment Editor to see how many customers are in your segment, how much they spent in the past year, how many are active, and how many of them should belong to a future campaign. |
|
|
You’re done building your audience! Click the Save As button in the top right corner of the Segment Editor. Give your segment a name that clearly describes the purpose and audience type for the segment. For example: “Braze Customer Profiles”.
|
|
|
Add this audience to a campaign that uses a single sub-audience to send customer profile updates to Braze on a regular basis. For example, every 30 days. Configure the list of attributes to meet the naming requirements for user profile fields, including naming and lowercase: 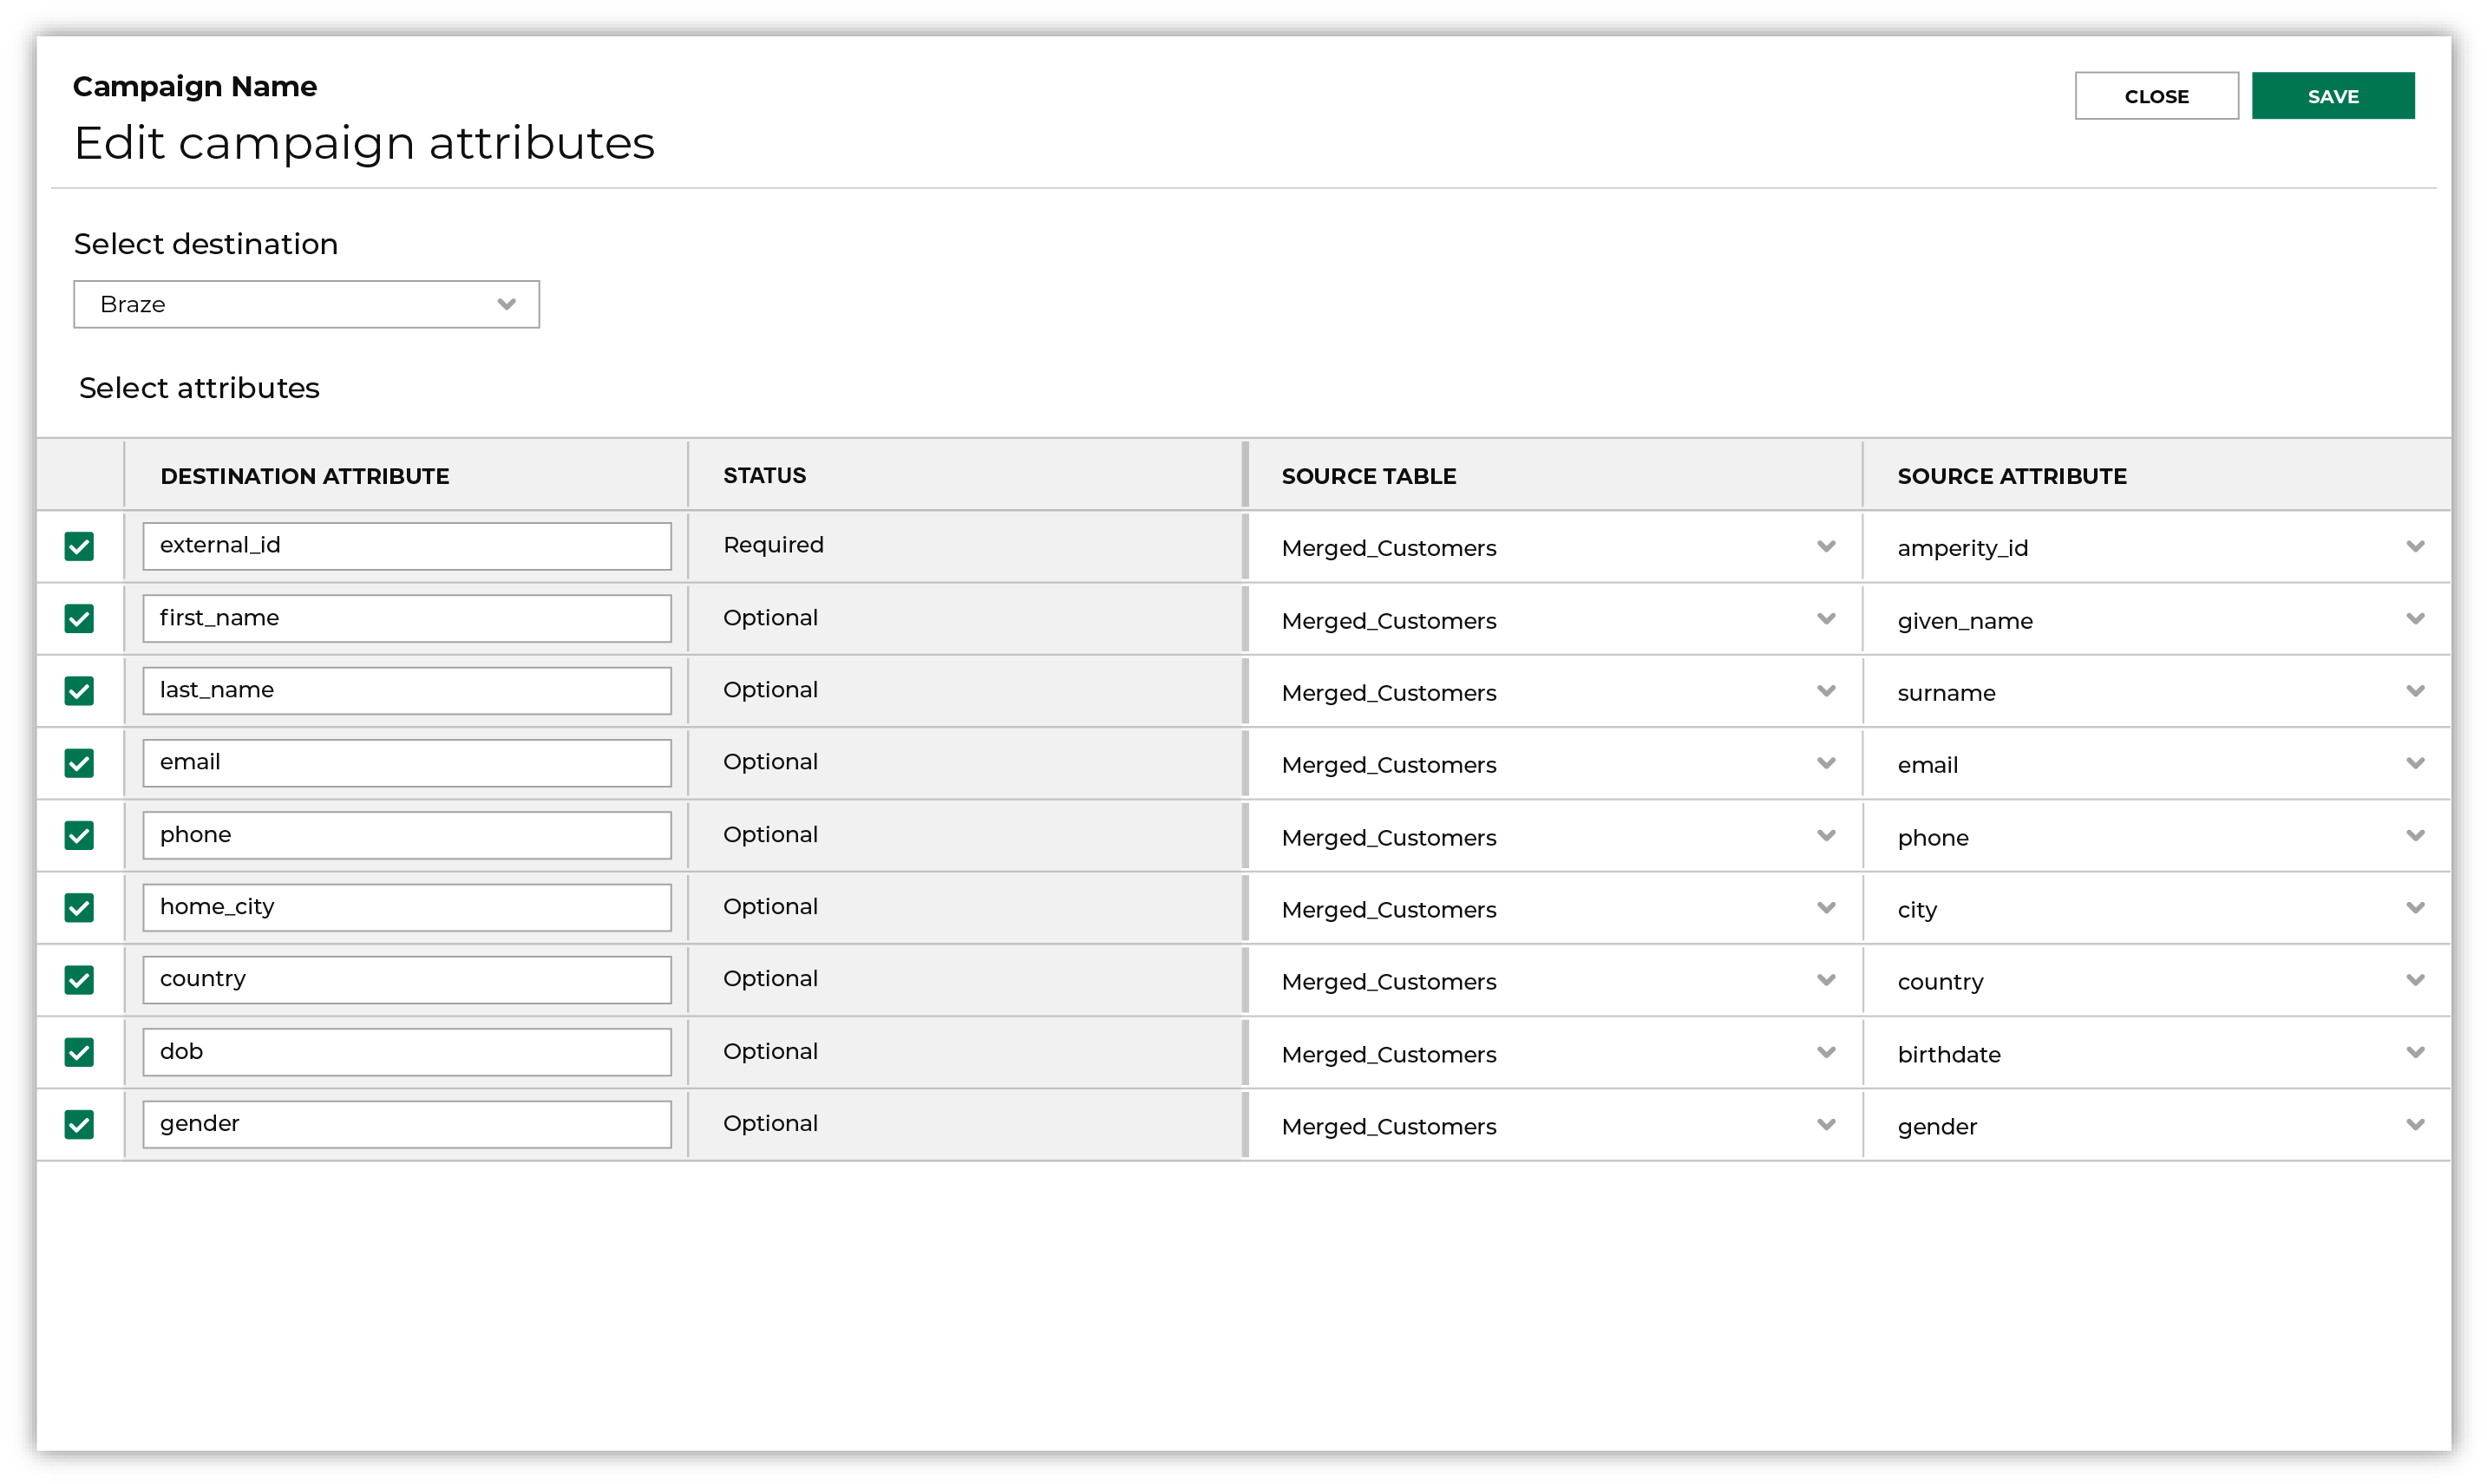
|
Add to a campaign
Use the campaign editor to configure Amperity to send data to Braze. Add a segment, define exclusions and sub-audiences, and then define each audience sent to Braze.
To add Braze to a campaign
|
|
Open the Campaign Editor. This is available from the Campaigns page. Click the Create campaign button in the top right corner of the page. |
|
|
Assign Braze as a destination for at least one treatment group. 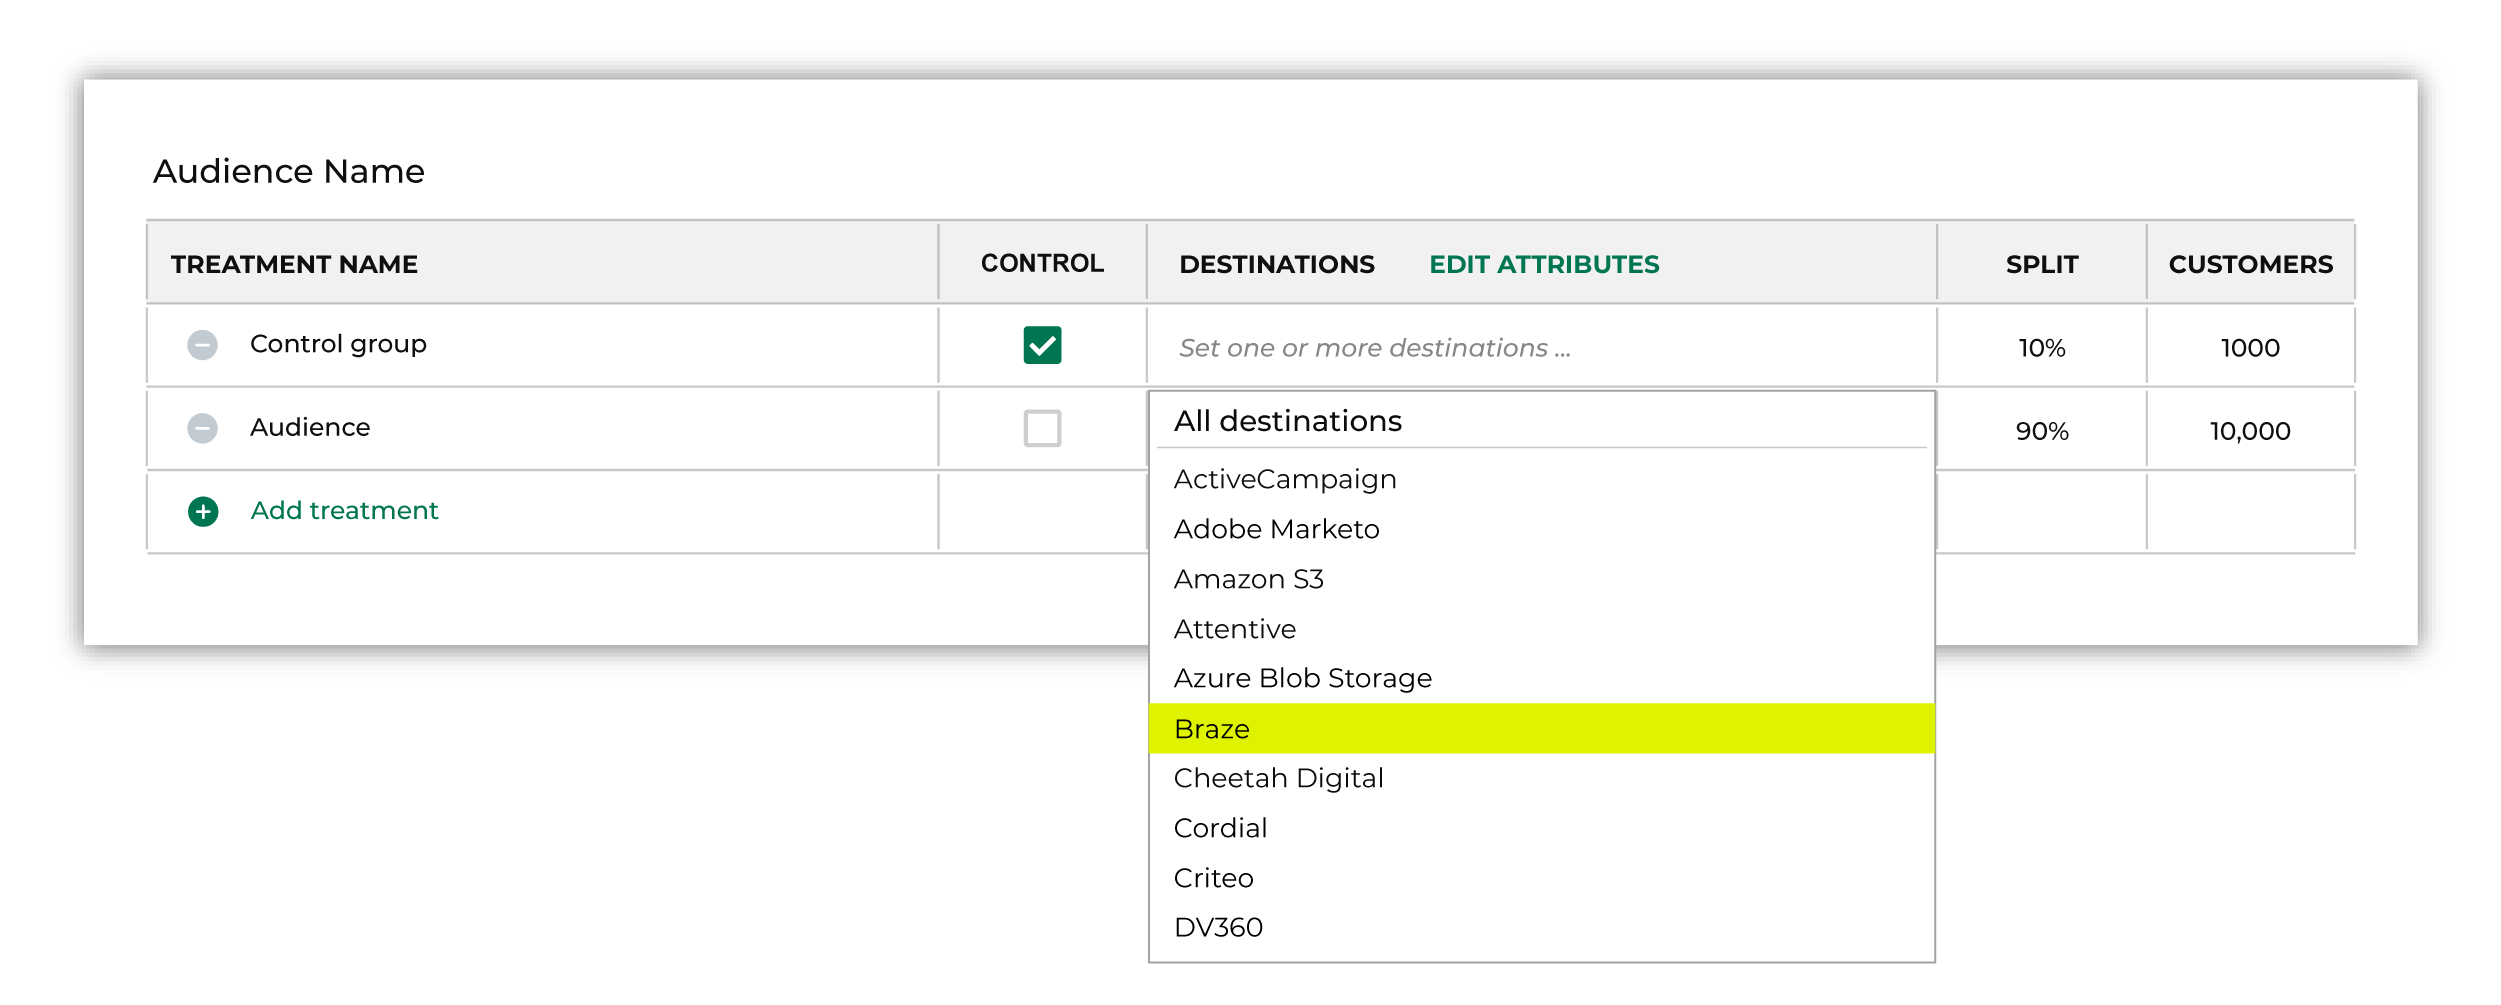
Note You may need to edit the attributes for the sub-audience to ensure Amperity is sending the right data to Braze. |
|
|
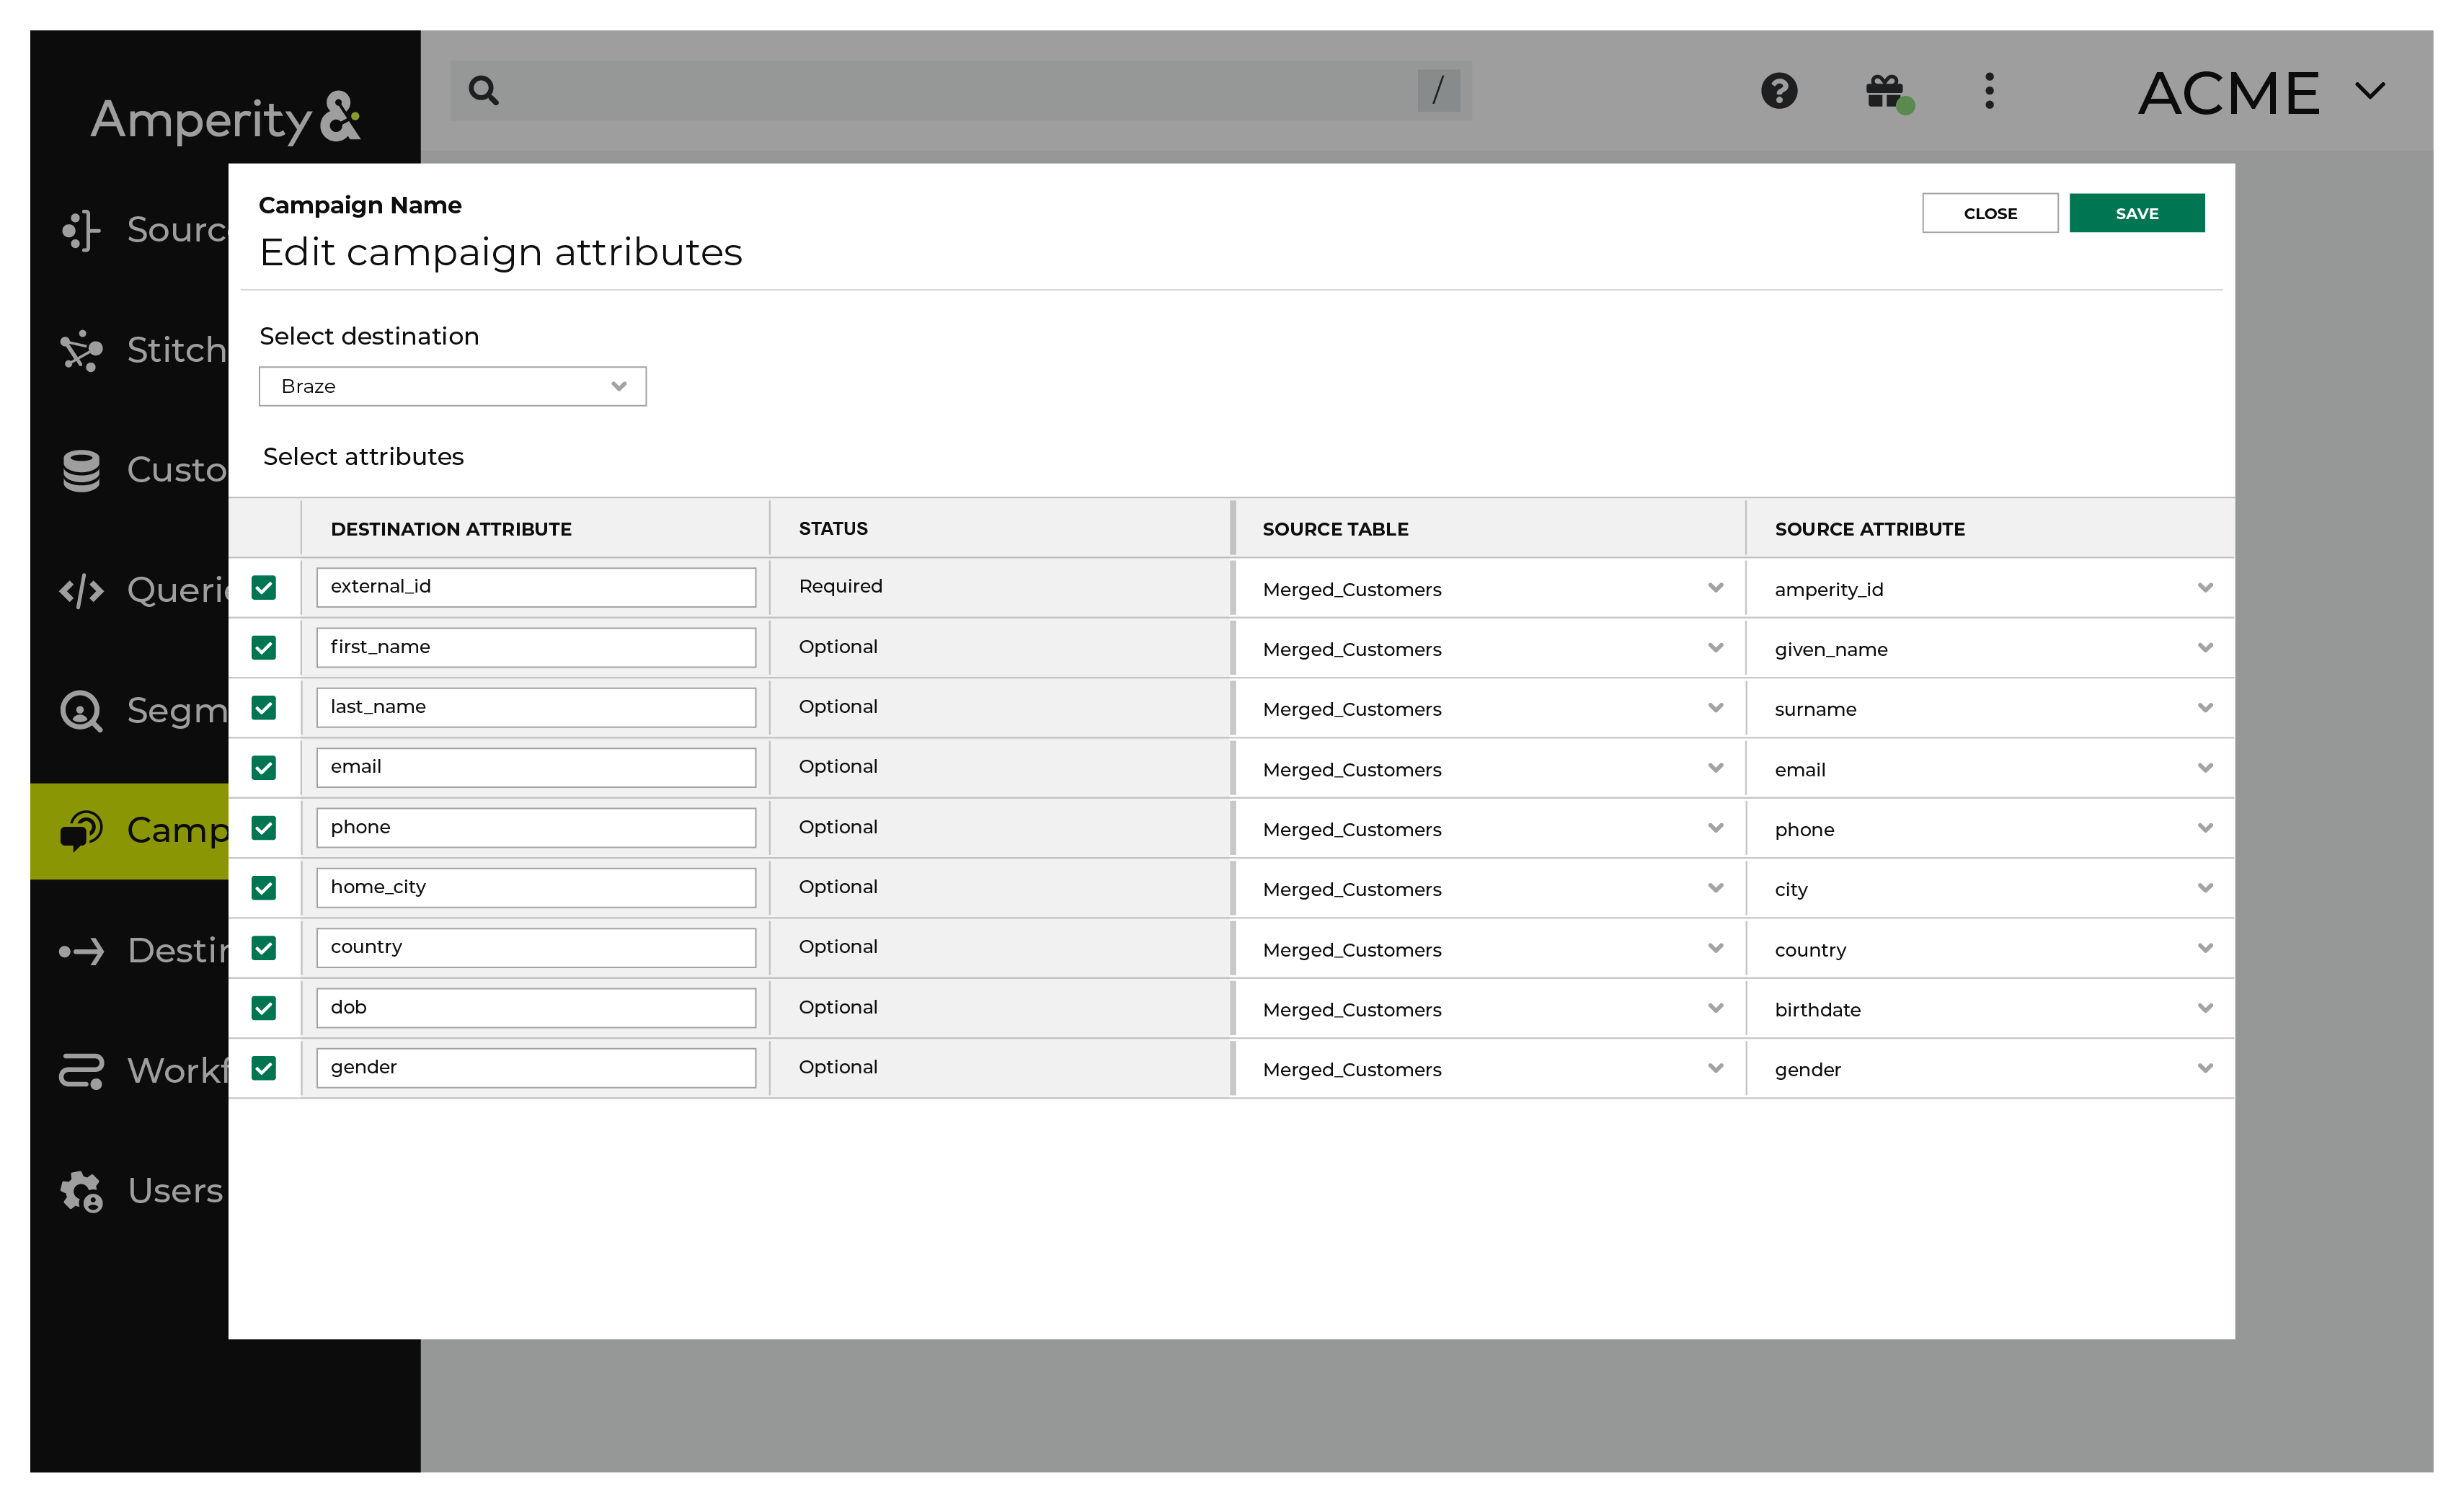
Click Edit attributes to review the attributes that Amperity sends to Braze. Braze requires “extern_id” or “braze_id”, along with a list of custom attributes that are defined by your brand. Amperity pre-selects the list of attributes sent to Braze. The Edit attributes page for Braze is similar to:
Note The Merged Customers table is the default table for sending data to Braze, even though segments are often built against the Customer 360 table. This is by design. The Merged Customers table is the underlying table for customer profile data and is the source for all customer profile data that exists within the Customer 360 table. Important Custom attributes may be sent in addition to the list of customer profile attributes that specifically match Braze default attributes. Ask your Amperity representative for help configuring your tenant to match the list of custom attributes that you want to send to Braze from Amperity. |
Configure default attributes
Each unique destination configured to send treatment group audiences to Braze has a set of default attributes.
Configure default attributes by clicking the Default attributes link next to the Create campaign button on the Campaigns page.
The source table defaults to the Merged Customers table for most attributes. This is configurable.
Braze has the following requirements for attributes.
Source attribute |
Destination attribute |
|---|---|