Send audiences to Amazon S3

Amazon Simple Storage Service (Amazon S3) stores customer data files of any size in any file formats.

This topic describes the steps that are required to configure campaigns to send email address, phone numbers, and other profile attributes to Amazon S3.

Note

Ask your DataGrid Operator or your Amperity representative for help configuring Amazon S3 as a destination to which you can send campaigns for customer activation.

Build a segment

Use the Segment Editor to build any audience using a series of drop-downs and picklists.

As you define the attribute profile for an audience be sure to refresh segment insights to see how many customers match your audience and to see how much value they bring to your business.

When the segment is ready, activate it, and then use it use it in a campaign to send to your preferred destinations for customer activation.

Which attributes should you use?

You can use any attribute that is in your customer 360 database to define your audience.

When the list of customers who belong to this audience is sent to Amazon S3 as part of a campaign you will be required to choose specific attributes to send.

Amazon S3 supports the following attributes: email address, phone numbers, and other profile attributes.

Build a campaign

Use the campaign editor to build campaigns that send data to Amazon S3. Add a segment, define exclusions and sub-audiences, and then configure Amperity to send campaign data to Amazon S3.

To build a campaign

Step 1.

The campaign builder is available from the Campaigns page. The Create Campaign button in the top right corner of the page opens the campaign builder.

After the campaign builder opens, give your campaign a name.

Open the campaign builder and give your campaign a name.

Tip

The campaign name will always appear in the filename that is sent to any destination.

Use good naming patterns for the campaigns you will send to Amazon S3. Good naming patterns help ensure that you can easily find your campaigns within Amperity and that the campaign is discoverable in Amazon S3 by users who may not be the same users who built the campaign in Amperity.

Avoid duplication between campaign and treatment group names.

Avoid using Amazon S3 in the name unless the campaign is sent only to Amazon S3.

Use a naming pattern that ensures the campaign name works across every treatment group that is configured within any sub-audience.

If brand names and/or region names apply to all sub-audiences in the campaign, consider using them within the campaign name.

Step 2.

All campaigns start with an audience. Choose a segment from the Include drop-down list. The customers in that list will become the audience for this campaign.

Choose the audience to use with your campaign.

Tip

When a campaign starts with an audience that is defined by a single segment, you can use the segment insights for that segment as a way to measure the performance of that audience over time.

Step 3.

Sometimes campaigns need to exclude certain members of your audience. For example, a churn prevention campaign is often configured to exclude customers who have opted-out of SMS messaging and/or who have unsubscribed from an email list.

When you need to exclude audience members, choose one (or more) segments from the Exclude drop-down list. The customers in an exclusion list will be removed from the audience for this campaign.

Exclude some customers from this campaign.
Step 4.

Some campaigns have just one audience, while others have many and require sub-audiences.

Sub-audiences can be many things. How you choose to configure them depends on your audience, marketing strategy and goals, and the type of campaign you will run in Amazon S3.

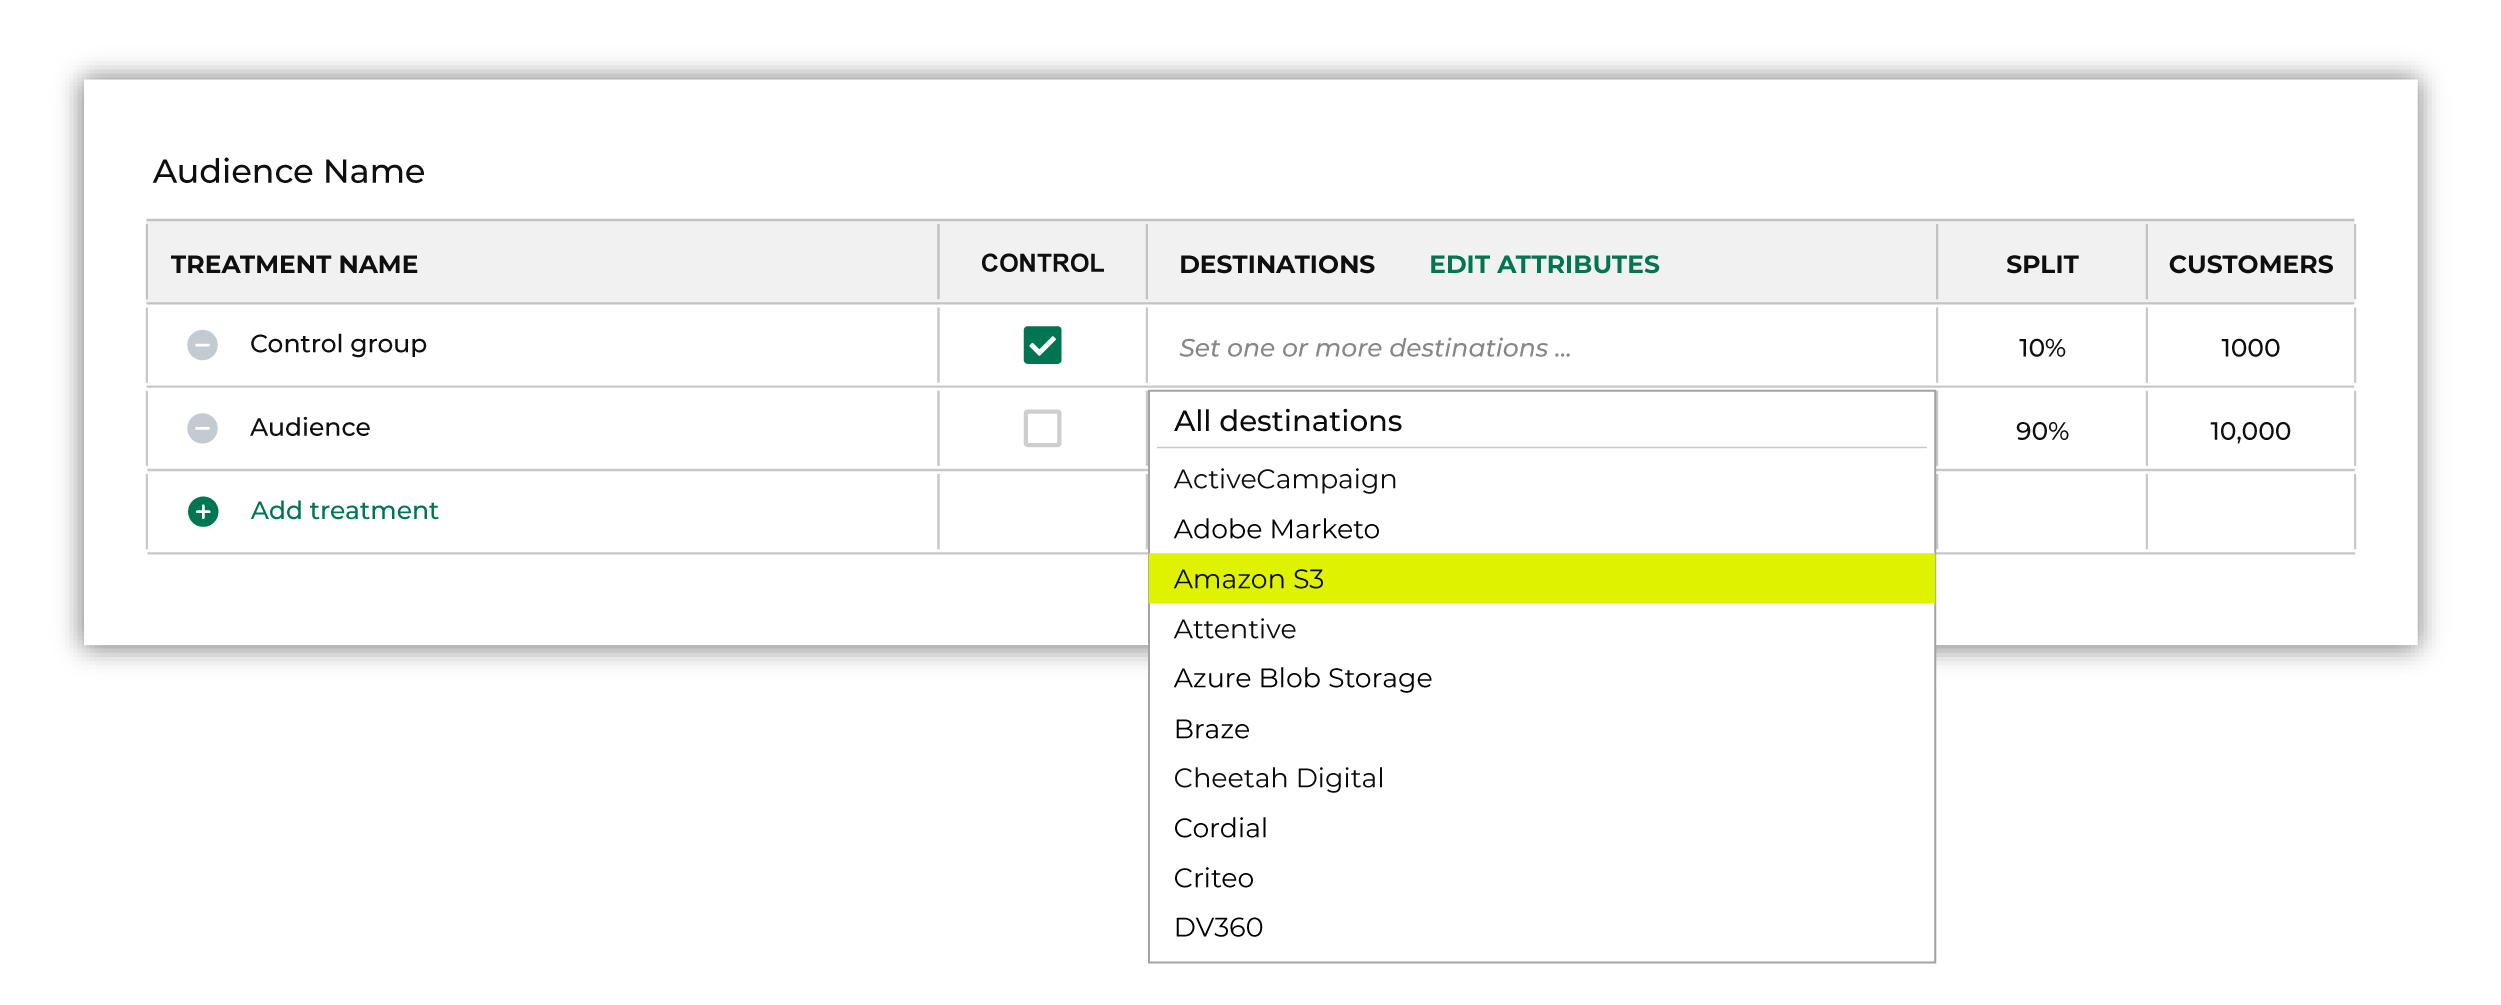
Click Add treatment to add another treatment group to a sub-audience. The total percentages for all treatment groups (and the control group, if present) must be 100%.

Click Add Sub-audience to add more sub-audiences to this campaign, and then use the Audience Builder to define the criteria for that sub-audience.

Step 4.

Assign Amazon S3 as a destination for at least one treatment group, and then edit the attributes for the sub-audience to ensure Amperity is sending the right data to Amazon S3.

Step 4.

Click Edit attributes to review the attributes that Amperity will send to Amazon S3.

You must select the set of attributes that are sent to Amazon S3. Review your downstream requirements, open the Edits attributes page, and then select the attributes you want to send to Amazon S3 for this campaign.

Amperity pre-selects the list of attributes that may be sent to Amazon S3. The Edit attributes page for Amazon S3 is similar to:
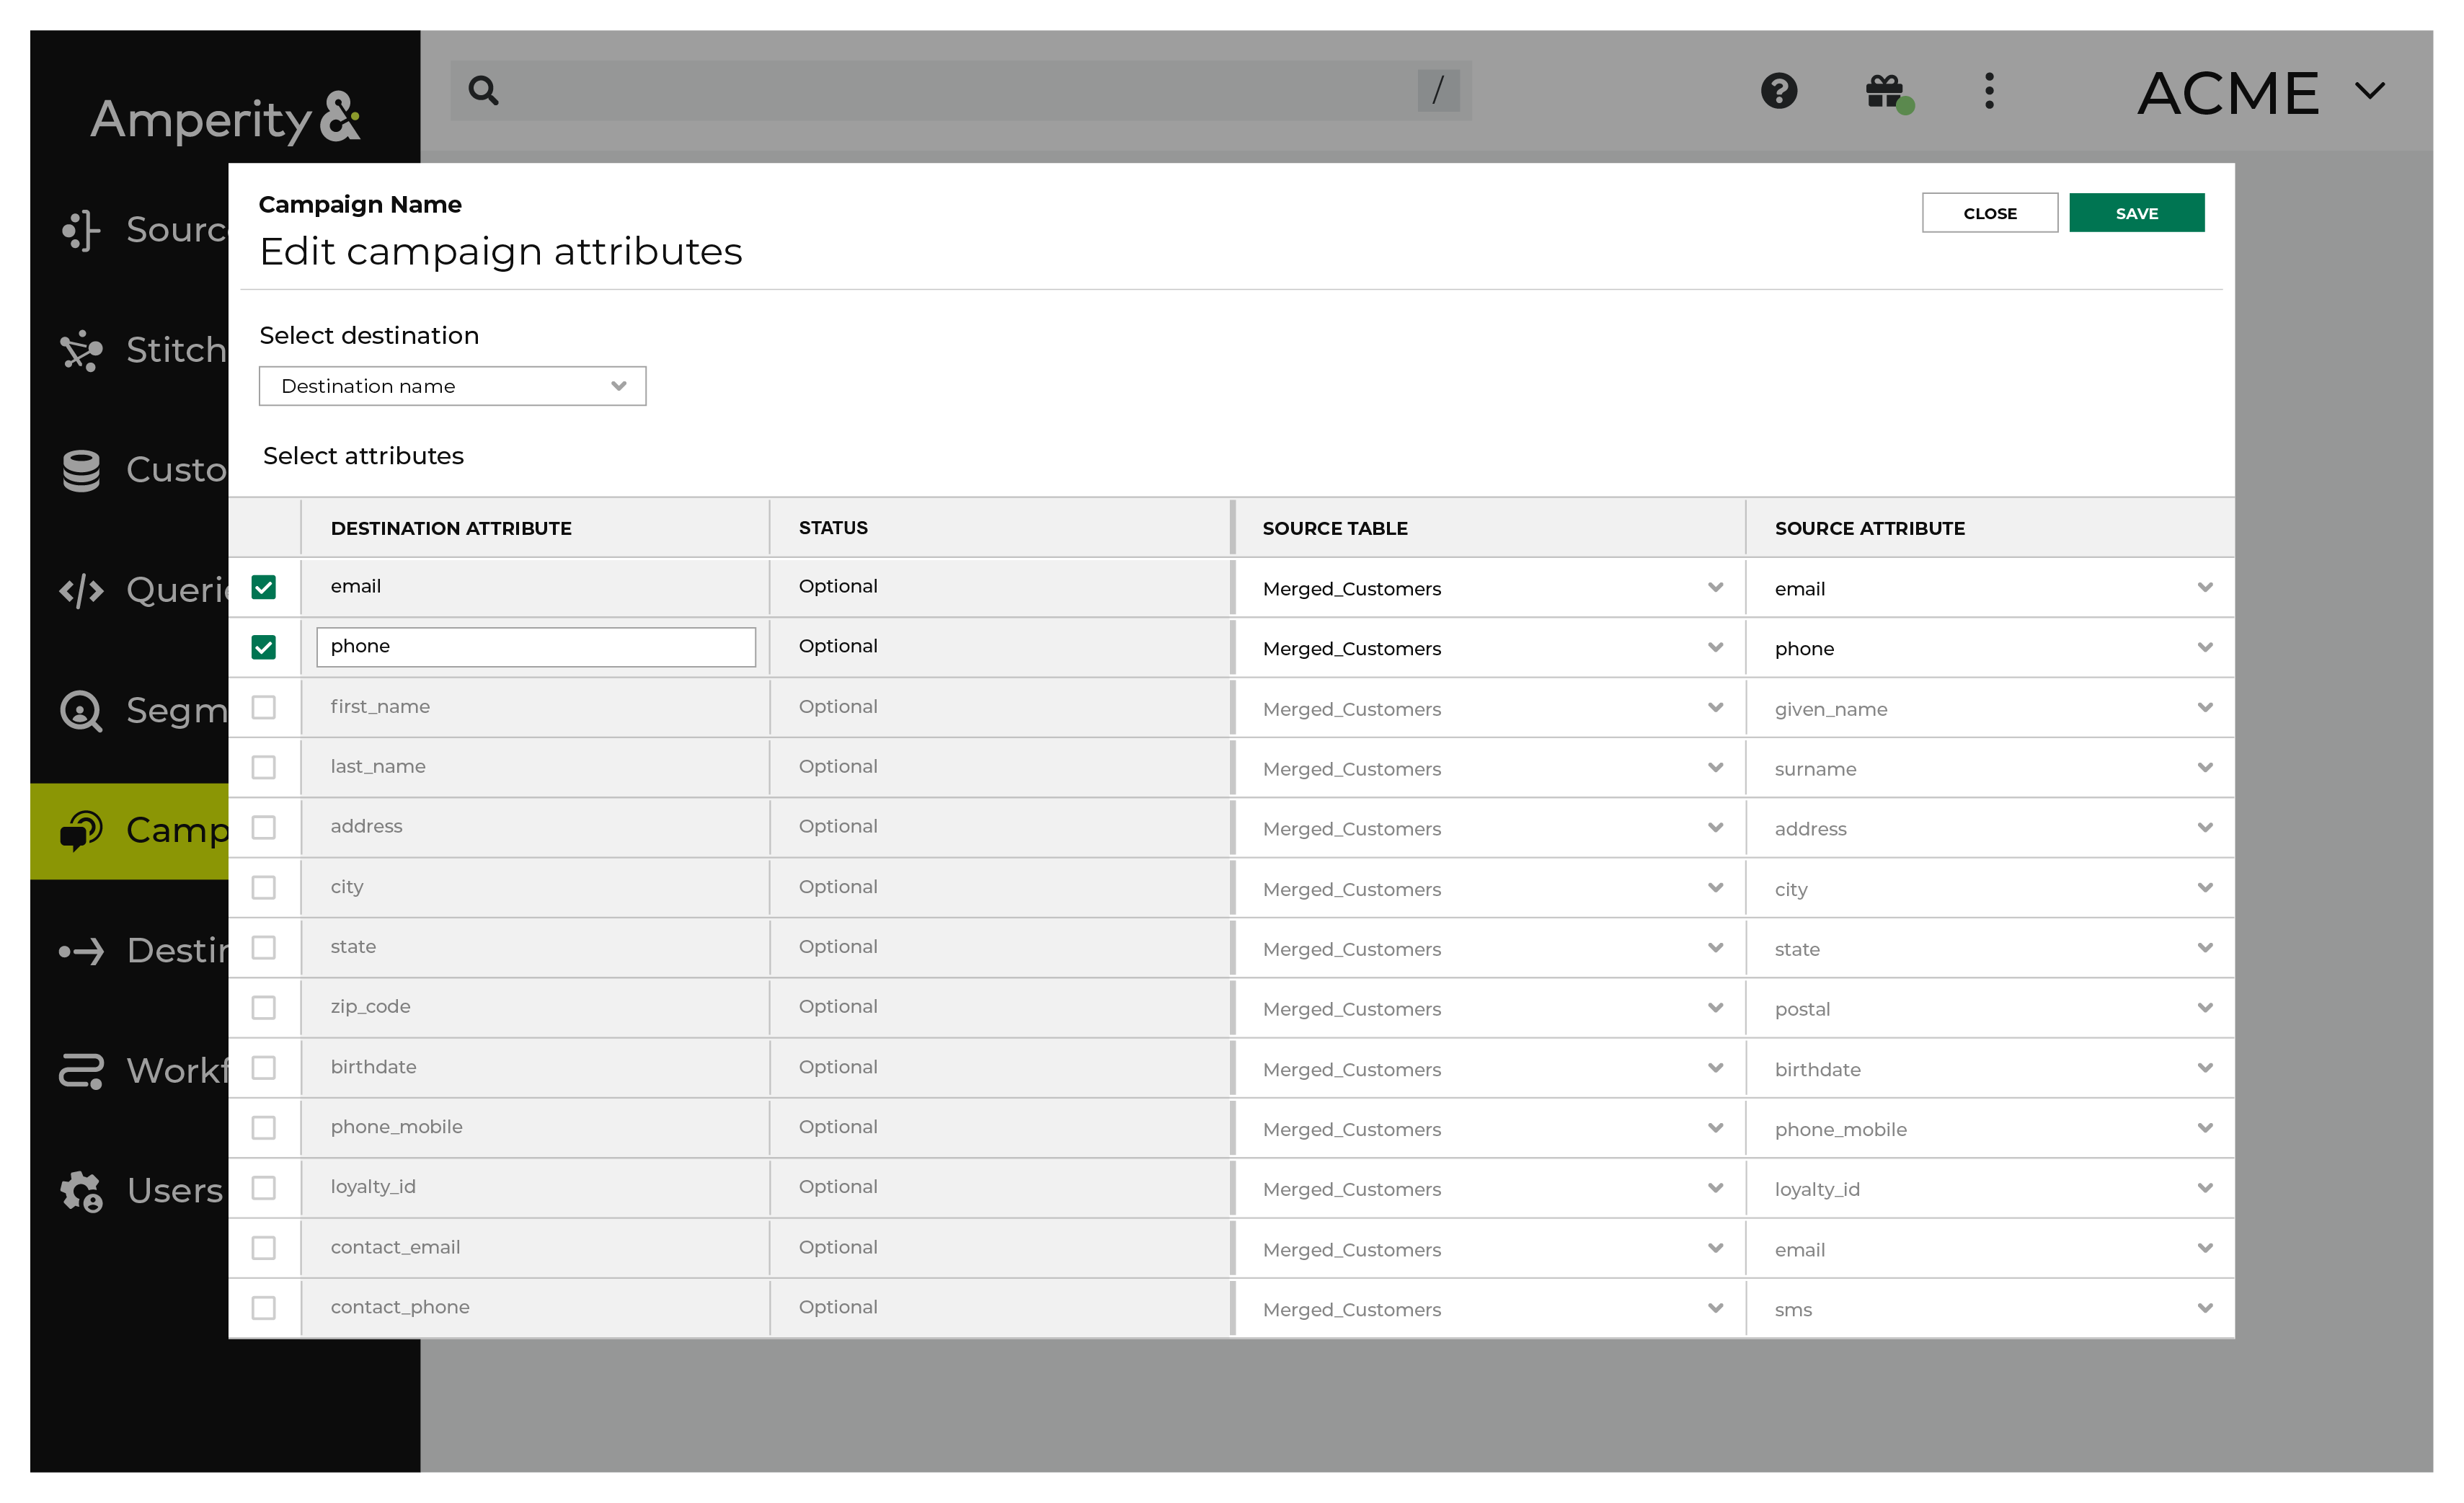
Edit the attributes for campaigns that are sent to Amazon S3.

Note

The Merged Customers table is the default table from which data is sent to Amazon S3, even though segments are often built against the Customer 360 table. This is by design. The Merged Customers table is the underlying table for customer profile data and is the source for all customer profile data that exists within the Customer 360 table.

Step 7.

A campaign can be configured to be sent once or on a recurring basis. A campaign can also be scheduled (i.e. “to be sent at the time you choose in the future”) or to be sent as soon as possible.

Give your campaign a name.
Step 8.

Enter the date on which you plan to launch your campaign in Amazon S3. This date helps Amperity improve results tracking and campaign results measurement.

Configure the schedule and timing for your campaign.
Step 9.

When your campaign is ready, click the Schedule button in the top right corner of the Campaigns page.

Note

Amperity will begin processing the segments that define audiences, exclusions, and sub-audiences, and will then send the results to Amazon S3.

Please allow for enough time for Amperity to complete this process before starting a campaign in Amazon S3.

Configure default attributes

Each unique destination that is configured to send data to Amazon S3 may be configured to have a set of default attributes that will sent to Amazon S3 every time this destination is associated with a treatment group in an active campaign.

Default attributes may be configured for a destination by clicking the Default attributes link next to the Create campaign button on the Campaigns page.

The source table is set to Merged Customers for most attributes. Your brand may configure each attribute to be pulled from the source table that best represents how your brand wants to use the attribute in Amazon S3.

Amazon S3 has the following requirements for attributes.

Source attribute

Destination attribute

amperity_id

amperity_id

email

email

given_name

given_name

surname

surname

address

address

address2

address2

state

state

city

city

postal

postal

country

country