
Send audiences to The Trade Desk
The Trade Desk is a platform for wide internet advertising and enables the use of Universal ID 2.0 for first-party paid media advertising.
This topic describes the steps required to configure campaigns to send email address lists to The Trade Desk.
Amperity can manage audiences for The Trade Desk demand-side platform, from which your brand can reach audiences throughout their entire digital journey and across every channel and device, including:
Display advertising on ABC, ESPN, the Wall Street Journal, live sporting events (Major League Baseball), in-store advertising at WalMart, and more.
Video advertising on over-the-top (OTT) and connected TV (CTV) apps and platforms, such as Disney+, Major League Baseball, Hulu, Fox, Vevo, Paramount+, and more.
Audio advertising in-between songs and during podcasts across Spotify, Pandora, SoundCloud, iHeart, and more.
What is UID 2.0?
Unified ID 2.0 is an open source identity framework that benefits consumers by allowing them to control over data sharing with publishers and advertisers.
The Trade Desk supports using UID 2.0 to help establish your customers’ identifies without using third-party data. UID 2.0 enables publisher websites, mobile apps, and Connected TV (CTV) apps to monetize through programmatic workflows, while offering user transparency and privacy controls that meet local market requirements.
Note
This destination uses the The Trade Desk API to manage audiences and send offline events.
Changes to audiences are not immediately available in The Trade Desk. Allow for up to 48 hours after the point at which Amperity has finished sending audience updates for them to be available.
Note
Ask your DataGrid Operator or your Amperity representative for help configuring The Trade Desk as a destination to which you can send campaigns for customer activation.
Build a segment
Use the Segment Editor to build any audience using a series of drop-downs and picklists.
As you define the attribute profile for an audience be sure to refresh segment insights to view audience size and to see the value it brings to your business.
When the segment is ready, activate it, and then use it use it in a campaign to send to your preferred destinations for customer activation.
Add to a campaign
Use the campaign editor to configure Amperity to send data to The Trade Desk. Add a segment, define exclusions and sub-audiences, and then define each audience sent to The Trade Desk.
To add The Trade Desk to a campaign

|
Open the Campaign Editor. This is available from the Campaigns page. Click the Create campaign button in the top right corner of the page. |
|
Assign The Trade Desk as a destination for at least one treatment group. 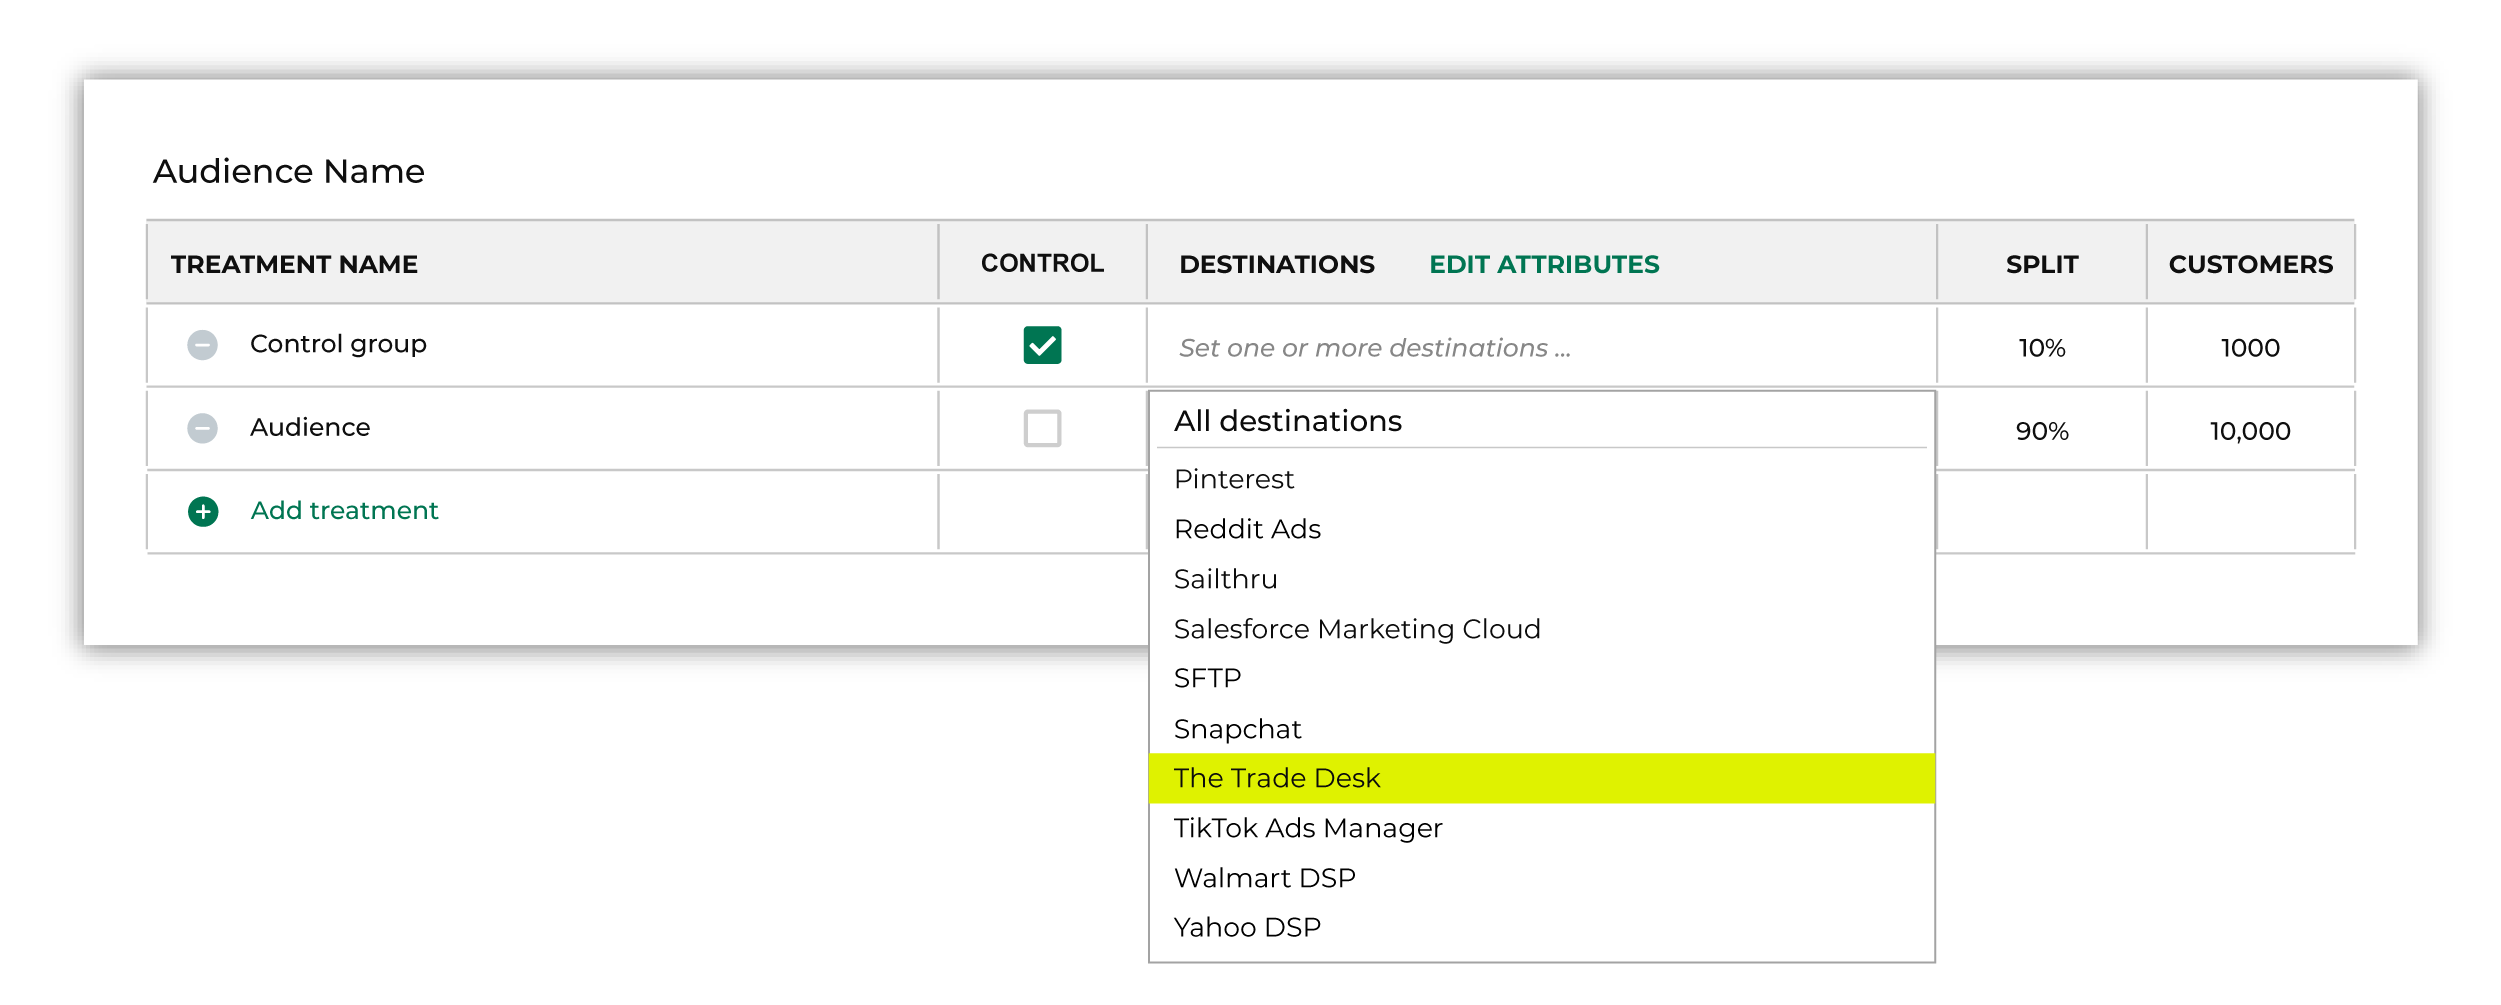
Note You may need to edit the attributes for the sub-audience to ensure Amperity is sending the right data to The Trade Desk. |
|
Click Edit attributes to review the attributes that Amperity sends to The Trade Desk. The Trade Desk requires only email addresses. There are no optional fields. Amperity pre-selects the list of attributes sent to The Trade Desk. The Edit attributes page for The Trade Desk is similar to: 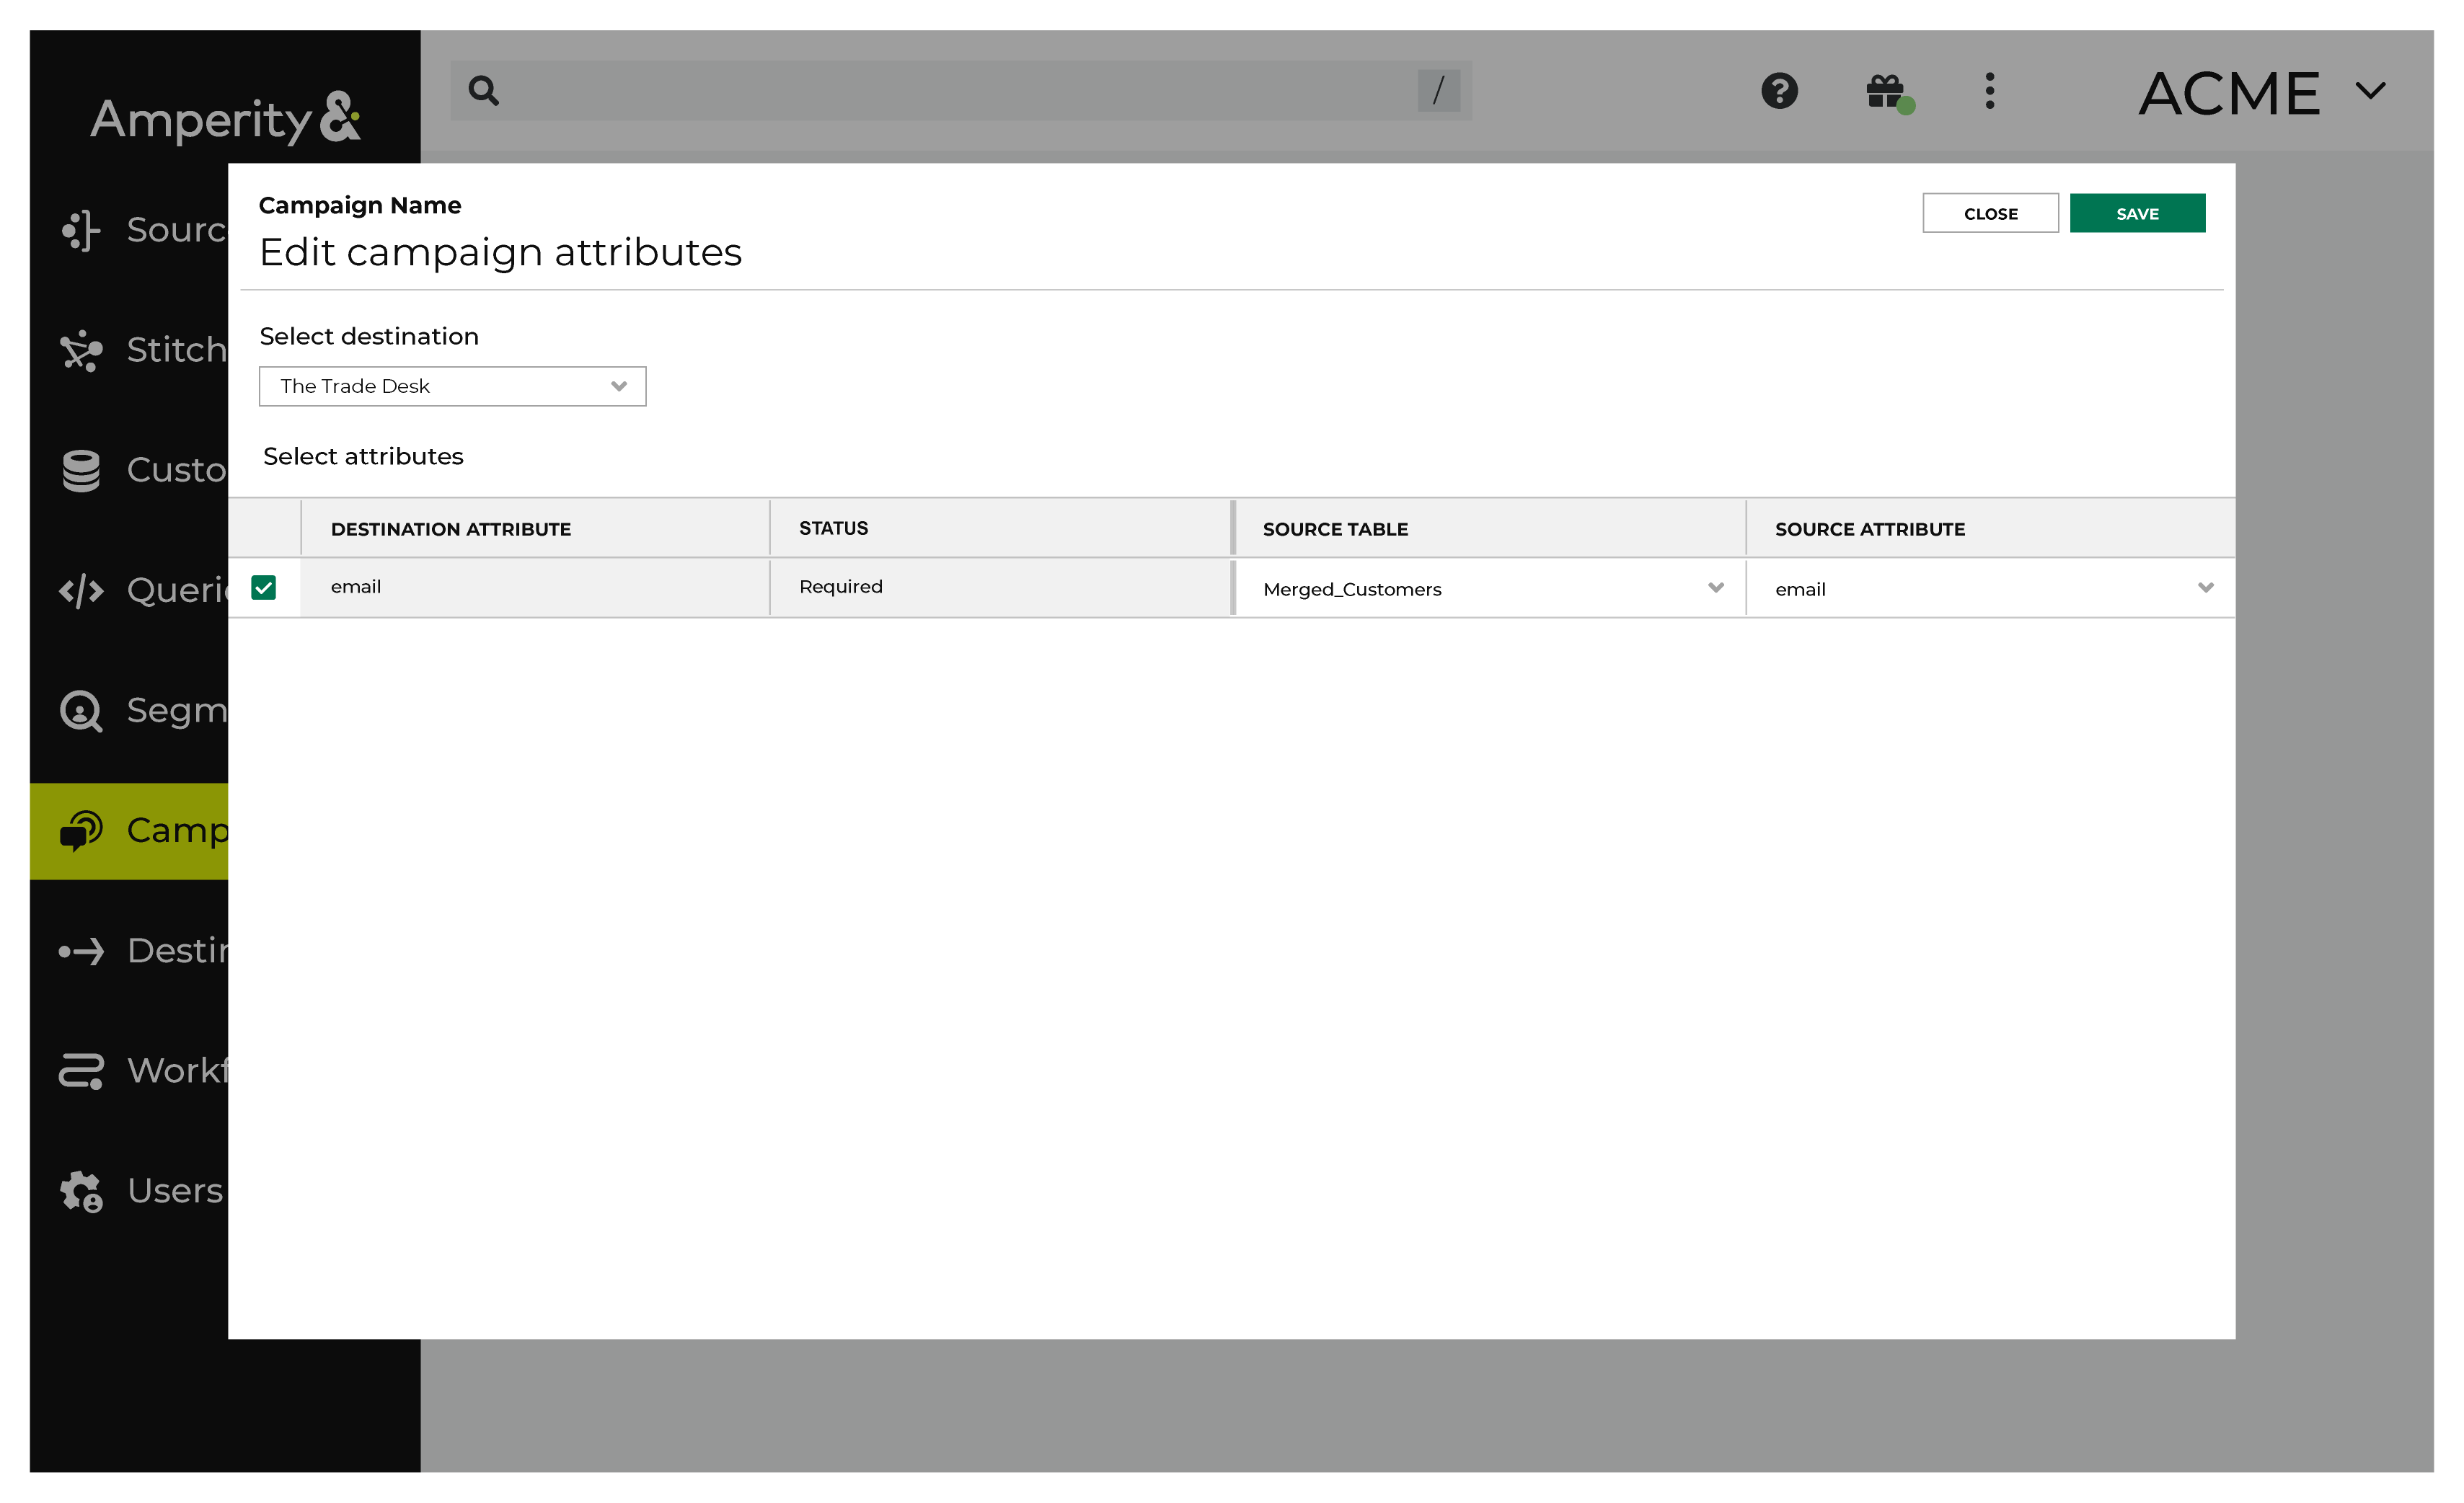
Note The Merged Customers table is the default table for sending data to The Trade Desk, even though segments are often built against the Customer 360 table. This is by design. The Merged Customers table is the underlying table for customer profile data and is the source for all customer profile data that exists within the Customer 360 table. |
Configure default attributes
Each unique destination configured to send treatment group audiences to The Trade Desk has a set of default attributes.
Configure default attributes by clicking the Default attributes link next to the Create campaign button on the Campaigns page.
The source table defaults to the Merged Customers table for most attributes. This is configurable.
The Trade Desk has the following requirements:
Source attribute |
Destination attribute |
|---|---|
uid2 You may use uid2 as a source attribute when Amperity is configured as a UID2 Operator for your brand. |
uid2 |
euid You may use euid as a source attribute when your brand is a participant in European Unified ID (EUID) . |
euid |