
Send audiences to Adobe Marketo
Adobe Marketo is marketing automation software that streamlines, automates, and measures marketing tasks and workflows.
This topic describes the steps required to configure campaigns to send static audience lists to Adobe Marketo.
Note
Amperity uses the Adobe Marketo API to update the membership of audience lists in Adobe Marketo to match the membership of audience lists sent from Amperity. The membership updates to match the membership of the audience list sent from Amperity. Amperity adds a user when they do not exist in Adobe Marketo.
Amperity does not keep smart lists and does not remove users from the Adobe Marketo database.
Important
An email address must be sent to Adobe Marketo. You may also send first names, last names, company names, and phone numbers.
Note
Ask your DataGrid Operator or your Amperity representative for help configuring Adobe Marketo as a destination to which you can send campaigns for customer activation.
Build a segment
Use the Segment Editor to build any audience using a series of drop-downs and picklists.
As you define the attribute profile for an audience be sure to refresh segment insights to view audience size and to see the value it brings to your business.
When the segment is ready, activate it, and then use it use it in a campaign to send to your preferred destinations for customer activation.
Which attributes should you use?
You can use any attribute that is in your customer 360 database to define your audience.
When sending the list of customers who belong to this audience to Adobe Marketo as part of a campaign you must choose specific attributes to send.
Adobe Marketo supports the following attributes: static audience lists.
Add to a campaign
Use the campaign editor to configure Amperity to send data to Adobe Marketo. Add a segment, define exclusions and sub-audiences, and then define each audience sent to Adobe Marketo.
To add Adobe Marketo to a campaign

|
Open the Campaign Editor. This is available from the Campaigns page. Click the Create campaign button in the top right corner of the page. |
|
Assign Adobe Marketo as a destination for at least one treatment group. 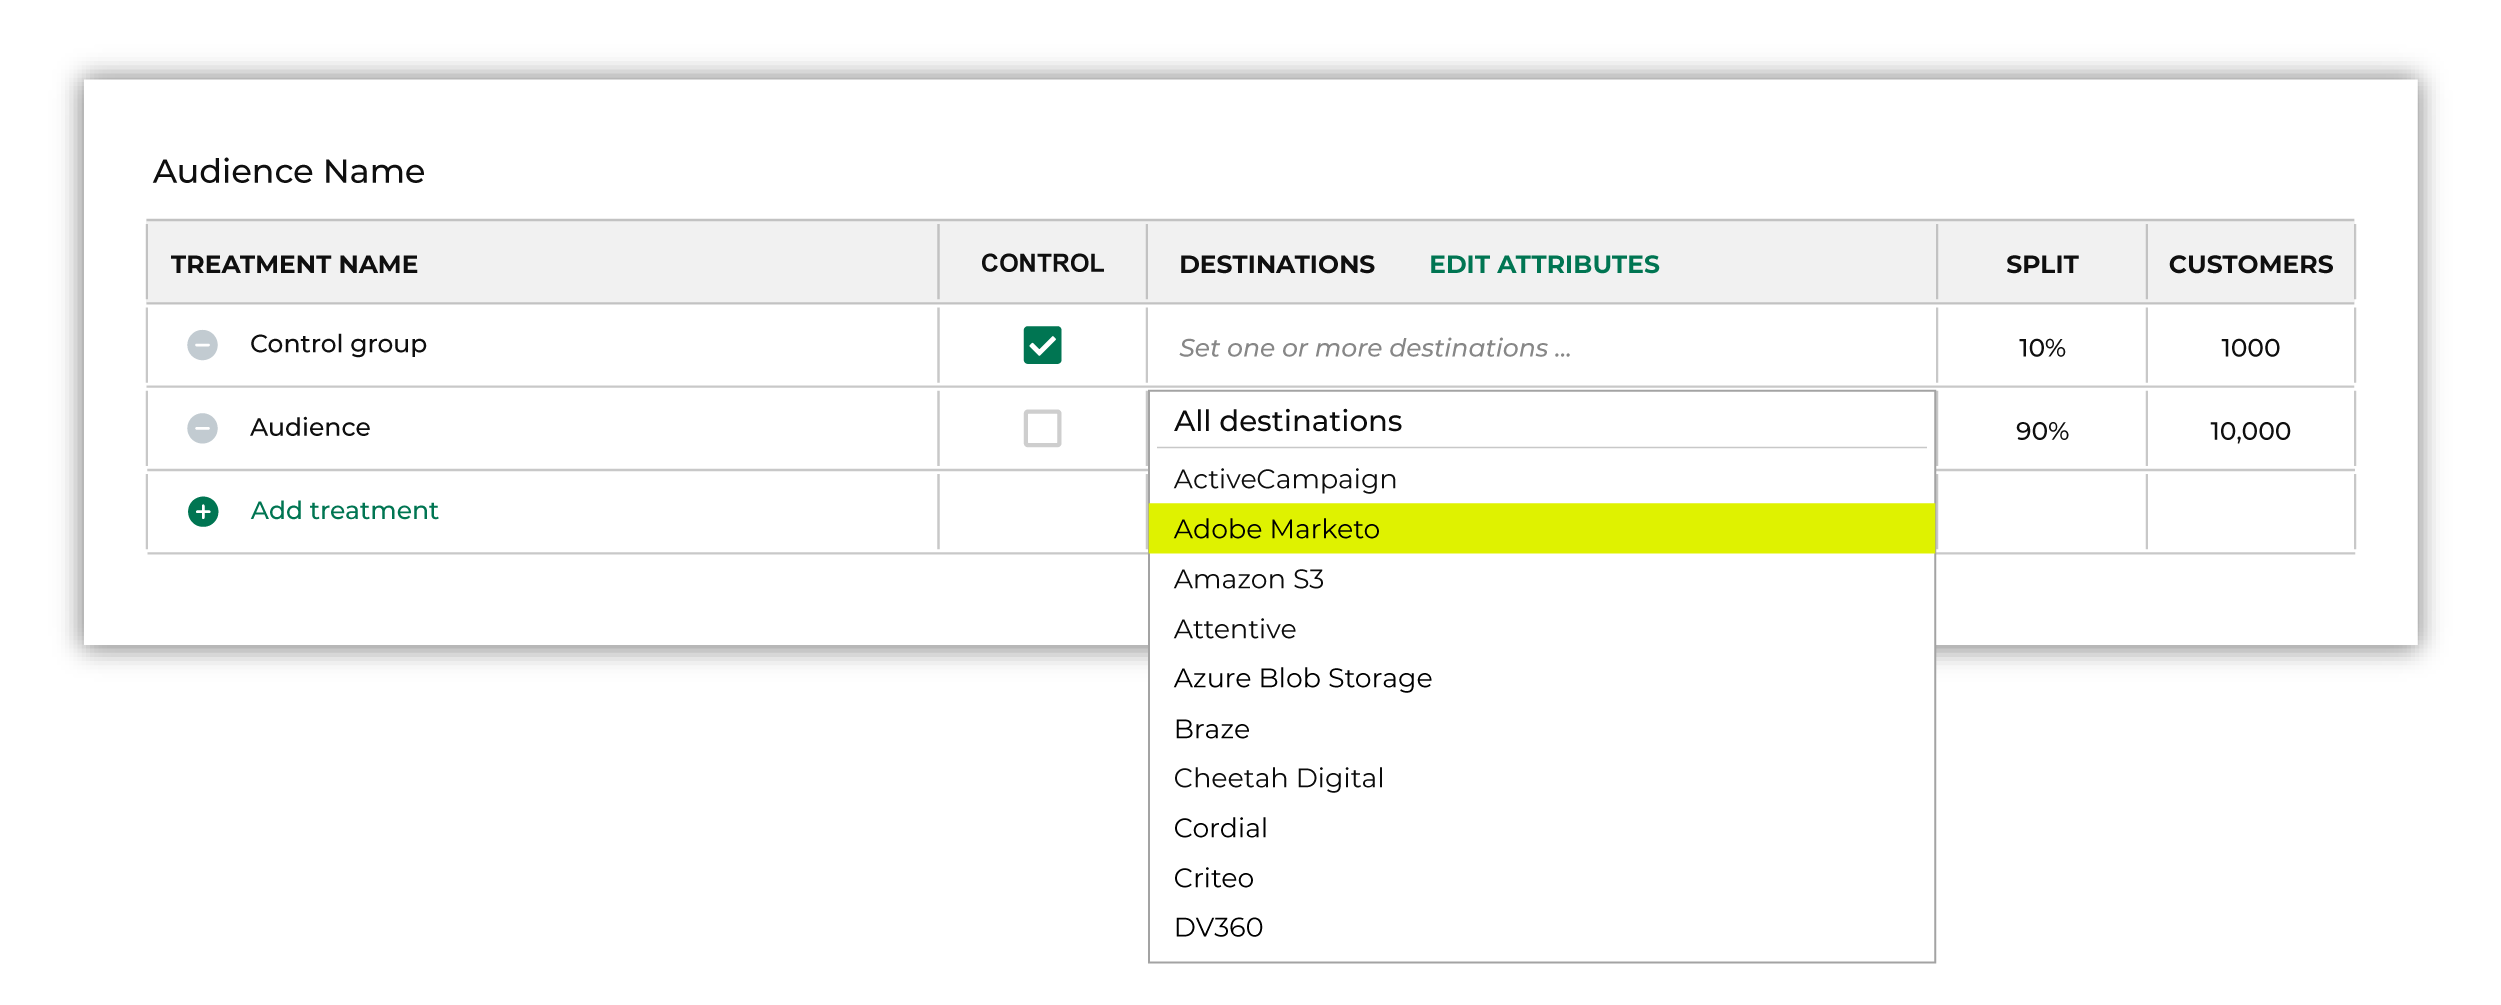
Note You may need to edit the attributes for the sub-audience to ensure Amperity is sending the right data to Adobe Marketo. |
|
Click Edit attributes to review the attributes that Amperity sends to Adobe Marketo. Adobe Marketo requires email addresses. You may also select any combination of phone number, first name, last name, and country attributes. Amperity pre-selects the list of attributes sent to Adobe Marketo. The Edit attributes page for Adobe Marketo is similar to: 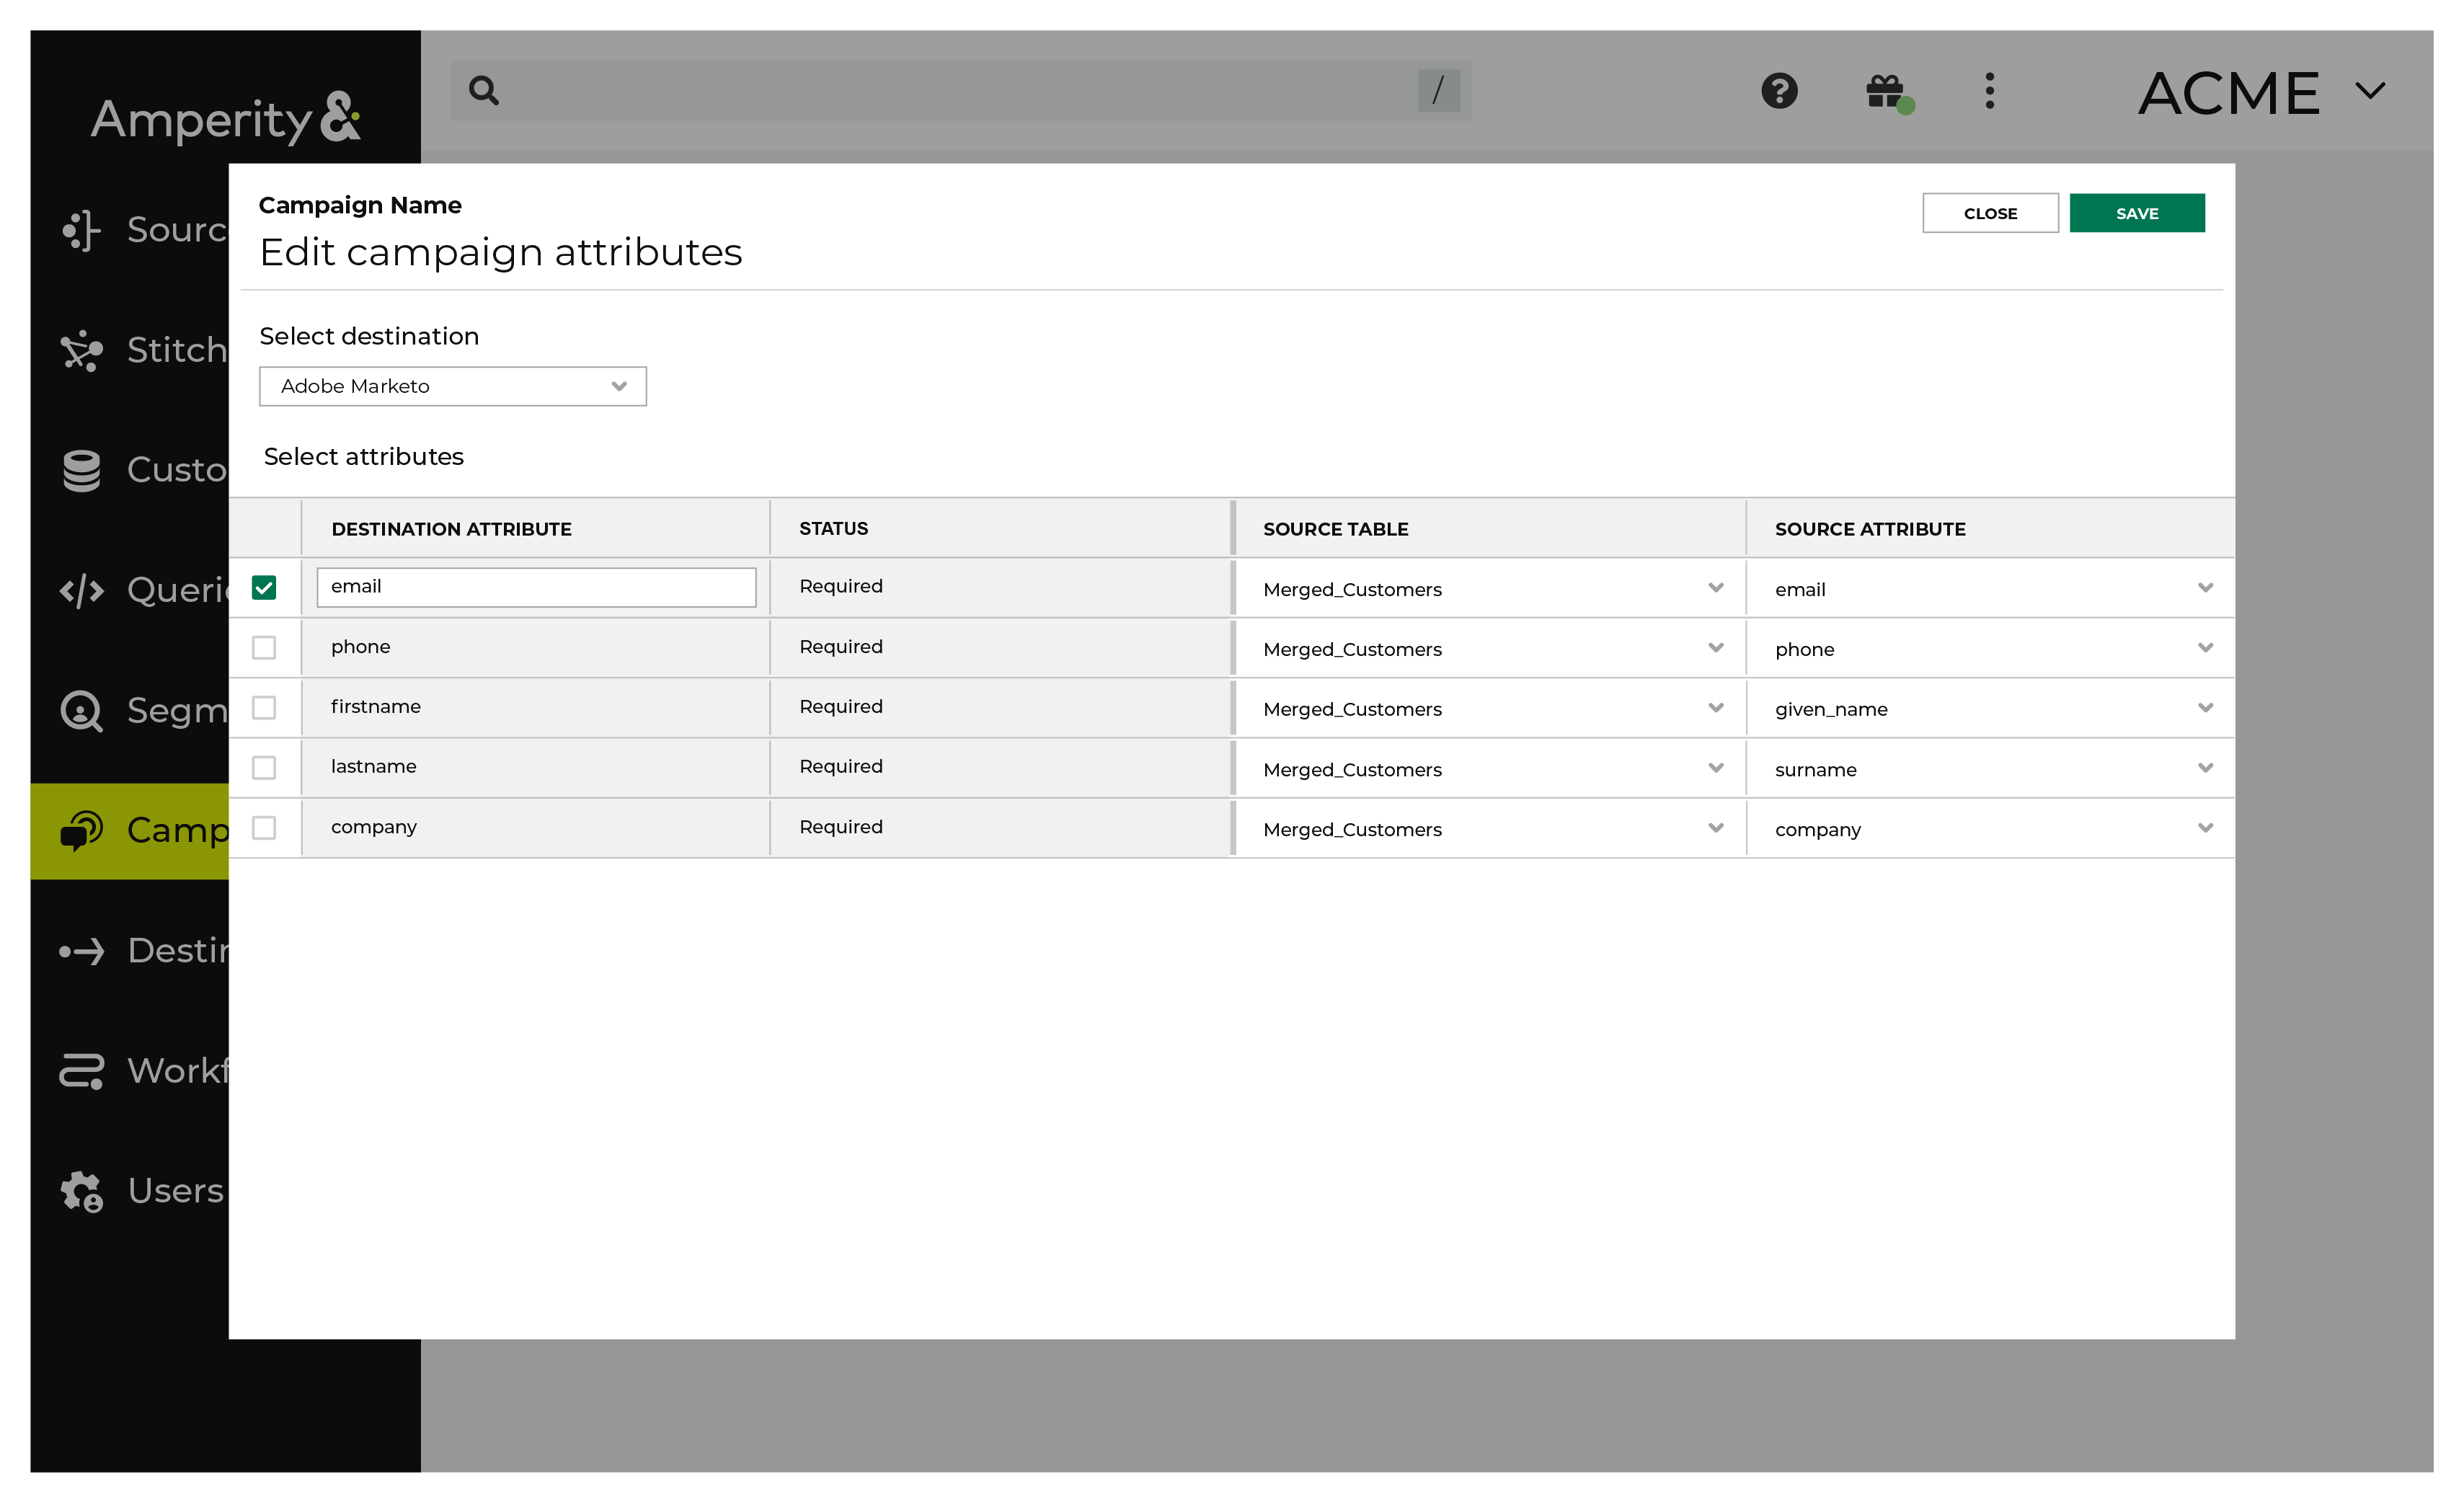
Note The Merged Customers table is the default table for sending data to Adobe Marketo, even though segments are often built against the Customer 360 table. This is by design. The Merged Customers table is the underlying table for customer profile data and is the source for all customer profile data that exists within the Customer 360 table. |
Configure default attributes
Each unique destination configured to send treatment group audiences to Adobe Marketo has a set of default attributes.
Configure default attributes by clicking the Default attributes link next to the Create campaign button on the Campaigns page.
The source table defaults to the Merged Customers table for most attributes. This is configurable.
Adobe Marketo has the following requirements for attributes.
Source attribute |
Destination attribute |
|---|---|
given_name |
firstname |
surname |
lastname |
phone |
phone |
company |
company |