
Default attributes
Sending campaigns from Amperity to downstream marketing workflows is a combination of:
A segment that defines the audience that you will use with your campaign.
A campaign that breaks that audience down into sub-audiences that align to your marketing strategies and goals.
A set of destinations that specify the locations and channels to which you will send each sub-audience.
Most destinations may be configured to send a list of attributes (this topic) that are specific to your brand’s use cases.
Default attributes are configured from the Campaigns page. Each destination may be configured to send a list of attributes that your brand can use with a variety of downstream workflows, such as audience matching, customer activation, paid media workflows, or measuring campaign results using offline events.
Important
For many downstream marketing applications the names of attributes are not arbitrary. There are often specific requirements for names of attributes and the data that may be associated with each attribute.
For example, the name of the field for an email address attribute may be case-sensitive, such as “email”, “Email” or “EMAIL”. Many downstream marketing applications require email addresses to be converted to a SHA-256 hashed value.
Review the documentation for individual destinations to verify if additional non-default attributes may be configured, and then sent alongside the default attributes.
The following sections describe the steps you’ll follow to configure the default attributes for individual destinations.

|
Default attributes for each destination are configured from the Campaigns tab in the Activations page. Click Settings to open the Configure attributes dialog. 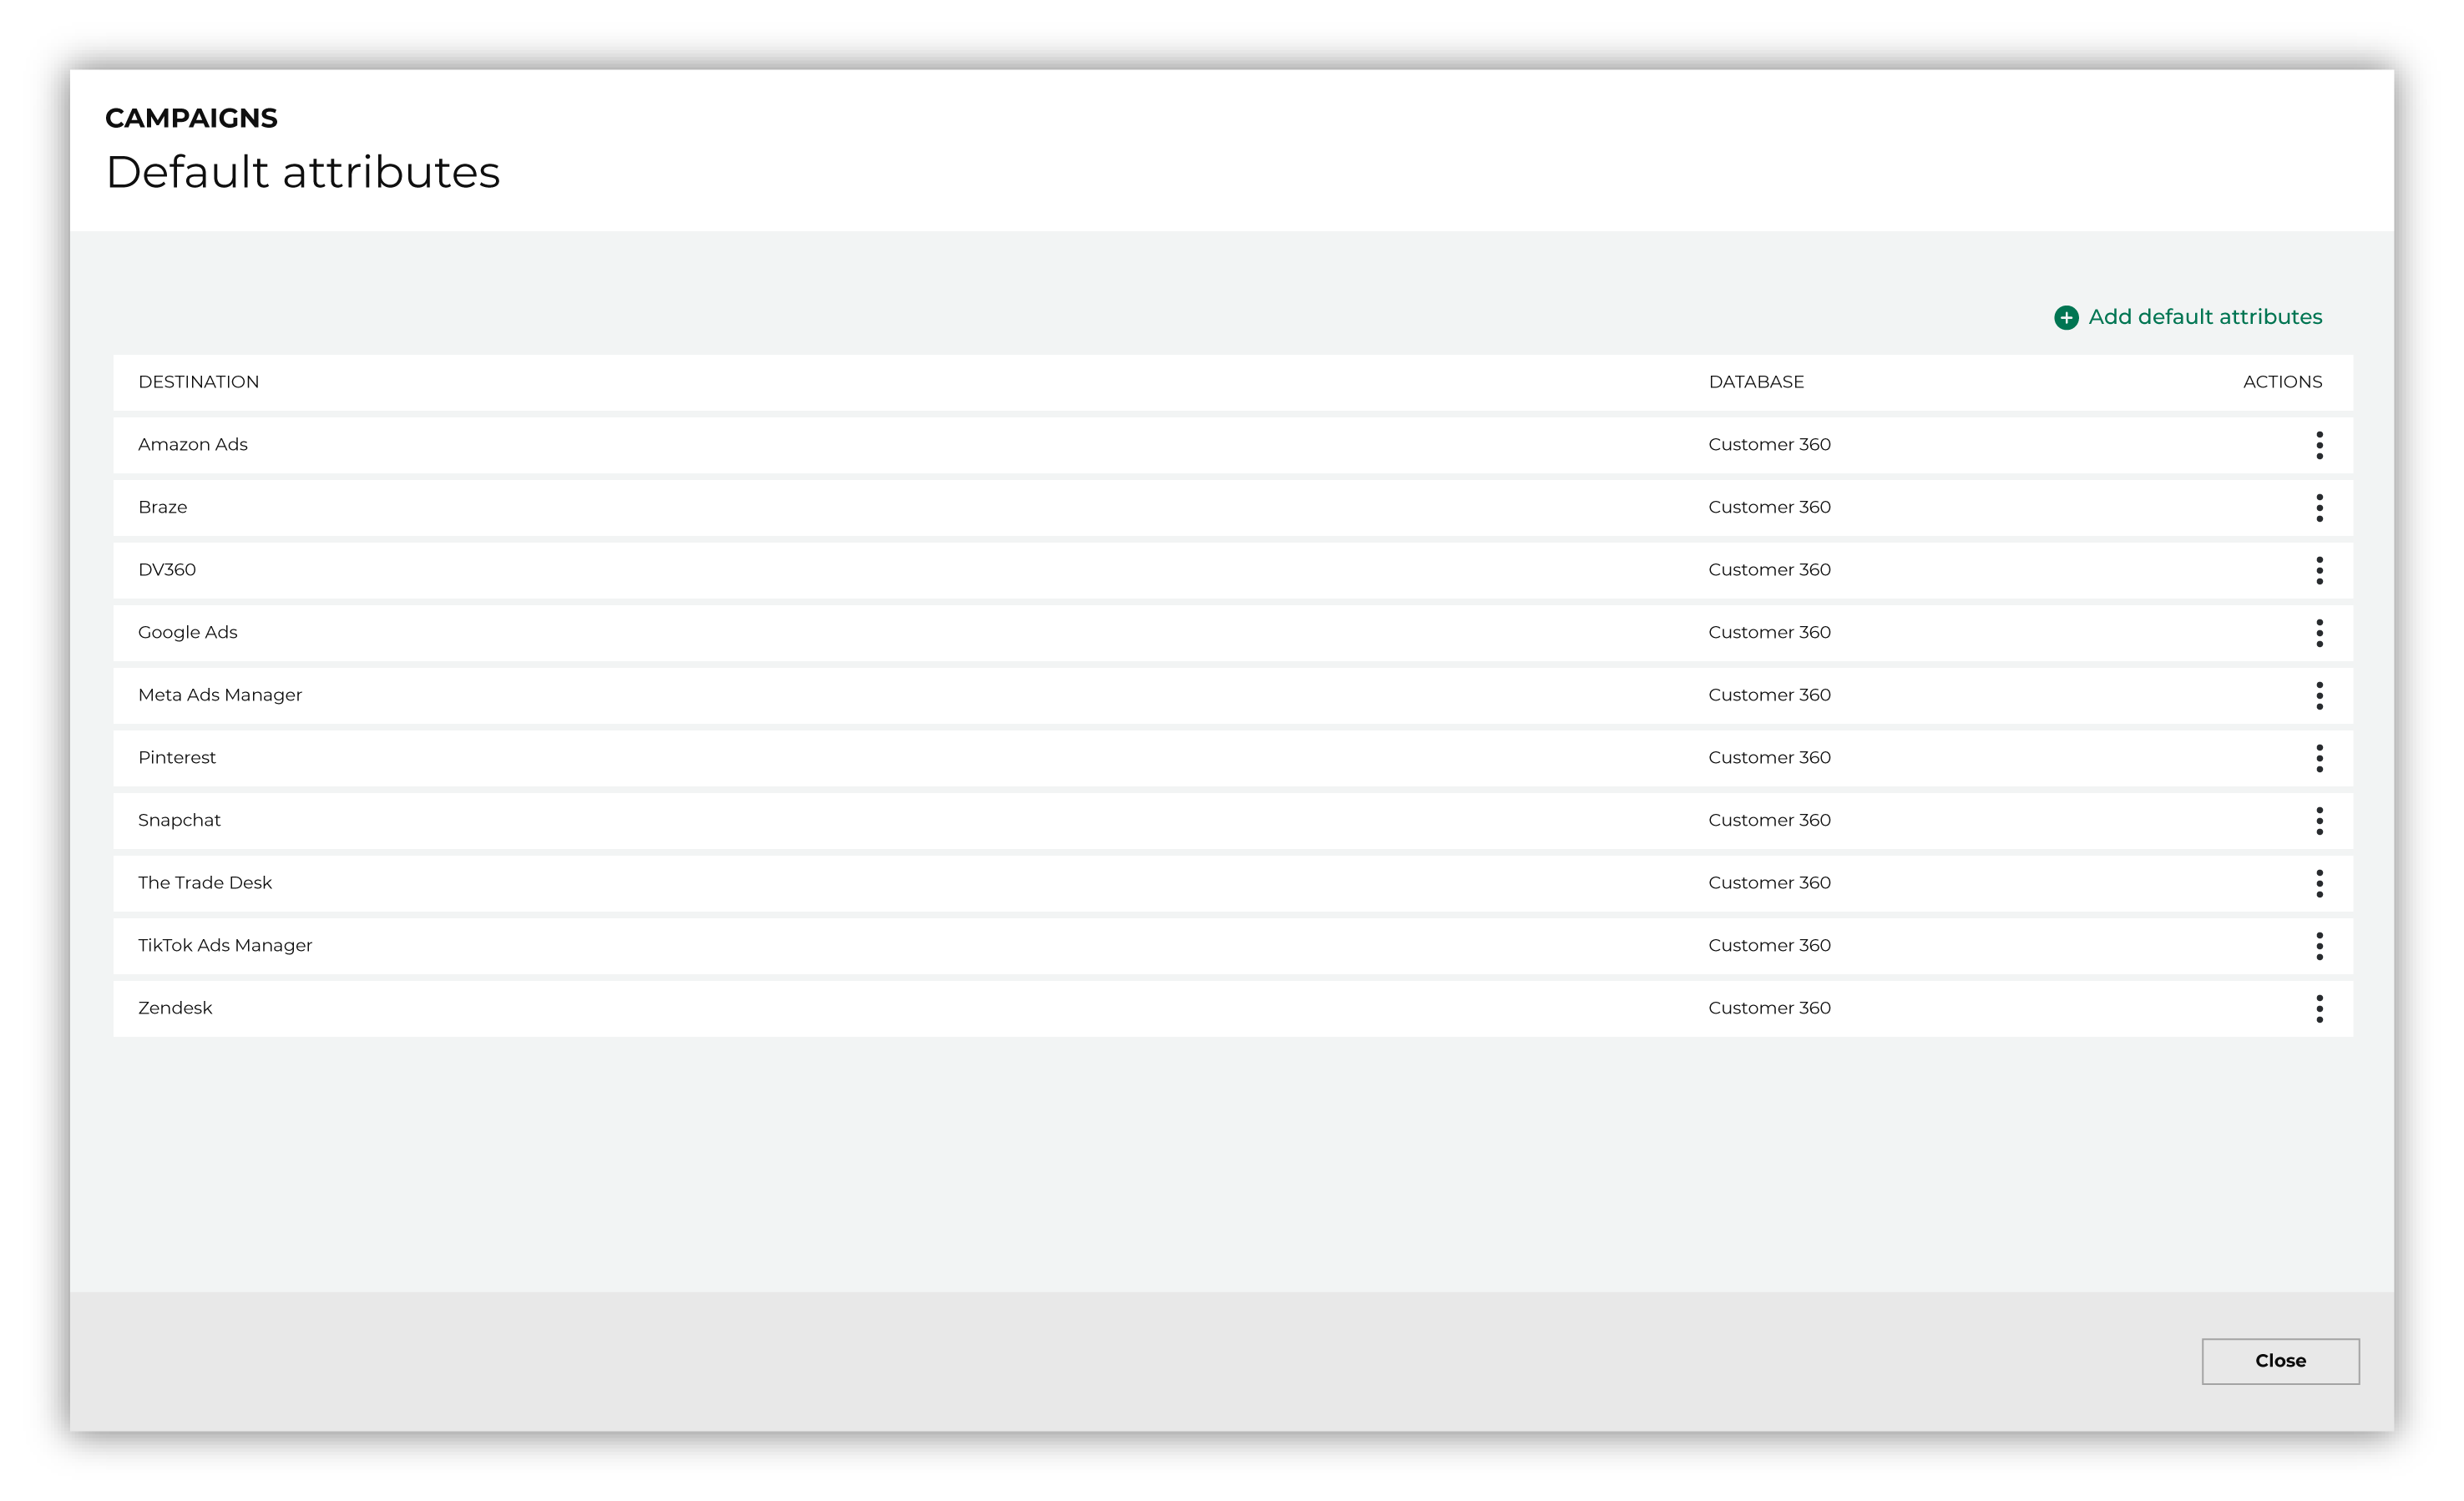
|

|
On the Default attributes tab, click Add default attributes. This opens the Configure attributes dialog. Under Configure attributes do the following: Select a destination from the Destination dropdown. Select a database from the Databases dropdown. Select a configured activation ID from the Activation ID dropdown. |

|
Under Default attributes click Add attribute. Select a table, and then choose an attribute. For example, the list of attributes that may be sent to Meta Ads Manager: 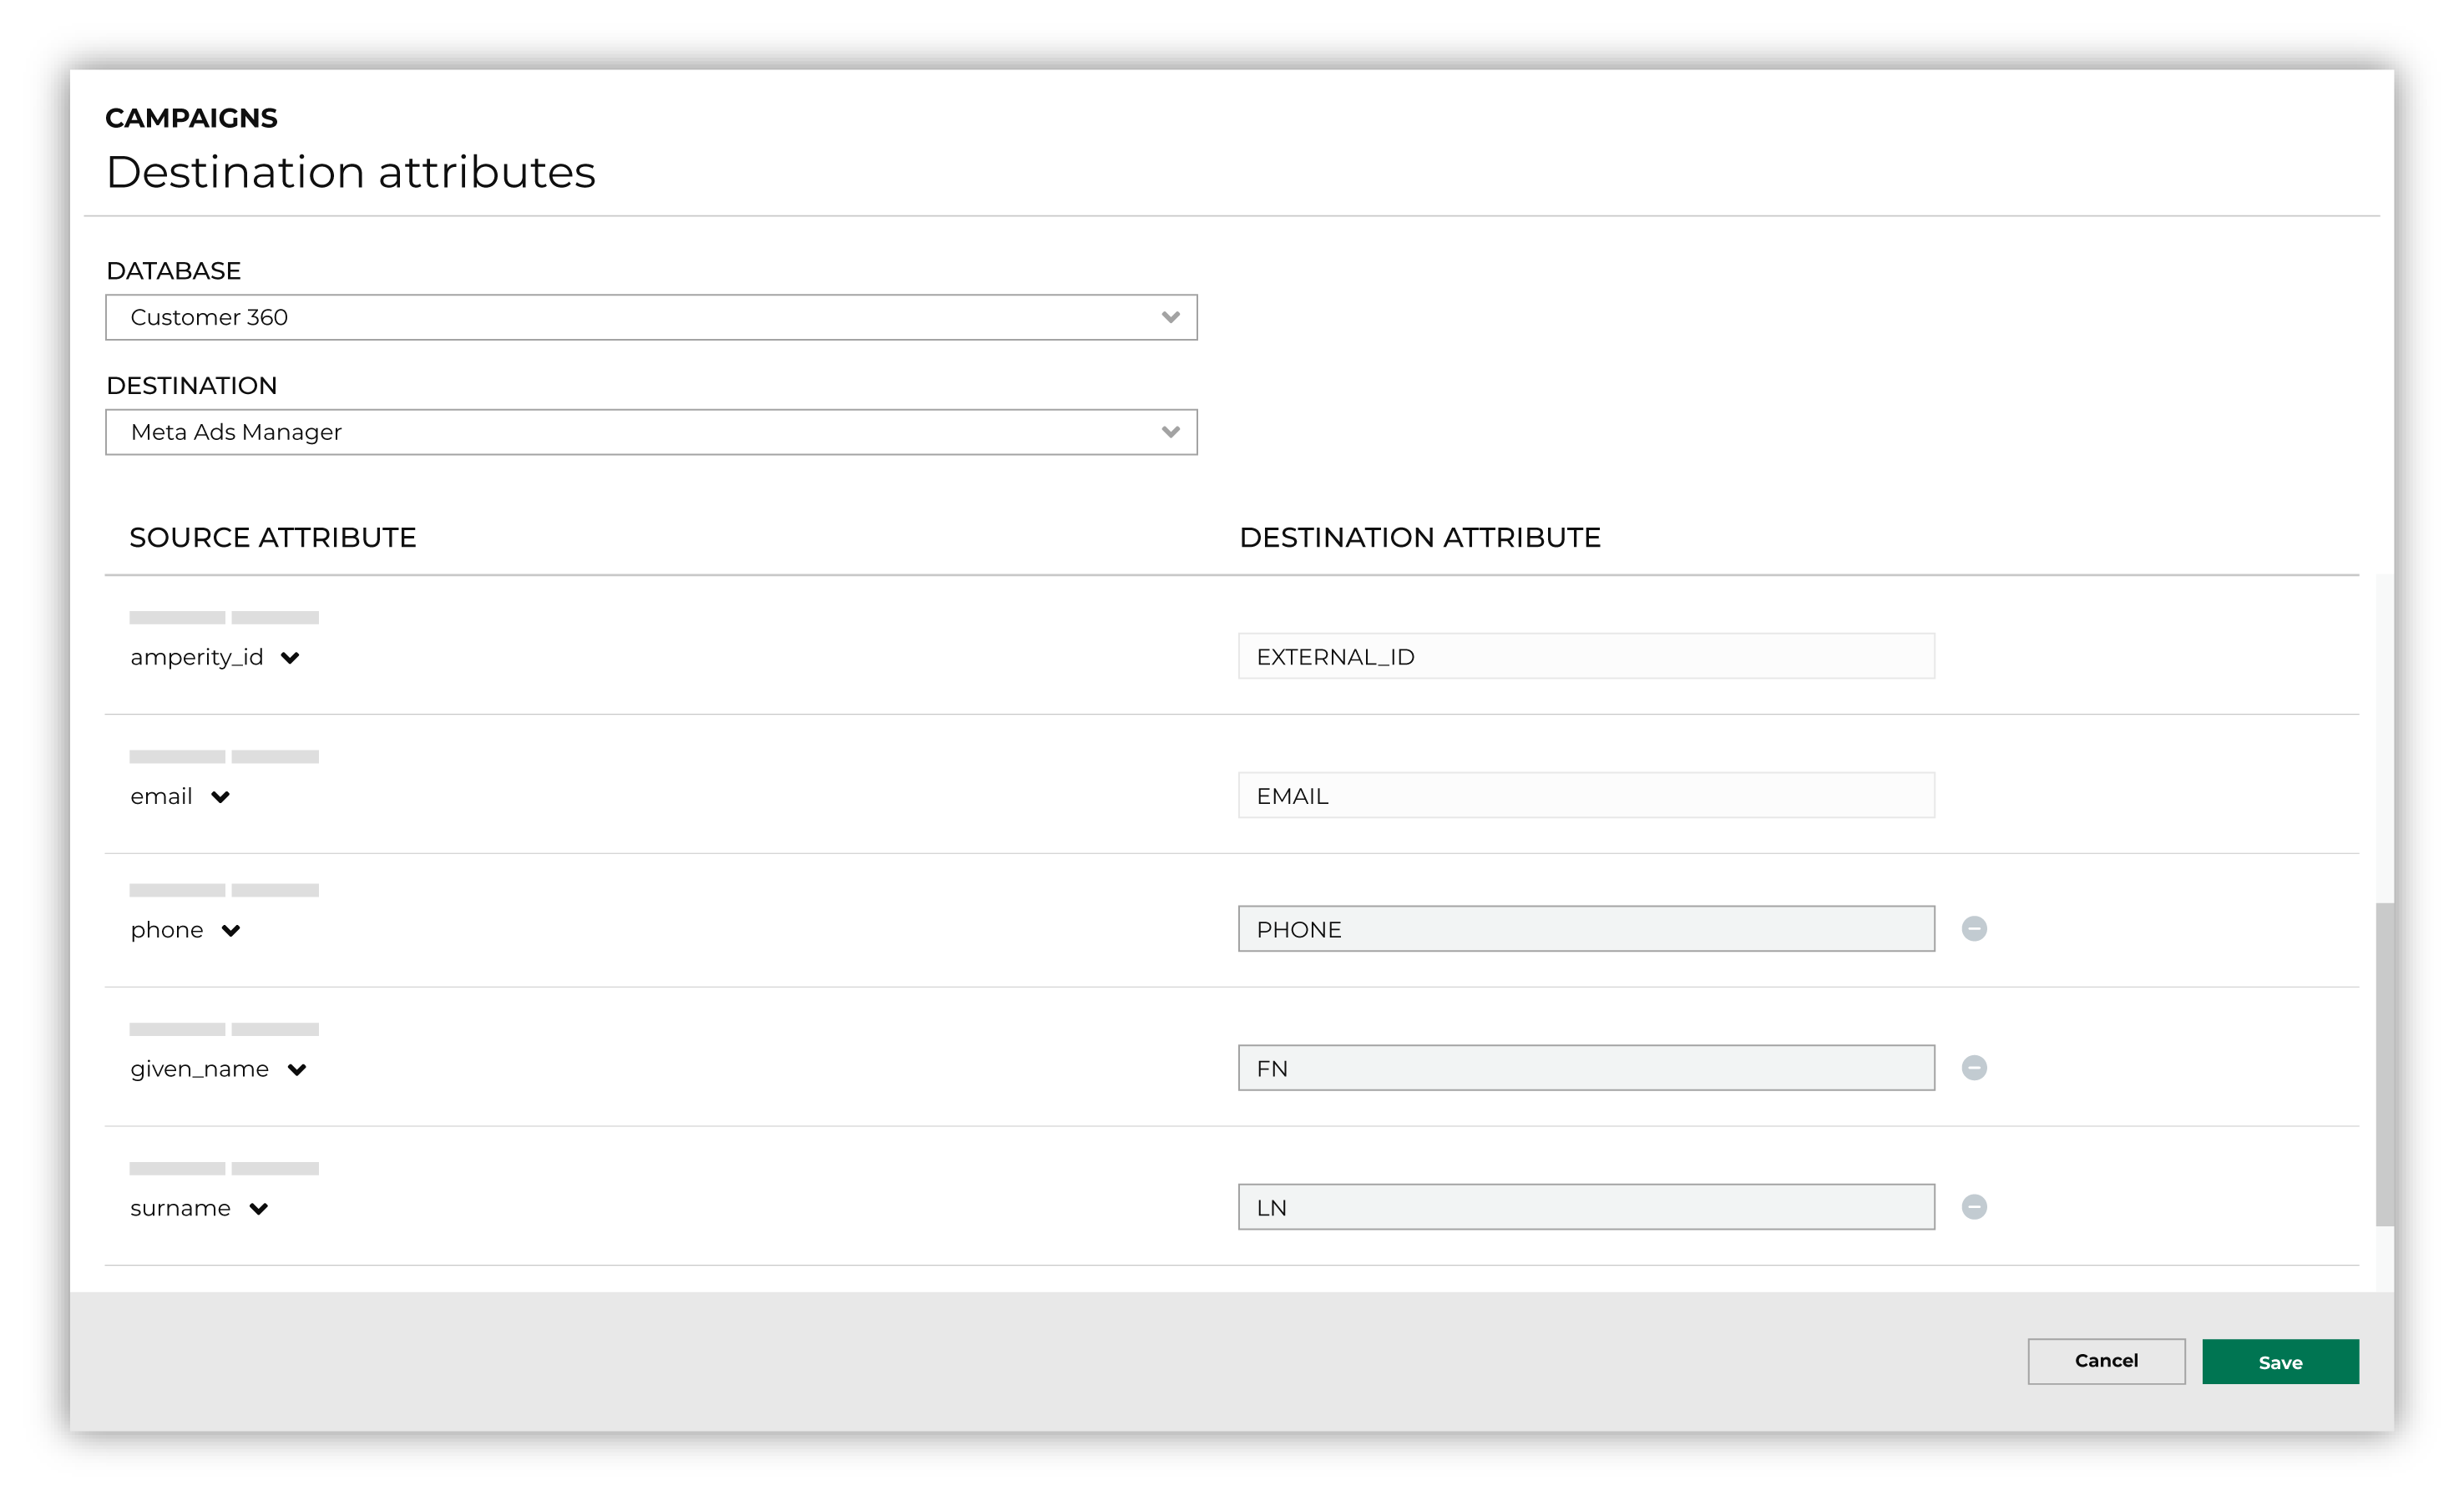
Important A destination can have very specific requirements for the names of fields and the values each field may contain. For example, some destinations:
For destinations that use an API, Amperity pre-configures the list of attributes that are required and/or are optional. Review the Amperity documentation for each destination to understand which attributes may be configured. For destinations that accept files—SFTP, Amazon S3, Azure Blob Storage, and Google Cloud Storage—your brand should verify the requirements for the downstream system to which data will be sent before configuring default attributes. |

|
When default attributes are ready, click the Save button in the lower right corner of the Default attributes page. Tip Be sure to verify the names of the fields and the values that appear within each field in the downstream system. This will ensure that Amperity is sending the right data and can support your brand’s use cases. |